Gardening Zeal

All About Gardening

  • Home
  • Gardening Guide
    • Growing Fruits
    • Growing Vegetables
    • Lawn Care
    • Plants and Flowers
  • Indoor Gardening
    • Houseplant Types
    • Indoor Plants FAQs

Purple Heart Plant: Tradescantia pallida Purple Queen Plant Mystery!

By Sarwat Rehman

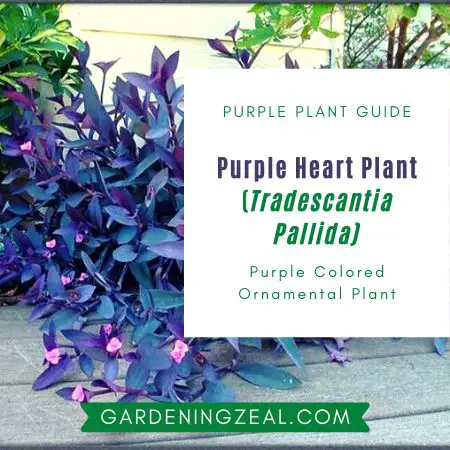
Purple heart plant (Tradescantia pallida) is the queen of all plants!

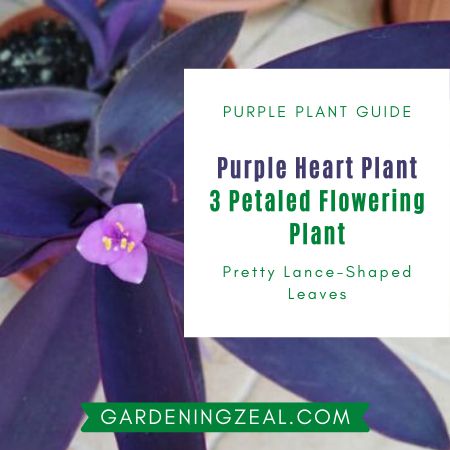
Yes, this purple heart plant is an evergreen plant with lance-shaped long purple leaves and delicate pinkish-purple flowers that make it queen of the garden.

This is a perfect houseplant that has much to explore!

purple heart plant
Purple Heart plant (Tradescantia pallida)

Its multiple common names, significance, planting instructions, indoor and outdoor care routine, uses, and benefits, most importantly, medicinal uses, all of these are worth knowing that are discussed here.

Last but not least, all of your questions related to ‘Purple heart plant’ are also answered at the end.

So, keep exploring this exceptional plant.

Purple Heart Plant Information

Purple heart plant (Tradescantia pallida) is an excellent groundcover with pointed long purple leaves that dignify the plant as ‘Purple Queen.’

Yes!

Purple heart plant is also well recognized as ‘Purple Queen Plant’ or ‘Wandering Jew.’

If you are looking for a striking flowering plant in your landscape, this purple plant is the best because its long velvety purple leaves give magnificent contrast with delicately small purplish-pink flowers.

Flowers bloom in the spring and autumn. Long purple leaves with three-petaled bright flowers at the ends of the stem give the plant a whole purple world in the garden.

Even if you see it, you will be amazed by its attraction as its purple stem is masked with large pointed leaves giving a perfectly crafted cover.

In addition to groundcover, the purple heart is an outstanding houseplant that grows well in a patio container or a hanging basket.

So, now there is no excuse for not having this purple anymore!

Just dedicate a corner of your indoor living or give it a space in the yard, it will wipe all your depressions with its beauty.

Purple Heart Plant Annual or Perennial? Explore Purple Plant

This is the mystery of the purple heart plant that whether it is an annual or perennial plant? If you are confused between annual and perennial plants, then let’s make it clear first.

Annual plants are the ones that are only for one year as the name indicates ‘Annual.’ They just grow, bloom, and produce seeds and die. You will not get them next year until replanted. 

But if we talk about perennial plants, these are the plants that bloom, die, and recover over the course. They bloom over the spring and summer season, die every autumn and winter, and then regain their stature every spring.

And their life cycle goes on…

These are generally small flowering plants.

Just like any other specialty in the purple queen plant, it is perennial.

In a frost-free climate, it is an excellent groundcover and generally likes full sun for full bloom.

So, you don’t need to take the tension of losing it because it is not going anywhere once you plant it.

The thing you need to do is just stick to simply easy to care tips that are discussed below and if you will strictly follow the last tip, it is guaranteed that your purple queen will never ever face any problem.

General Summary: (Purple Heart Plant)

 ?      Scientific NameTradescantia pallida
 ✅     Common NameWandering Jew/ Purple Queen Plant
?       TypeEvergreen Perennial
 ⬆⬆       Height8-12 In.
↔         Spread10-15 In.
?      FoliagePurple
?       FlowerPink
⚡       Blooming SeasonSpring to Autumn
⛪     Suitable PlaceFull Sun
 ☀      LightPrefers Full Light
?         WaterVariable
?      TemperatureWarm
?     Zone9 – 11
?     ToxicitySkin Irritation
?       Special CharacteristicCold Tolerant/ Drought resistant
?     UsesOrnamental/ Controls Air Quality
Purple Heart Plant Information

Tradescantia pallida Purple Heart Planting Guide 

If you don’t have a purple heart plant in your yard, it’s the best time to grow and enjoy its mesmerizing beauty.

Without any further delay, let’s begin the purple queen planting guide.

You need

  • Hoe, spade or power tiller
  • Organic matter (peat or compost)
  • Starter Fertilizer e.g. (12-12-12)
  • Purple heart plant (baby plant)

When you are sure that you have all the things needed, start this step-by-step procedure of planting a purple heart plant.

  1.     Manage the Best Space

First thing you need to consider before growing purple heart plant is its place.

As purple plant can grow in partial shade, but it keeps the best color in the sun. So, select its place wisely for its full brilliance.

Even if you want to grow indoors, give it a place facing the sun.

The second thing you have to keep in mind is that maintain a reasonable distance between newly planting purple queen and other plants in the periphery.

There will be more competition between crowdedly grown plants that will lead to fewer blooms.

As it is groundcover and reaches up to 1 foot, so try to keep a distance of approximately 2 feet.

  1.    Prepare the soil

The second step you have to do is prepare the soil with a hoe, spade, or power tiller and enrich it with nutrients.

You can add peat moss, manure, or compost as they add nutrients and also help to improve the drainage of the plant.

You may also add starter fertilizer or all-purpose balanced feed. It will give an extra boost to plant growth.

  1.     Set the Plant in Soil

Now is the final stage of placing your purple plant in the soil. You have to dig a hole, larger than that of the root ball of the plant.

Just rake the roots with your hand so that dense roots will be more available.

Now, put the plant in soil and fill space around the root ball with fingers. Gently tap the soil hands or use the flat side of the trowel to firmly even the soil.

Make sure that the soil around the root ball is even.

Water the plant at the time so that the new plant can grow to its best.

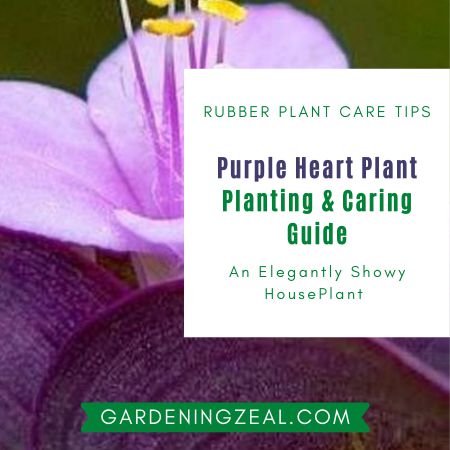
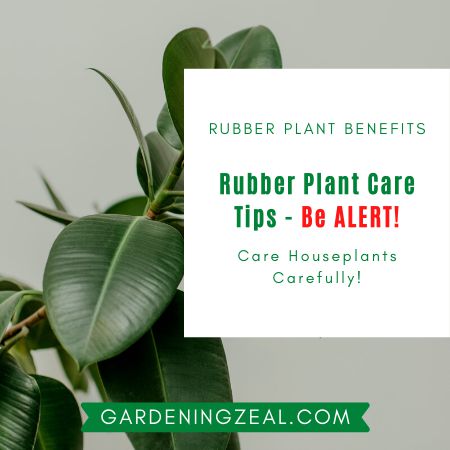
Purple Heart Plant Care – Tradescantia pallida Best Care Routine 

Coming towards the care routine of purple queen plant, you need to follow some of the care tips that are discussed below, and you will enjoy a healthy purple plant ever.

All of the tips are worthy of following, but the last one will rock your plant.

  1. Water

Newly grown purple heart plant (Tradescantia pallida) needs more water than elderly grown. So, if your plant is newly planted, water it daily for some weeks.

Later on, give it less water and shift to a watering routine that depends on weather and soil conditions because a well-established purple queen is considered drought tolerant.

So, water it carefully.

You can adjust your routine to every 2-3 days.

If your plant is grown in sandy soil, water it more often because sandy soil retains less water than clay soil.

Pro Tip: You can also check moisture in the soil simply by your fingers or use a small trowel to dig in and check moisture.

If you observe 5 to 10 cm of the soil is dry, it means it is the right time to water the plant.

  1. Fertilization 

Fertilization of every plant is critical and needs sensible attention. So, fertilize purple heart with a proper routine so that plants may grow with full potential.

Fertilize your purple heart plant once a month when it is in the early growing phase. Decrease fertilization in winter and again apply in summer or spring.

There are different types of fertilizers like granulated, synthetic, or organic fertilizer, and slow release.

Check the label of the fertilizer that you are using and follow all the instructions mentioned for best results.

Pro Tip: Don’t fertilize too much as over-fertilization may also damage the plant.

  1. Pinching off 

The most effective care tip is to pinch off the tips of the stems so that plant can be more bush-like. Pinching back the plant boost dense growth and encourage more flowering.

After flowering, cut the stems about half of their height. This will give a robust growing effect on the Tradescantia Pallida. 

Pro Tip: Whenever you look plant is slenderly growing, pinch it off to get more blooms.

Purple Queen Plant Indoors Care 

If your purple queen plant is indoors, you still need to keep an eye on it and follow some care tips as

  • Grow purple queen in potting soil contained pot or container and make sure that it has a hole for maximum drainage.

Wet and soggy soil will lead to root rot. So, be careful in pot selection.

  • Most people inquire, ‘Will purple heart grow in the shade?’ The answer for them is ‘YES’ it can grow in the shade but for full purple blooms, place it in full sun even if indoors.
  • Use general-purpose liquid fertilizer for indoor plants as directed on the label. Apply it on the damp soil as there are chances of the burning of the roots if directly applied on dry soil.
  • Pinch the tips of the plants to maintain a manageable shape of the plant.
  • Maintain temperature about 60-70oF of the indoor place where Tradescantia Pallida is grown.

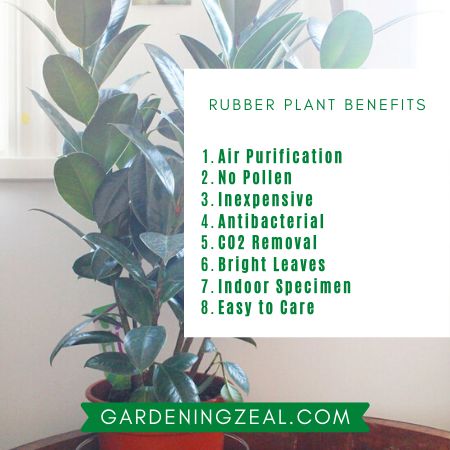
Purple Heart Plant Benefits

Purple heart plant has numerous benefits ranging from giving immense beauty and eye-catching view to a healthy environment to live.

Here are some of the exceptional benefits you must know and feel the pride of having this plant.

  •       Air purification 

Tradescantia Pallida is one of the best plants that serve air purification jobs and is authorized by NASA for this potential behavior.

They filter ‘Volatile organic compounds that are present in the air. These VOCs are major air pollutants and respiratory irritants that cause severe problems.

Purple queen plant efficiently removes these compounds and make indoor air livable.

  •       Bio indicator 

This purple plant is an excellent bioindicator of contaminants and air pollutants.

  •       Food color 

As Tradescantia pallida have an astonishing purple color, research shows that has majorly two such pigments that are used as a food colorant.

Tradescantia Purple Queen Uses

Tradescantia pallida is an economically significant plant that is grown indoors and outdoors as ground cover or in the basket as a hanging plant.

It is also used as window boxes or grown as beds that give a perfect contrast in the garden. Even Tradescantia pallida are also grown in porches and patios.

Tradescantia pallida Medicinal Uses

Purple heart plant (Tradescantia pallida) is a valuable plant that has specific medicinal properties in addition to its charming beauty.

Here are some

  • Taiwanese studies report it to improve blood circulation.
  • It is also reported that the purple heart plant has anti-inflammatory and anti-oxidant properties.
  • In China, Tradescantia Pallida is called Shui Gui Cao (Water Turtle Grass) that is considered beneficial for treating kidney
  • Tea is also made in China with Wandering Jew that is helpful for stomach ailments.
  • This plant is also reported beneficial for hypertension and high blood pressure.

FAQs: Purple Heart Plant (Tradescantia pallida)

  1. What do you say Is Purple Heart Plant Poisonous?

No, purple plant is not deadly poisonous but may cause complications if ingested, especially sap. That is why wash your hands when you come in contact with the sap.

Its foliage may also cause skin irritation, so keep it away from the pets so that they may not get any problems.

  1. Is Purple Queen Plant Toxic to Dogs?

Purple queen may cause some allergic problems that may pertain for several months. So, it is not fatal for dogs or pets, but you have to be careful.

  1. Is Purple Heart Plant Toxic to Cats or Not?

Contact allergy is the same in cats as in dogs. Cats get allergies when they come in contact with purple heart plant. So, grow it at a place or in the pots that are inaccessible for pets.

  1. Why My Purple Heart Plant is Turning Green?

The bright purple color of purple heart plant (Tradescantia Pallida) is achieved in full sun. If your plant is turning green, check its location and water on time.

  1. What Do You Say About Tradescantia pallida’s Toxicity?

Tradescantia pallida is equally toxic for all as it may cause mild complications for pets, cats, and dogs, even for the grower.

  1. Is Purple Heart Plant Edible or Not?

As far as purple queen’s consumption is concerned, it is not reported as an eatable plant. Most widely, it is used as an ornamental plant that decorates lawns, porches, and even indoors.

I hope you have got all the questions about purple heart plant here in one place. Now you can easily grow your plant or take care of already grown by following all the tips described.

Make your plant happy and keep your lawn wealthy!

Rubber Plant (Ficus elastica): 8 Exceptional Rubber Plant Benefits

By Sarwat Rehman

If you start counting Rubber Plant Benefits, you may get tired but this splendid rubber plant tree will not.

As this is such an attractive houseplant, it will not let you go without praising its beauty. So, why not grab its beauty plus benefits?

Get ready to take double benefit after reading this article because…

Here you will get all the details of extremely surprising 8 Rubber Plant Benefits starting from its air-purifying capability with the whole mechanism to its simply easy and workable care tips.

More you will find how to prune and propagate rubber plant and most worthy common rubber plant problems.

So, let’s start to dig in all about rubber plant and their benefits!

Rubber Plant Scientific Name

Here is the scientific name of Rubber plant ‘Ficus elastica’.

Rubber Tree Information – An Elegantly Showy Plant

Rubber tree belongs to the Banyan group of figs, native to eastern parts of South Asia.

It is absolutely stunning with broad thick glossy leaves and unusual height reaching up to several feet if not cut.

Leaves: The leaves are one of the reasons for their captivating beauty. Broad bright thick green leaves are the specialty of rubber plant trees that make them unique from the rest of the plants.

Broad oval leaves may grow up to 10-30 cm long and 5-15 cm broad which is one of the rubber plant benefits for cleaning indoor air.

Flower: This plant is well known for its long height not because of the flower. As it is a plant not producing bright and striking flowers.

Many of the growers get confused about the newly emerging leaves as they emerge from the bright red sheath. But these do not flower.

You may get figs on mature plants but remember before giving it a corner of your room or lounge that it is popular for bright green foliage not because of the flower.

This plant will give you a perfect green sight!

General Summary

Scientific Name Ficus elastica
Common Name Rubber Plant
Height Natural Habitat: up to 100 feet

Pot: 7-10 feet

Special Characteristic Air Quality Enhancers

Highly Manageable

Suitable Place Indoors
Foliage Bright waxy green
Flower No colorful or fragrant flower
Light Indirect bright
Water Variable
Temperature Variable
Toxicity Sap may cause irritation
Problems Not specific

Rubber Plant Benefits – 8 Exceptional Rubber Plant Tree Benefits

  1. Air Purifiers

One of the exceptional benefits of the Rubber plant is its air-purifying quality that makes this plant worthy of the rest of the indoor plants.

Broad thick leaves make this plant suitable as an air purifier. According to studies of NASA, the rubber plant is categorized among plants capable of improving indoor air quality.

Rubber plants can purify air as

  • Absorbs and convert harmful airborne chemicals into harmless ones
  • Increase breathable oxygen
  • Eliminate microbes from air e.g; bacteria
  • Make air free of mold spores

Air Cleaning Process

Rubber plant exhibiting multiple benefits is well known to clean air due to its broad leaves that play a central role in this cleaning process.

These oval thick leaves are broad enough 5-15cm and 15-35cm long. Due to the vast surface area, leaves absorb air containing pollutants and other chemicals.

When water is supplied from roots to the upper plant body, as the natural system works, the air is drawn downwards. As a result, contaminants are also drawn with air and deposited in the soil.

Here, comes the ultimate fate of these contaminants. Soil is rich in microbes. When pollutants encounter contaminants, they are broken down into harmless compounds or other nutrients that soil may provide plants as a nutritional source.

This is how rubber plant freshens the air in addition to giving a stunning look to your indoor garden.

  1. No pollen – No Allergy Problem

If you grow plants indoors and get worried about the allergy, you must know that it is due to the pollens produced by their blooms.

Most indoor growers face this issue.

But rubber plant gives the tremendous benefit of not producing pollen grains. Now, this is the best choice to grow at the home, office, or even in your clinic.

  1. Inexpensive – Easy to Propagate

Growing plants may be the desire of many of you but costly plants may push it far away but adding to your good luck, the rubber plant is not an expensive plant.

You can easily afford and manage with little care to grow by propagation that you can see below in detail how you can propagate rubber plant.

Now it’s up to you how much time you waste without getting benefits from the rubber plant.

Just do it fast and enjoy its benefits.

  1. Anti Bacterial

You know bacteria exist where we live. In water, soil, food, and most importantly in the air. Here is a huge count of bacteria in the air we think clean and safe. According to a study, almost 1800 kinds of bacteria are present in the air.

Among some airborne harmless bacteria, most of them are dangerous as they may cause infections. So, there is an ultimate need to control.

This act is accomplished by the rubber plant because it is anti-bacterial and can reduce bacteria and mold up to 50%.

  1. Carbon Dioxide Removal – Best Rubber Plant Benefit

Adding to rubber plant benefits, especially air freshening quality, this astonishing rubber plant will not only remove pollutants but also give you plenty of oxygen.

Yes!

More oxygen, fresh air!

If you are wondering how this rubber plant benefit can be achieved is you just have to grow it indoors and it will efficiently convert exhaled carbon dioxide into oxygen.

As you know, indoor spaces are mostly closed and fresh air is restricted to enter. The rubber plant is the best of all indoor plants to give you what you want.

  1. Bright Green Leaves – Keep Plant Alive

Rubber plant (Ficus elastica) has leathery green leaves with a shiny broad oval shape. These large leaves are the largest in size on young plants approximately 18 inches long.

This leaves’ texture gives the plant a tough waxy nature that you can easily clean and make the plant glowy.

  1. Rubber Plant – An Indoor Specimen

Rubber plant grows and continues to grow upwards. It would not be wrong to say it is an indoor tree because of its growth.

This plant was one of the best houseplants some decades ago when people were used to living in big houses but unfortunately, when we became more modernize and made smaller apartments, this houseplant moved away.

Fortunately, this rubber plant revived its value and people started to grow it as an indoor plant.

Even if you have grown this plant and it’s getting beyond the limit tall, you can easily restrict its height by pruning after reading how to prune the rubber plant below.

  1. Easy to Care

Rubber plant is such a friendly plant that if you give it little time, it will give you back fast growth without any problem.

So, just read the simple and easy-to-follow care tips and apply them to your indoor rubber plant to get the best of rubber plant benefits.

Rubber Plant Tree Care Tips

Ficus elastica, commonly known as rubber plant is an easy to grow plant that requires little care.

Some people say rubber plants may go well even with negligence but don’t be a careless grower because plants and trees demand nothings but little care.

So, here are some care tips for rubber plants that you can take care of and get a fully grown fresh and amazing plants.

  1. Light

Just like other houseplants, rubber plant grows well in bright indirect sunlight. You can place your pot near a window with sheer curtains so that plant gets the right amount of sunlight.

They can withstand dim light but not bright direct light as they may burn the leaves and damage plants.

So, be choosy while placing your rubber plant even most of the houseplants.

  1. Soil

The best soil for rubber plants is well-drained and well-aerated soil. If you are having well-drained soil in a plant pot, half of your caring steps are fulfilled.

Stay concerned for your greens!

  1. Water

Give water to the rubber plant rightly so that it may not get any problem of leaves and any other. You can set watering by seeing its stage and season as

Growing season: Summer; require more water (once or twice a week)

Dormant season: Winter; less water (once or twice a month depending upon need)

Don’t make the plant standing in the water-filled pot. In the growing season or in dry conditions, you may water once or twice a week but be careful especially in winter.

If you overwater your plant, it may be susceptible to root rot.

In addition to watering, you must have a check on misting the leaves or just wipe the leaves with a damp cloth. Moist clean leaves will be more efficient to give all the benefits.

  1. Temperature

Rubber plant is quite a temperature-sensitive plant. Just like other care checkpoints, the temperature is also a worthy one.

Generally, it prefers a humid environment because of its tropical origin and doesn’t like hotter conditions.

The plant will happily grow if you keep the temperature between 10-30oC. In a hotter environment, the plant will not be able to sustain its turgidity.

In winter, it can withstand temperatures as low as 4oC.

  1. Fertilization

There is not much need for fertilization to rubber plants but like other indoor plants, the best time to fertilize is during the growing season.

Don’t fertilize in winter.

Precaution – Be Alert!

You must be aware of the fact that the rubber plant produces milky white material ‘Sap’, if injured, that may prove toxic if taken internally.

So, be careful when handling this plant and wash your hands after dealing with it because it may cause irritation to the eyes or diarrhea.

Rubber Plant Pruning

Pruning of rubber plant trees is not a big deal. If you live in a space not supporting extensive plant growth, just prune the plant.

As the rubber plant is fast-growing and can reach a height of feet within years, you have to prune to restrict its growth.

  • Don’t cut the top of the plant until you have achieved desired height.
  • Once your plant got an appropriate height, cut the branches to reshape it.
  • Like other plants, the best time to prune rubber plant trees is spring or summer.
  • Don’t do this in winter.

Rubber Plant Propagation

Hopefully, you are done with caring rubber plant tree and it’s growing well.

Now your friends must be driveling for this beautiful plant. So, here is the way you can propagate rubber plants and gifts to your loved ones.

  • How to Propagate a Rubber Tree Plant

Four steps easy way to propagate rubber tree plant

  1. Take a 10-15cm long piece of a growing plant. You may also take a growing tip.
  2. Wash it after removing leaves until sap stops oozing.
  3. Plant the cut and washed stem or growth tip into compost or soil (can also use rooting hormone).
  4. Place the pot in a slightly warmer place.
  • Air Layering Rubber Plant

Propagation by air layering is another method of propagating rubber plants that you can easily opt for.

You just have to follow this simple method.

  • Make a cut in the rubber plant’s branch or stem and place a clean toothpick in that hole.
  • Wrap it in damp moss and cover it with plastic wrap so that it may remain on the toothpick.
  • When you see roots growing, cut the branch and plant in new soil.

Rubber Plant Pests and Problems

  1. Pests or Diseases

Generally, Rubber plant (Ficus elastica) is pest-resistant but might be attacked by certain pests or caught by the diseases.

Here are some common pests that attack most of the houseplants so the rubber plant

  • Scale insects
  • Mealybugs
  • Aphids
  • Spider mites
  • Thrips

You just need to have a check on the plant so that you can figure out any damage at the initial stage.

But no need to be worried about if your rubber plant has been affected.

Try these

  • Neem oil is a better option for this purpose as it is not harsh and will not do any damage.
  • You can also use insecticidal soap sprays until you get plant pest-free.
  1. Common Problems

  • What if your Rubber Plant Leaves Curling?

If your rubber plant leaves are curling, it may be the effect of temperature or overwatering.

As it grows best in temperature up to 30 degrees, but if it gets higher than thirty degrees plant leaves may get affected and show curls.

  • Are Your Rubber Tree Leaves Drooping?

First, observe are the leaves only drooping or drooping leaves are falling?

Only Drooping: If the leaves of your rubber plant are drooping but not falling it means your plant is underwater. Water it properly and timely.

You will see leaves will strengthen again.

Leaves Drooping and Falling: If you locate the problem as the drooping leaves are falling, your plant is overwatered.

Check the pot. It must have drainage. If your pot doesn’t have holes for drainage either repot it to a new pot or give it less water so that roots will not rot.

  •  Rubber Plant Leaves Falling Off?

The two most common reasons for falling leaves of rubber plant trees are over-watering and change in light exposure.

If you bring your outdoor plant inside, it may be affected due to a change in light exposure and leaves will shed.

Another reason is overwatering. As rubber plant is sensitive to watering, neither over water nor underwater it.

Hope you got all the points clear regarding rubber plant benefits and are now ready to take advantage of this plant.

Happy gardening!

Does Baking Soda Kill Ants? Burning Question of the Time

By Sarwat Rehman

‘Does Baking Soda Kill Ants?’, the most burning question of the time that is searched not only by gardeners but every person frustrated by ants in the home.

does baking soda kill ants
Ants – Tiny Lawn Destroying Creature

If you are one of those you must know first ‘Ants belong to the family Formicidae’ that have more than twenty thousand species and most diversified insects on the earth.

This tiny creature is the prime problem in the garden as they modified after flowering plant diversification. With the divergence of ants, man found multiple ways to tackle their nuisance.

So is the the ‘Baking Soda’.

Here is the solution to the problem and pet answer to your query about ‘Does baking soda kill ants?’.

Let’s begin with the devastating role of ants in the garden, ant species, and finally about how you can use baking soda to kill ants in the garden.

Ants in Garden

You may be stung by an ant BUT there are thousands of ants that live in colonies. These thousands of ants are grouped into soldiers, drones, and workers that are head by only the queen.

This huge number of ants make complex nests underground, on trees, under tree trunks or logs, hollow stems, or under stones in the garden.

The tiny wise ants have a deep selection sense of nest building. They use soil and plant material to build their protective nests.

Different ant species make nests carefully.

  • Temnothorax albipennis

These ants are clever enough that they do not make nests in gardens where they find dead ants as indications of disease or predator.

They quickly sense the threat and abandon the place to a safe site.

  • Weaver ant (Oecophylla smaragdina)

Weaver ants belong to the family Formicidae that live on trees and are recognized due to their unique nest-building strategy.

The workers build nests by weaving leaves using larval silk. They build enormously huge nests spanning number of trees.

  • Formica polyctena

The ants of this species construct nests consciously by considering nest temperature. They maintain a constant temperature so that larva develops.

They not only maintain their nest ventilation but also maintain heat by making a nest in a sunny place.

  • Fire Ants

Fire ants also called red ants belong to the genus Solenopsis that are stinging in nature. These little ants with painful stings are reddish-brown in a color that gives an appearance of fire red color.

These ants reside in the form of colonies by producing large mounds on lawns or ground that feed on young plants.

does baking soda kill ants
Fire Ants – Stinging while walking in lawn?

Ants in Garden Good or bad

So, after finding ant species in the garden, you must be wondering whether ants in the garden are good or bad?

These biting ants not only sting you when caring for plants in the garden but also damage your greenery.

Coming to the point, ants do more bad than good in the garden.

The only benefit you may get from ants is they prey on insects.

Fortunately, you can take this benefit from having frogs in garden then why keep plant devastating ants in the garden as they weaken plant roots and make them vulnerable to diseases.

They build deep complex nests having food storage rooms and nursery rooms that are complex structures of the nest.

If you have a patchy lawn with irregular grass, this may also be the gift of ant colonization because they prevent proper growth of grass.

Now surely you want to get rid of ants, but how?

Adding to your luck, you can get rid of this tiny creature easily with BAKING SODA.

See what baking soda is and how you can use it to eliminate ants.

Baking Soda as Insecticide – Answer for ‘Does Baking Soda Kill Ants’

Baking soda in an inexpensive natural solution to the problem of ants.

When ants ingest baking soda in any way, they release carbon dioxide from the body that ultimately leads to their death.

How to Use Baking Soda to Kill Ants – Use in Combination

So, your curiosity about ‘Does baking soda kill ants?’ is going to end up here.

You will know 5 fantastic ways to use baking soda with different materials to eliminate ants in the garden or elsewhere in the house.

  1. Baking Soda and Sugar

Ants like sugar. You can deceivingly attract them by giving sugar mixed in baking soda.

To make this mix, you have to take icing sugar because ants are clever enough to separate sugar crystals from the mix.

Take equal amounts of baking soda and sugar — mix in a container.

You can also add water to make a paste depending upon your using strategy.

When made this mix, scatter in the lawn where you see high mounds. Add at the trunk base. You can also sprinkle beneath and alongside the stones that you have placed on the garden paving.

Find out any nesting by removing topsoil and fallen leaves and sprinkle there to get rid of ants.

  1. Baking Soda and Powder Vitamin C

Just like other combinations of baking soda to kill ants, Vitamin C pills also work to eliminate ants. Just crush the pills and mix with baking soda and sugar in water to make a mixture.

When you are done, locate the anthills in the garden and apply the prepared mixture as per the massiveness of the colony.

You may also apply near young sensitive plants to protect from any attack of ants.

  1. Baking Soda and Boric Acid

Using baking soda with boric acid is a good combination to kill ants. Boric acid is a good antiseptic that can help to get rid of ants.

For extra benefit, you can mix the boric acid into a sugar masked baking soda mix.

Caution: Boric acid is toxic for human and pets both. You must take care to use it in the garden where your kids and pets play.

does baking soda kill ants
Kill ants with baking soda

  1. Baking Soda and Diatomaceous Earth

Diatomaceous Earth is a natural compound made from marine animals, shells of diatoms.

Add some powdered diatomaceous earth with baking soda alone or a mixture of sugar and baking soda for a more potent mix.

You might be thinking what diatomaceous is going to do with ants?

So, here comes the puzzle solved, Diatomaceous powder is quite abrasive in nature. When an ant comes in contact with it, its protective outer covering, cuticle, damages.

Due to its absorbent activity, ant loses water-holding capability and as a result of dehydration dies.

Caution: In order to get rid of ants in the garden, use food-grade diatomaceous earth as it is safe and non-toxic for both pets and humans.

Some varieties other than food grade may have somewhat pesticide activity and are not safe to use in pets and kids’ accessible areas.

  1. Baking Soda and Cooking Oil to Kill Ants

Cooking oil mixed in baking soda gives good results to deter ants. Take one teaspoon of baking soda and mix in less than one spoon of cooking oil.

Make a spray of this mixture by mixing it in warm water. One cup of warm water is sufficient for this mixture.

If you have more colonies of ants, you can prepare as per your need and spray where you see ant hills in the garden. Still, if the problem is unsolved contact pest control vancouver and gets rid of the pests.

What is the Best Time to Repair Lawn Patches? 6 Classy Steps to Repair

By Sarwat Rehman

‘What is the best time to repair lawn patches?’

As no one likes baldness, how one can manage bald spots in a lush grassy lawn. These bare lawn spots are quite irritating when sitting on a shiny winter morning.

You have to repair these patches at the right time so that you can fully enjoy gleaming mornings.

Here is all about what is causing patches in the lawn and best time to repair with detailed and easy steps of repairing patches.

Patchy Lawn Causes – Repair Lawn at Time

Big soil revealing patches in lush green grass give quite an odd view. These bare patches make all your efforts, of decorating and planting, fruitless.

best time to repair lawn

It looks like baldness covered your lawn.

So, you have to cover this baldness at right time but before going into detail all about repairing time and techniques, first, point out what are the causes your lawn is going to be patchy.

  • Insects or Diseases
  • More foot traffic
  • Drought
  • Fungal attack
  • Animal (pets) urine
  • Harsh chemicals
  • Chemical spill
  • Unsharp mowing blades
  • Bugs
  • Unsuitable grass (dormancy of planted grass)
  • Erosion from water runoff
  • Improper cleanliness
  • Ground rubbish or debris
  • No or improper fertilization
  • Mowing grass too much
  • Vehicles

So, before applying techniques for repairing patches, locate the problem you may have in your lawn then start any treatment.

If you fail to locate the problem, you can also consult a professional.

Because…

Diagnosis first, cure later!

Lawn Repairing – Best Time to Repair Lawn Patches

When you are done with locating the cause, go for its repairing. But when?

Time of repairing matters as if you repair in hot scorching heat it will result in damaging seedlings that is why see which season is best for repairing.

  1. Spring or Summer?

Is spring the best time to repair lawn patches?

No, spring is too late to repair.

Growing new grass seedlings in summer may give them trouble. The burning heat of summer results in drying of your lawn that will result in stunted growth.

Even if you water enough, it will give tough struggling time to grow.

  1. Fall or Winter – Best Time to Repair Lawn

Fall! The best time to repair patchy spots in the lawn. As fall is a much cooler season and you don’t need to give much water. The grown seedling will grow easily without much struggle.

In these conditions, cool and damp, the lawn has the potential to recover.

But when winters end, new grass finds more competition with weeds and will be difficult to recover patches well.

How to Fix Patchy Grass – 6 Classy Steps to Repair Lawn in Fall

  1. Mowing

Mow the lawn so that all areas where repairing needs to be done reach up to reasonable height.

Set your mower at lower settings so that lawn could be 2 or fewer inches in height. You can go twice to the area where replantation needs to be done.

  1. Flatten the Grass

When done with mowing, go for flattening with an iron rake and remove all the unnecessary debris or weeds from the lawn.

Removing any debris and weeds will give more chances to seeds to grow with minimum competition.

best time to repair lawn

  1. Spread the Soil

The next step is to spread the soil overground.

When your lawn grass is mowed and flattened equally, you have to spread the best organic soil you want to use.

Spread the soil to about one-fourth to half of the inches deep. After spreading soil, go for the next step.

  1. Water It

You must have a sprinkling system on your lawn. When you have spread the soil, water it with the help of a sprinkling system for about 15 – 20 minutes.

It will help the soil to moisturize and seeds will grow well.

  1. Sow the Seeds

Now is the time to sow seeds. Take the seeds of the best company that you use occasionally or search online and spread a layer over moist soil that you have spread on the ground.

If you select low maintenance seeds with maximum drought tolerance capability will give good results.

If you have a roller, you can use it to push the seeds deeper into the soil so that they firmly grow into the soil.

  1. Care it Consciously

So, done with all necessary steps next is to care rightly.

Water the lawn every morning. If you live in a hot and dry location, water twice a day but not in the evening as it will result standing water overnight, and chances of fungal growth will be more.

Make a routine of watering for at least one month in Northern areas and longer in hot areas.

30+ Amazing Indoor Plant Pots You Must Try!

By Sarwat Rehman

Right ‘Indoor Plant Pots’ are the key to healthy plant growth indoors.

If you pick an inappropriate pot like grow the wide-spreading plant to a small and narrow pot, you will not get anything but lose the plant.

So, select an appropriate indoor plant pot that is not only you like but also is suitable for your interior.

Indoor Gardening

To grow plants is as healthy as to eat organically grown fresh fruits.

Many people get disappointed by not having much outdoor space or backyard and think planting is impossible for them.
Buy Red Patterned Planters Here

Adding to their good luck and for those having a backyard, indoor gardening is the best and easiest option to grow green.

Indoor plant pots give services for this.

But why plant indoors?

Is there any significance of indoor plantation?

YES!

The indoor plantation is not less than a blessing in times when International Climate Change Management Authorities gave RED SIGNAL for abrupt environmental changes.

Smog is grabbing international attention.

Air quality index is affected to such a threatening level that people are moving towards oxygen bars to take oxygen in.

In such cases, we need to grow more and more plants no matter indoors or outdoors.

  • Plants as Air Purifiers

As plants are the ultimate source of oxygen that we inhale, indoor plants majorly serve as air purifiers.

The clean indoor places that we think are safe for us also contain toxins and harmful gases that we inhale.

These toxins come from synthetic building materials, cleaning agents, sprays, or other household solvents that silently poison us.

Air purifying indoor plants absorb such harmful gases and give us oxygen.

Pot Selection Matters!

Deciding which pot you have to select for plants is important. Because pot selection matters!

If you pick a pot quite irrelevant to decor, it will look odd. So, be choosy to select indoor plant pots.

  1. Pot of Which Material is Best?

The right pot for the right plant adds to the life of the stunning plant. Depending upon the place where you want to decorate or plant you want to grow, types of pots vary.

You have a wider variety of materials to pick the right one as

  • Plastic
  • Ceramic
  • Glass
  • Wooden
  • Metallic pots

Now, pick that suits your interior design or you are comfortable with.

 Buy Wooden Plant Organizer Here

  2. Which Size of Pot You Have to Pick?

When you have decided which plant you are going to grow, select pot according to its size.

Some plants spread like a mini tree and some grow tall while many plants like succulents are small enough. Pick your planter as per your plant growth.

Some plants like Blue Star Fern is easy to grow indoor fern that you can place at your side table in a simple pot.

  1. Indoor Space

As you know indoor gardening also serves as an alternative to the yard where space is limited, pick the right planters for maximum plantation.

Hanging planters and other modern indoor pots (those discussed below) are in trend to save your space and give you green where you want.

So, without any further delay, select indoor plant pots that suit your place best and give your house a new life.

Growing Plants Indoors – Indoor Plant Pots Ideas

Definitely, you were looking for indoor plant pots, but after knowing the significance of indoor plants you must be dedicated to the plantation.

To help your plantation, here are many indoor plant pot ideas that you can design yourself or purchase from your near garden store.

  • Decorative Indoor Plant Pots

This is everyone’s desire to decorate the home and make it attractive.

Plants decorate your home wonderfully!

There are many types of indoor pots to grow plants. You can simply use your unusable pots or make something new.

Here comes the most attractive and easy-to-make indoor planter. You can craft by painting unattractive pots to stylish planters and grow whatever plants you like.

Placing plants in the lounge and drawing room is so energizing. You can purchase a wooden planter to grow plants indoors and make your place refreshing or have amazingly designed ceramic planters.


Buy Cute Mini Decorative Planters Here

Antique-style tabletop planter!

Buy this ceramic tabletop planter Here

This is a simply elegant planter for flowering plants that you can place at your side table or dining table and enjoy its captivity.

A cycle-style indoor plant pot is absolutely attractive and a unique way to place your pot. Children also find it interesting and in this way, you can develop a sense of planting in children.

Buy Square Self-watering Planter Here

Indoor plant pots in stands are getting special attention these days.

As, they are easy to manage with little space and if you have toddlers, these stand-style pots are perfect to protect your plants from kids.

A corner stand-in room with fresh green plants will give you energizing vibes when you get up in the morning.

  • Indoor Flower Pots

You must have flowers in your room or a place where you spend most of the time because they will not only give your room freshness but also enlighten your mood.

You can select a pot for flowers or flowering plant that complements your interior or contrasts flowers.

indoor plant pots
Indoor Pots for Flower – Pot Ideas

Bright-colored stylish pots enlighten your room. Flowers not only help to release stress but also give you magnificent psychological benefits.

It is also proved from research that flowers boost your intellectual performance so, you can have beautiful flower pots at your workplace or in your study room.

  • Cactus Plant Pots

Growing Cactus in a living place adds special colors. Cactus is a plant with a special ability to survive drought so you must grow it in best ceramic pot.

If you are in a quite warmer place and worried about indoor plants, the cactus can give you many interests by their striking shapes and colors.

Hot place, dry environment, forget to water plants timely…Grow multiple Cactus in one pot!

As cacti store water in leaves, stems, and roots you can grow them in mini pots with no drainage.

Buy Mini Cactus Planters with Bamboo Stand Here

Place a big pot of multiple cacti near windowsills and go on a long tour without worrying about water, your cacti will still welcome you refreshingly.

So, take a large planter and experience this.

Buy this Large cactus Planter Here

Mini planters are most appropriate to grow stunning cacti particularly, animal featured pots give a stunning view and add character to your indoors.

Buy Goat Featured Cacti Planter Here

Buy Sloth Hanging Cacti Pot Here

Bright colored pots with striking green plants will add grace you will amaze with!

Buy Multi-colored Cacti Pots Here

  • Indoor Plant Pots with Saucers

Some plants don’t need plenty of stored water in the soil and their growth is affected in soggy soil. Planters with shallow trays or dishes under the pot, saucers, are best for such plants.

Buy Now!

You can place an indoor plant pot with a saucer on a kitchen shelf or in a side corner of your living.


indoor plant pots with saucers
Indoor Plant Pots with Saucers – Pot Ideas

Hanging Indoor Plant Pots

Hanging planters are also in a trend that makes your lounge corner a masterpiece.

Many plants grow as trailing vines protruding from hanging planters. Lipstick Plant is best to grow in a hanging pot with protruding bright red lipstick-like flower.

A glass tube like hanging indoor plant pot!

Buy Gold Plant Hangers with Pots Here

Buy Large Hanging Planters Here

These hanging indoor plant pots not only give different styles to grow plants but also manage multiple herbal or shrubby plants in less space.


A white hanging planter at sidewall with fresh green foliage will unburden from fatigue.

Buy Unique White Hanging Planters Here 

Modern Indoor Planters

These are the most trending indoor planter styles that you can copy. Growing plants beside a glass door on top of the cabinet or self will give you green sight from the outdoor that will refresh your mind.

Vertical planters opened doors to the most feasible and eye-catching plantation.

You can design your wall of lounge with such grasping green plants that give an opportunity to plant in a small apartment.

Buy Wall Planters with Wooden Stand Ladder Here


Buy Modern Wall Planter Here

Space Saving Planters

If you have no space, go to space-saving planters.

They are usually vertical planters in the form of hanging pots or rack planters.

 Buy Space Saving Living Wall Planter Here

You can make a wall of mini planters and grow cacti. It will give you such a mesmerizing view.

Mini plants in mini pots!

Buy Min Planters Here

You can cut bottles on your own and make planter to save space and grow more.

A vertical stand with pots gives you the opportunity to have more plants either herbs in no space.

 Buy Vertical Herb Wall Garden Here

Large White Plant Pots

White-colored pots give elegance to the room. You can take a stand and place white pots at the side corner or just place it on the shelf.

Your pets will love it too!

white indoor plant pots
White Indoor Plant Pots – Pot Ideas

So, you saw the exceptionally beautiful 30+ indoor plant pot ideas that you can easily try indoors to grow more and more plants so that not only your house gets purified but also you feel comfortable at home.

These indoor plants will relieve you in such a way you can not do it yourself!


  • « Previous Page
  • 1
  • …
  • 4
  • 5
  • 6
  • 7
  • 8
  • …
  • 10
  • Next Page »

Most Recent

  • How to Store Butternut Squash [to Save Harvest]
  • How Do Indoor Plants Purify Air – Surprising Truth!
  • Do Indoor Plants Need to be by a Window? [Secret Answer]
  • Are Indoor Plants Harmful at Night? Truth behind the Myth
  • How to Grow Butternut Squash in Small Space [3 Methods]
  • About Us
  • Privacy Policy
  • Terms and Conditions

Copyright © 2025 | Privacy Policy | Terms & Conditions|