Gardening Zeal

All About Gardening

  • Home
  • Gardening Guide
    • Growing Fruits
    • Growing Vegetables
    • Lawn Care
    • Plants and Flowers
  • Indoor Gardening
    • Houseplant Types
    • Indoor Plants FAQs

How to Store Butternut Squash [to Save Harvest]

By Sarwat Rehman

Butternut squash is a versatile and nutritious vegetable that can be used in a variety of dishes, from soups and stews to salads and roasted vegetables. However, to get the most out of your butternut squash, it’s important to know how to store it properly.

In this article, we’ll share essential technique for storing harvested butternut squash to prolong its shelf life, preserve its nutritional value, and ensure that it stays fresh and flavorful for as long as possible. Before that, you will get to know about ideal storage conditions and location for butternut squash.

Let’s explore everything about how to store butternut squash.

Ideal storage conditions for butternut squash

The ideal storage conditions for butternut squash are cool, dry, and dark. Here are some specific recommendations for storing butternut squash:

  1. Temperature

The temperature for storing butternut squash should be between 50 to 55 degrees Fahrenheit (10 to 13 degrees Celsius). Temperatures that are too cold or too warm can cause the squash to spoil or deteriorate more quickly.

  1. Humidity

The ideal humidity level for storing butternut squash is around 50-70%. High humidity can cause the squash to rot or mold, while low humidity can cause it to dry out and lose flavor. Therefore, it is important to store butternut squash in a location that has moderate humidity levels. If you are storing the squash in a dry environment, you can place a damp cloth or paper towel nearby to help maintain the humidity level. Conversely, if the environment is too humid, you can use a dehumidifier to reduce the moisture in the air. By maintaining the right humidity level, you can help to extend the shelf life of butternut squash and preserve its quality and flavor.

How to store butternut squash
Butternut squash
  1. Ventilation

Ventilation plays an important role in storing butternut squash as it helps to prevent the build-up of moisture and mold. Good air circulation allows any excess moisture to evaporate and helps to maintain a moderate humidity level. Without proper ventilation, the environment can become too humid, which can cause the squash to rot or mold.

  1. Darkness

Butternut squash should be stored in a dark place to prevent it from being exposed to light. It is important to note that even a small amount of light exposure can cause damage to butternut squash over time. Exposure to light can cause butternut squash to break down and lose its nutritional value, as well as cause the skin to harden or become discolored.

  1. Separation

Store butternut squash separately from other fruits and vegetables. Fruits such as apples, bananas, and pears produce ethylene gas, which can cause the squash to ripen and spoil more quickly.

By following these ideal storage conditions, you can extend the shelf life of butternut squash and ensure that it stays fresh and flavorful for several months.

Finding ideal storage location for butternut squash

Butternut squash can be stored in several different places, as long as the conditions are cool, dry, and dark. Here are some examples of suitable storage locations for butternut squash:

  • If your pantry is cool and dry, it can be an excellent place to store butternut squash. However, make sure that it’s not too close to any sources of heat or moisture.
  • A root cellar is a traditional storage area that is perfect for storing root vegetables like butternut squash. It’s a cool, dark, and humid environment that can help keep your squash fresh for several months.
  • If you have a basement that is cool and dry, it can be a good place to store butternut squash. However, make sure that it’s not too damp, as excess moisture can cause the squash to rot.
  • If you have a garage that is insulated and stays cool, it can be an ideal place to store butternut squash. However, make sure that it’s not too humid or subject to extreme temperature fluctuations.

Remember to store your butternut squash in a single layer and avoid stacking them to prevent bruising and rot. Also, avoid storing them near fruits that release ethylene gas, such as apples or bananas, as this can cause the squash to ripen and spoil more quickly.

How to store butternut squash?

After getting storage conditions and perfect location, you are at the final step of how to store butternut squash. Here is step by step procedure:
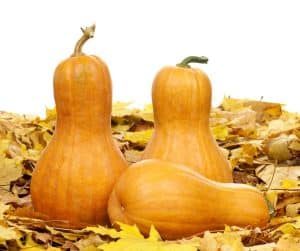
How to store butternut squash
Storing butternut squash

Step 1 – Clean the squash

To clean butternut squash for storage, follow these steps:

  1. Rinse the squash under cool, running water to remove any dirt or debris from the surface.
  2. Use a clean vegetable brush to scrub the surface of the squash gently to remove any remaining dirt or debris.
  3. Dry the squash with a clean towel or allow it to air dry completely before storing.

It’s important to ensure that the squash is completely dry before storing, as any moisture can promote the growth of mold and cause the squash to spoil more quickly. Once the squash is clean and dry, you can proceed with the curing and storage process as described earlier.

Step 2 – Cure the squash

Curing is the process of allowing the butternut squash to dry and harden before storing it. It develops a tough outer layer that protects squashes from moisture and bacteria, preventing it from spoiling quickly and prolongs shelf life.

Here are some benefits of curing butternut squash before directly storing:

  1. Curing helps to dry out the outer layer of the squash, creating a protective barrier that prevents moisture from entering and bacteria from growing. As a result, cured butternut squash can last for several months in storage.
  2. Curing can enhance the natural sweetness of butternut squash and produce a nuttier flavor. It also helps to firm up the flesh, making it easier to cut and cook.
  3. Curing can help to preserve the nutritional content of butternut squash by slowing down the degradation of its vitamins and minerals.
  4. Cured butternut squash can be used in a wide range of recipes, from soups and stews to roasted vegetables and side dishes.

To cure butternut squash, it should be left in a warm, dry place with good ventilation for about 7-14 days, depending on the size and thickness of the squash. After curing, the squash can be stored in a cool, dry, and dark place for several months.


Step 3 – Storing at the right place

Choose a cool, dry, and dark location to store butternut squash as directed in the first section.

Do not stack the squash on top of each other, as this can lead to bruising and spoilage. Instead, place the squash in a single layer on a shelf or in a basket, with space between each squash to allow for air circulation.

Another option is to wrap squashes for storing. It’s not necessary, but doing so can provide an extra layer of protection against moisture and pests. If you choose to wrap the squash, use a breathable material such as paper or a loosely woven cloth. This allows for air circulation and prevents the squash from sweating and developing moisture, which can lead to mold growth and spoilage.

Perforated plastic bags also work fine. This allows for air circulation while also providing a barrier against moisture and pests.

Whether you choose to wrap the squash or not, make sure to store it in a cool, dry, and well-ventilated location with a temperature between 50-55°F and a humidity level between 50-70%.

Post storage checking of butternut squash

How to store butternut squash
How to store butternut squash?

Here are some tips for checking, caring, and maintaining stored butternut squash to prevent spoilage and decay:

  1. Regularly inspect the squash for any signs of damage or decay, such as soft spots, mold, or discoloration. Remove any damaged or spoiled squash immediately to prevent the spread of decay.
  2. Handle the squash gently to avoid causing any bruises or cuts that can lead to spoilage.
  3. Maintain the storage area at the optimal temperature and humidity levels, as described earlier.
  4. Check the squash periodically to ensure that it’s still in good condition. If you notice any signs of decay or spoilage, remove the affected squash immediately.
  5. If you wrapped the squash in paper or cloth, check it periodically to ensure that it’s still breathable and not trapping moisture inside.
  6. Avoid stacking the squash too high or too tightly, as this can cause the squash to become crushed and bruised, leading to spoilage.
  7. If you notice any pests in the storage area, take steps to eliminate them immediately to prevent them from damaging the squash.
  1. Consider using natural pest control methods, such as diatomaceous earth or essential oils, to discourage pests.

By following these tips, you can help ensure that your stored butternut squash stays fresh and flavorful for as long as possible.

How to check for signs of decay or spoilage?

There are several signs that you can look for to check if your stored butternut squash has started to decay or spoil:

  1. Appearance: Check for any visible mold or discoloration on the surface of the butternut squash. If you notice any soft spots or sunken areas, it may indicate that the squash has started to rot.
  2. Smell: Give the butternut squash a sniff. If you detect any sour, musty, or unpleasant odors, it may indicate that the squash is spoiled.
  3. Texture: Press your finger gently on the surface of the butternut squash. If it feels soft or mushy, it may have started to decay.
  4. Taste: If you’re unsure about the quality of your butternut squash, you can cut off a small piece and taste it. If it tastes off or has a strange texture, it’s best to discard the squash.

How to store butternut squash
Butternut squash

It’s important to store butternut squash in a cool, dry place, away from direct sunlight or sources of heat. If you notice any signs of decay or spoilage, it’s best to discard the squash to avoid the risk of foodborne illness.

Freezing butternut squash

Freezing harvested butternut squash is important because it helps to preserve its nutritional value and flavor for longer periods of time. Freezing can also save you time and money by allowing you to store excess squash and use it when needed. Here are the steps to freeze harvested butternut squash:

  1. Prepare the butternut squash: Wash the squash thoroughly and cut off the ends. Cut the squash in half lengthwise and scoop out the seeds with a spoon.
  2. Cut the squash into small pieces: Use a sharp knife to cut the squash into cubes or slices of the desired size.
  3. Blanch the squash: Blanching helps to stop enzyme activity that can cause the squash to lose flavor and nutrients. Bring a large pot of water to a boil and add the squash. Boil for 2-3 minutes, then immediately transfer the squash to a bowl of ice water to stop the cooking process.
  4. Drain and pat dry: Drain the squash and pat it dry with paper towels to remove any excess moisture.
  5. Pack the squash into freezer bags: Label freezer bags with the date and contents. Pack the cooled squash into the bags, leaving some room at the top for expansion during freezing. Remove as much air as possible from the bags before sealing them.
  6. Freeze the squash: Place the bags of squash in the freezer and freeze for up to 8-10 months.

To use the frozen squash, simply remove the desired amount from the freezer and thaw it in the refrigerator or microwave before using it in your recipe.

Can butternut squash be canned?

Yes, butternut squash can be canned, but it’s important to follow specific guidelines to ensure that it’s done safely. The USDA recommends using a pressure canner to can butternut squash, as it’s a low-acid vegetable that can harbor bacteria such as Clostridium botulinum, which can cause botulism.

To can butternut squash safely, start by peeling and cubing the squash, then blanch it in boiling water for two minutes. Pack the hot squash into clean, sterilized canning jars, leaving about an inch of headspace at the top. Add hot water or vegetable broth to cover the squash, then wipe the rim of the jar clean and place a lid and ring on top.

Process the jars in a pressure canner according to the manufacturer’s instructions, taking care to maintain the recommended pressure and processing time. After processing, let the jars cool for several hours before checking the seals and storing them in a cool, dry place.

What is the ideal storage life of butternut squash?

The storage life of butternut squash depends on several factors, including how it was harvested, cured, and stored. Generally, properly cured and stored butternut squash can last for several months, up to 3-4 months, if stored in optimal conditions. However, the squash may begin to deteriorate or spoil earlier if it was not harvested or cured properly, or if it is stored in unfavorable conditions such as high humidity or temperatures. It’s important to regularly check the squash for signs of spoilage and discard any that show signs of deterioration.

Top 5 reasons of storing butternut squash

Storing butternut squash properly can provide several benefits, including:

  1. Properly stored butternut squash can last for several weeks or even months, depending on the storage conditions. This can be particularly useful if you have a large harvest or want to buy in bulk during the peak season.
  2. Butternut squash is rich in essential vitamins, minerals, and antioxidants, and storing it properly can help to preserve these nutrients for longer periods of time.
  3. Butternut squash is a versatile vegetable that can be used in a variety of dishes, including soups, stews, curries, casseroles, and roasted vegetables. By storing it properly, you can have this nutritious ingredient on hand whenever you need it.
  4. Storing butternut squash can be a cost-effective way to enjoy this nutritious vegetable throughout the year, particularly if you’re able to buy it in bulk or at a discounted price.
  5. By storing butternut squash, you can reduce food waste and make the most of your harvest or grocery store purchases, which is a more sustainable approach to food consumption.

Overall, storing butternut squash properly can provide several benefits, including prolonging its shelf life, preserving its nutritional value, increasing its versatility, saving money, and promoting sustainability.

Conclusion – How to store butternut squash?

In conclusion, storing butternut squash properly is essential to prolong its shelf life, preserve its nutritional value, and prevent food waste. By following simple storage techniques, such as choosing the right squash, storing it in a cool and dry place, and checking for signs of spoilage, you can enjoy this delicious and nutritious vegetable for several weeks or even months. Additionally, freezing or canning butternut squash can be a great way to store it for even longer periods of time. By taking the time to properly store your butternut squash, you can ensure that it stays fresh, flavorful, and healthy, providing you with a versatile and cost-effective ingredient for a wide variety of dishes.

Hope your query about how to grow butternut squash is answered to the fullest. Do share your valuable experience or any tips worth sharing.
How Do Indoor Plants Purify Air – Surprising Truth!

By Sarwat Rehman

Did you know that indoor air can be up to 5 times more polluted than outdoor air?

With common household items like cleaning products and furniture releasing harmful chemicals into the air, it’s important to find natural and effective ways to purify the air we breathe. And that’s where indoor plants come in.

Not only do indoor plants add a touch of green to your space, but they can also help remove harmful pollutants and toxins through a process called Phytoremediation.

In this article, we’ll explore the science behind this process to know how do indoor plants purify air and highlight some of the best plants for air purification (including NASA-approved houseplants). You will also get to know about 6 factors to consider when choosing air purifying plants and lastly, the major pros and cons of these air plants are there as a bonus.

So, if you want to breathe cleaner, fresher air and improve your overall health, keep reading!

Why Does Indoor Air Need Purification?

Indoor air is not always as fresh and clean as we would like it to be. In fact, it can often be filled with all sorts of pesky pollutants that can cause a wide range of health issues, from coughing and sneezing to more serious respiratory problems.

Here you can find some common indoor air pollutants:

  • Dust and dust mites
  • Pollen
  • Mold spores
  • Pet dander and hair
  • Tobacco smoke
  • Carbon monoxide
  • Nitrogen dioxide
  • Formaldehyde
  • Volatile organic compounds (VOCs) from cleaning products, paint, and building materials
  • Radon gas
  • Asbestos fibers (in older homes or buildings)
  • Lead particles (in older homes or buildings)
  • Bacteria and viruses

Indoor air purification can help remove these pollutants and improve the overall air quality in your home or building.

How Do Indoor Plants Purify Air?

Well, it turns out that plants are natural air purifiers, thanks to a process called phytoremediation.

Phytoremediation is the process by which plants can remove or mitigate pollutants from the environment. Specifically, it involves the uptake of contaminants such as heavy metals, organic chemicals, and radioactive compounds from soil, water, or air into the plant’s tissues, where they can then be broken down or immobilized.

  • When it comes to VOCs specifically, plants have been shown to be particularly effective at removing formaldehyde, benzene, and trichloroethylene – all common indoor air pollutants. These harmful chemicals can be released by-products like furniture, carpets, and cleaning agents, but indoor plants can help to reduce their levels in the air.
  • But that’s not all! Plants also release oxygen as a byproduct of photosynthesis, which can help boost the air quality and make us feel more energized and alert. Plus, having plants around can have a calming effect and reduce stress levels, making us feel more relaxed and happy overall.

The Best Air Purifying Indoor Plants

Not all indoor plants are created equal when it comes to air purification. Some plants are more effective than others at removing certain types of pollutants from the air.

Here are some top air-purifying indoor plants:

  • Spider plant –effective at removing formaldehyde, xylene, and toluene from the air.
  • Boston fern – good for removing formaldehyde and benzene.
  • Peace lily – helps to remove formaldehyde, benzene, and trichloroethylene.
  • Snake plant – removes formaldehyde and benzene from the environment.
  • Aloe vera – helps clean indoor air by removing formaldehyde and benzene.
  • Dracaena – effectively removes trichloroethylene and xylene.
  • Golden pothos – makes the air clean by removing formaldehyde and carbon monoxide.
  • Bamboo palm – effective at removing formaldehyde, benzene, and trichloroethylene from indoors.
  • Rubber plant – good for removing formaldehyde from the air.
  • Philodendron – removes formaldehyde from surrounding

What are NASA Approved Air-purifying Indoor Plants?

In the late 1980s, NASA conducted a study to determine the most effective indoor plants for purifying the air. The study found that certain plants were particularly good at removing pollutants such as benzene, formaldehyde, and trichloroethylene from the air.

List of NASA-Approved Air Purifying Houseplants

Here is a list of some of the NASA-approved air-purifying plants:

  • Aloe vera (Aloe barbadensis)
  • Spider plant (Chlorophytum comosum)
  • Snake plant or mother-in-law’s tongue (Sansevieria trifasciata)
  • Peace lily (Spathiphyllum spp.)
  • English ivy (Hedera helix)
  • Boston fern (Nephrolepis exaltata)
  • Bamboo palm (Chamaedorea seifrizii)
  • Rubber plant (Ficus elastica)
  • Golden pothos (Epipremnum aureum)
  • Areca palm (Dypsis lutescens)

These plants have been found to be effective at removing various indoor air pollutants and improving the overall air quality. In addition to their air-purifying qualities, many of these plants are also relatively easy to care for and can add natural beauty to indoor spaces.

How Many Houseplants Do I Need To Purify The Air in My Home?

The number of houseplants you need to purify the air in your home depends on several factors, including

  • Size of your home
  • Types of pollutants present
  • Types of plants you choose

According to a NASA study, you should aim for at least one plant per 100 square feet of indoor space. This means that a 1,000-square-foot home would require at least 10 plants to effectively purify the air.

However, this is just a general guideline, and the actual number of plants you need may vary depending on the factors mentioned above.

6 Factors to Consider for Choosing Air Purifying Plants

When selecting air-purifying plants for your indoor space, consider the following factors:

1.      Air Purification Ability

Look for plants that are known for their air-purifying qualities. Some common examples include the Peace lily (Spathiphyllum), Snake plant (Sansevieria), Spider plant (Chlorophytum comosum), and Boston fern (Nephrolepis exaltata).

These plants have been shown to effectively remove pollutants from the air.

2.      Plant Size and Maturity

Consider the size and maturity of the plant and ensure it fits well within your available space. Some air-purifying plants like rubber plants can grow quite large, while others are more compact.

Additionally, larger, more mature plants will have more leaves and therefore be more effective at removing pollutants from the air. However, smaller plants can still be effective, especially if you group them together in clusters.

3.      Lighting Requirements

Assess the lighting conditions in your space and choose plants that can thrive in those light levels. It’s a fact that some plants require bright, indirect light, while others can tolerate low-light conditions.

4.      Maintenance Needs

Consider your ability to provide care for the plants. Different air-purifying plants have varying watering and maintenance requirements. Thus select plants that align with your schedule and ability to provide the necessary care.

5.      Toxicity

If you have pets or small children, be mindful of plant toxicity. Some air-purifying plants may be toxic if ingested therefore research the toxicity levels of plants and choose non-toxic options if safety is a concern.

6.      Personal Preference

Finally, consider your personal preference and aesthetic taste. Choose air-purifying plants that you find visually appealing and that complement the style of your indoor space.

By considering these factors, you can choose air-purifying plants that not only improve your indoor air quality but also suit your space, lifestyle, and personal preferences.

Do Indoor Plants Remove Mold From The Air?      

Indoor plants have been shown to help reduce the levels of mold in the air, but they may not be the most effective solution for removing mold.

Mold growth occurs when moisture accumulates in an area, so the most effective way to prevent and remove mold is by addressing the moisture issue.

However, some plants can help by absorbing excess moisture in the air, which can reduce the risk of mold growth. Plants like spider plants, Boston ferns, and peace lilies have been shown to be effective at reducing airborne mold levels.

Additionally, the soil in indoor plants can sometimes harbor mold spores, so it’s important to keep the soil properly aerated and not over-water the plants, which can contribute to mold growth.

11 Benefits of Having Air Purifying Houseplants

Indoor plants not only add a touch of natural beauty to your living space, but they also have a variety of health benefits, particularly when it comes to air quality.

Here are 9 benefits of having air-purifying houseplants:

  1. Plants absorb carbon dioxide during photosynthesis and release oxygen back into the air, which can help increase oxygen levels in your home and promote better breathing.
  2. Studies have shown that being around plants can help reduce stress and anxiety levels, leading to a more relaxed and calm environment.
  3. Plants have been shown to improve concentration and cognitive function, making them a great addition to home offices and workspaces.
  4. Some plants, like lavender and jasmine, have a calming effect and can help promote better sleep quality.
  5. Many plants have natural scents that can help purify the air and provide a natural and pleasant aroma to your home.
  6. Plants release moisture into the air through a process called transpiration, which can help increase humidity levels and alleviate dry skin and respiratory issues.
  7. Being around plants can have a positive impact on mental health, helping to reduce symptoms of depression and improve overall well-being.
  8. Indoor plants can add a natural and calming touch to your home, creating a relaxing and inviting atmosphere that can improve your mood and overall sense of happiness.
  9. Some plants have antibacterial properties and can help boost your immune system, helping to reduce the risk of getting sick.
  10. Plants can help absorb sound waves, which can reduce noise pollution in your home and create a more peaceful environment.
  11. Plants can help boost creativity and promote innovative thinking, making them a great addition to home offices and creative spaces.

Overall, having air-purifying houseplants can provide a range of health benefits and help create a more inviting and relaxing living space.

3 Disadvantages of Air-purifying Plants

Houseplants themselves are not harmful or have any drawbacks but they are either associated with some allergens or alter surroundings for sensitive individuals.

Here you can find major problems associated with air-purifying indoor plants:

  1. Some houseplants produce small amounts of pollen, which can trigger allergies in susceptible individuals. Examples include plants in the Araceae family (e.g., peace lilies, philodendrons) and certain flowering plants.
  2. Indoor plants create a humid environment, which can promote the growth of mold and fungi on the soil, leaves, or surrounding surfaces. Mold spores can become airborne and cause allergic reactions or respiratory issues in some individuals.
  3. Dust can accumulate on the leaves of houseplants, especially in indoor environments with poor air circulation. Dust mites or other particles present in the dust can act as allergens for some people.

It’s important to note that while these allergens can be present in houseplants, they are generally not significant sources compared to outdoor allergens such as pollen from trees, grasses, or weeds. Regular cleaning and maintenance, such as wiping the leaves, providing proper drainage, and ensuring good ventilation, can help minimize allergens associated with houseplants and create a more allergy-friendly indoor environment.

Conclusion – How Do Indoor Plants Purify Air?

In conclusion, indoor plants are much more than just a decorative addition to your living space. They can also provide numerous health benefits by purifying the air we breathe. By selecting the right plants and taking proper care of them, you can enjoy the benefits of cleaner, fresher air, reduced stress levels, and improved overall health. So whether you’re a seasoned plant enthusiast or just starting out, incorporating air-purifying plants into your indoor environment is a smart choice for your well-being.

Say goodbye to stuffy air and hello to fresh air with indoor plants!

Do Indoor Plants Need to be by a Window? [Secret Answer]

By Sarwat Rehman

Indoor plants in homes and offices are preferred to be grown near windows but what about people living in windowless places? Do indoor plants need to be by a window in real-time and cannot grow elsewhere? Worth intriguing!

So yes, indoor plants need to be by a window for the right amount of light to promote photosynthesis and all other vital functions going on in the plant. Windows give direct access to light and also maintain their temperature plus humidity.

You need to dive into the details of different window orientations in a room, find suitable houseplants and grow that work well for you. Also, discover alternatives to windows for gardeners living in windowless apartments or get the benefit of them in a low-light area. Additionally, you will find signs of plants growing in low light and some useful tips to care for houseplants placed far from the window.

Lastly, houseplants growing in low light conditions are also given to make plant selection easy for you. Let’s see!

Windows and Plants – What’s the Connection?

Placing indoor plants near windows is important for the core reason – sunlight. This light is the life for plants for various reasons like:

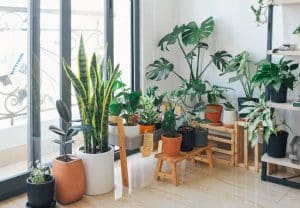
do indoor plants need to be by a window
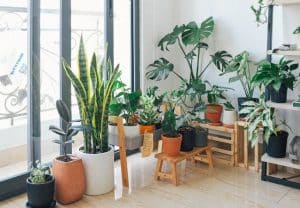
A room rich in indoor plants!
  • Light is an essential element for the growth and development of plants. It plays a crucial role in a process called photosynthesis, where plants use light energy to convert carbon dioxide and water into glucose, a type of sugar, and oxygen. This process is the foundation of plant growth and is the reason why light is so important.
  • Without light, plants cannot perform photosynthesis, which means they cannot produce the energy they need to grow, develop, and produce flowers and fruits. Also without light, you get deprived of oxygen.
  • Light also affects the plant’s shape, color, and overall health.
  • It influences the size and shape of leaves, the color of flowers, and the growth rate of stems and roots.
  • Windows allow fresh air to circulate around plants, promoting better ventilation and preventing stagnant air.
  • Windows also play a vital role in regulating the temperature of a room for optimum growth.

Do Indoor Plants Need to be By a Window – Really?

Indoor plants really need to be by a window for light. It is also evident from above mentioned reasons convincing light brings energy and life to the plant.

Placing houseplants next to the windows allow more light exposure. Now you may ask if there are multiple windows in a room with varying lights at different times of the day so which window suits best for my plant.

This is a valid concern.

Remember, the intensity of light is also important. Too much light can cause a plant’s leaves to burn, while too little light can cause the plant to grow tall and spindly instead of growing strong and healthy. It’s a delicate balance and your plants will grow to their full potential if grown at the right window.

Here’s a description of windows based on their orientation and where indoor plants should be placed:

1.      South-facing windows

These windows receive the most sunlight throughout the day, making them ideal for plants that require a lot of light.

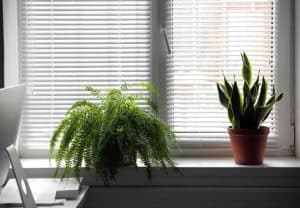
do indoor plants need to be by a window
Indoor plants at windowsill

However, direct sunlight can also be intense and hot, so it’s important to choose plants that can tolerate the heat and to avoid placing sensitive plants directly in the sun.

Plants that do well in south-facing windows include succulents, cacti, and tropical plants like bird of Paradise and hibiscus.

2.      East-facing windows

These windows receive bright morning light but less intense afternoon sunlight. Plants that prefer bright, indirect light are well-suited for east-facing windows.

Examples include ferns, snake plants, and peace lilies.

3.      West-facing windows

These windows receive the most intense afternoon sunlight, which can be too hot and intense for some plants.

Plants that can tolerate the heat and bright light, like succulents, can do well in west-facing windows.

4.      North-facing windows

These windows receive the least amount of direct sunlight, making them best suited for plants that can tolerate low-light conditions.

Plants like ZZ plants, spider plants, and pothos can thrive in north-facing windows.

It’s worth noting that not all rooms have windows facing each direction, and the amount of sunlight that enters a room can also be affected by the surrounding buildings or trees. It’s important to choose plants that match the available light conditions.

Window OrientationAmount of SunlightBest Plants for the Window
South-facingMost intense and direct sunlight throughout the daySucculents, cacti, bird of paradise, hibiscus
East-facingBright morning light and indirect light in the afternoonFerns, snake plants, peace lilies
West-facingMost intense and direct sunlight in the afternoonSucculents, cacti
North-facingLeast amount of direct sunlightZZ plants, spider plants, pothos

Alternatives to Placing Indoor Plants by a Window

Now houseplant enthusiasts living in apartments, vans, studios, or other small areas don’t have access to all types of windows. There are window alternatives for more controlled light conditions.

These include:

  1. Artificial lighting
  2. Grow lights
  3. Reflective surfaces

·         Artificial lighting

Artificial lighting can be a great alternative to natural light for indoor plants, especially if your home or office lacks windows or natural light sources.

There are many types of artificial lighting available, including

  • LED lights
  • Fluorescent lights
  • High-intensity discharge grow lights
  • Incandescent lights

When choosing an artificial light source for your plants, it’s important to consider the color temperature, and brightness of the light. Most plants require a color temperature between 5500-7000K for optimal growth, which is similar to the color of natural daylight.

In terms of brightness, most plants require between 200-1000 foot candles of light per day, depending on their specific needs.

It’s also important to adjust the duration and intensity of the light to meet your plants’ needs and ensure they receive adequate light for photosynthesis and growth.

>>>>

It’s worth noting that different types of plants have different lighting needs, and you may need to adjust the intensity and duration of the artificial lighting depending on the plant species.

·         Grow lights

Grow lights are specifically designed to provide plants with the spectrum of light they need for photosynthesis and growth.

They come in a variety of sizes and types, from small desktop lamps to large overhead fixtures.

When choosing a grow light, it’s important to consider the type of plants you have and their specific light requirements. Different plants require different spectrums of light, so be sure to choose a grow light that provides the appropriate spectrum for your plants.

·         Reflective surfaces

There are several other methods of providing light for indoor plants, such as reflective surfaces, mirrors, or even white walls. These can help bounce light around the room and provide more indirect light for your plants.

Additionally, rotating your plants regularly can help ensure they receive equal amounts of light from different directions. While these methods may not be as effective as natural or artificial light sources, they can still provide some light for your plants and help them thrive.

do indoor plants need to be by a window
Do indoor plants need to be by a window?

Overall, there are several alternatives to placing indoor plants by a window that can help your plants receive the light they need to grow and thrive. By researching your plants’ specific light requirements and providing them with the appropriate type and amount of light, you can help your plants reach their full potential and enjoy a healthy, vibrant indoor garden.

How Can You Tell if Your Indoor Plants are not Getting Enough Light?

Now you already know the answer to the prime query do indoor plants need to be by a window still be aware of the signs showing plants do not have adequate enough light. These signs will better help you identify light issues at the right time making it possible for a quick solution.

Here are the signs of houseplants not receiving enough light:

1.      Leggy growth

An obvious sign of inadequate light source in plants is their leggy growth. If your plant is growing tall and thin with long spaces between leaves then clearly get that it’s not getting enough light.

Leggy growth occurs when a plant stretches to reach available light sources and can result in weak, spindly stems that are more susceptible to damage.

2.      Small or discolored plant leaves

Smaller or pale plant leaves are a clear indication that it’s not getting enough light. Without adequate light, plants may not produce enough chlorophyll, which can cause their leaves to appear pale or yellowish.

3.      Stunted growth

Plants growing in inadequate light grow slowly. If your plant is growing slower than usual, this could be a sign that it’s not getting enough light. Without sufficient light, plants may not be able to produce the energy they need for photosynthesis and growth, causing stunted growth.

4.      Leaf drop

Without enough light, plants may not be able to produce enough energy to sustain their leaves, which can cause them to drop off.

5.      Lack of blooms or fruits

If your plant usually produces flowers or fruit but has stopped doing so, this could be a sign that it’s not getting proper light. When there is no light, there will be no energy to support flowering or fruiting.

If you notice any of these signs, it’s important to take action to provide your indoor plants with more light. This could involve moving them to a brighter location, supplementing their natural light with artificial lighting, or adjusting the duration and intensity of their light source to meet their specific needs.

With the right amount and type of light, your indoor plants can thrive and add beauty to your home or office.

Can Indoor Plants Survive Without Natural Light?

While most indoor plants require some amount of natural light to survive, there are some species that can thrive in low-light conditions. These plants have adapted to low-light environments in their native habitats and can survive with minimal exposure to sunlight.

do indoor plants need to be by a window
Do indoor plants need to be by a window?

Some examples of indoor plants that can survive without natural light include:

  • Snake Plant (Sansevieria) is an extremely low-maintenance houseplant and can survive in almost any light condition, including low-light environments.
  • ZZ Plant (Zamioculcas zamiifolia) is known for its ability to survive in low-light conditions and is also drought-tolerant, making it an excellent choice for those who are new to indoor gardening.
  • Peace Lily (Spathiphyllum) can survive in low-light conditions, although it may not produce as many blooms as it would with more light exposure.
  • Chinese Evergreen (Aglaonema) can also tolerate low-light conditions, but it may grow more slowly and produce smaller leaves.
  • Pothos (Epipremnum aureum) is a popular houseplant that can survive in low light but may lose some of its variegation and color without adequate light.

It’s important to note that even low-light plants still require some amount of light to survive and grow. If you’re growing plants in low-light conditions, it’s essential to ensure they still receive some light exposure, such as through artificial grow lights or by placing them near a bright window.

Additionally, low-light plants may grow more slowly and require less frequent watering than those in brighter conditions.

Overall, placing your houseplants near a window can provide them with access to natural sunlight and improve the air quality in your home. However, it’s important to consider the potential risks such as temperature fluctuations, sunburn, pests, and drafts. By carefully monitoring your plants and adjusting their placement as needed, you can help ensure their health and growth.

5 Tips to Care Houseplants away from a Window

Caring for indoor plants that are not placed near a window requires a bit of extra attention to ensure they receive the light, water, and nutrients they need to thrive.

do indoor plants need to be by a window
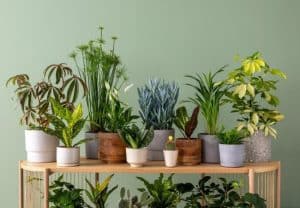
Pretty indoor plants

Here are some tips for caring for indoor plants that are not placed near a window:

  1. As mentioned earlier, providing artificial lighting is crucial for indoor plants that do not receive enough natural light.
  2. Indoor plants that are not near a window may not require as much water as those in brighter areas. Check the soil moisture level regularly and water only when the soil is dry to the touch.
  3. Ensure your indoor plants are potted in well-draining soil that allows excess water to drain away easily. This will prevent water from accumulating in the soil and causing root rot.
  4. Many indoor plants thrive in humid environments. If your indoor space is dry, consider using a humidifier to increase the humidity levels and help your plants thrive.
  5. Even if your indoor plants are receiving artificial lighting, it’s still a good idea to rotate them occasionally to ensure they receive light evenly. This will prevent one side of the plant from growing more than the other side.

By following these tips, you can help ensure your indoor plants thrive even if they are not placed near a window.

Conclusion – Do Indoor Plants Need to be by a Window?

In fact, plants placed near a window get all they want for happy and healthy growth. Remember, all houseplants are not the same and their light requirements vary so choosing the right window (south, east, west, or north-facing) is important. A comprehensive table listing all the types of windows with light intensity at different intervals of the day can help you in this matter. Suitable plant varieties are also discussed as per each window orientation.

Lastly, don’t think you cannot have indoor plants if you live in a windowless place. Artificial lighting and other sources are there to help. Just use them the right way as discussed and take good care of plants not growing near windows.

Your indoor garden will be happily thriving.

Are Indoor Plants Harmful at Night? Truth behind the Myth

By Sarwat Rehman

Are you someone who loves to have indoor plants in your bedroom but is concerned about their impact on your health at night? You’re not alone. The question of whether or not indoor plants are harmful at night has been a topic of debate for some time so to break your suspense, indoor plants are not harmful at night.

In fact, they can be quite beneficial. How? We will discuss this and much more to burst the myth “Are indoor plants harmful at night?”. You will also learn the science behind the whole process, tips to choose right indoor plants for ultimate safety and top 9 indoor plants with no harm at all.

So, let’s dive in and explore the world of indoor plants at night!

The Science behind Indoor Plants at Night!

To understand “are indoor plants harmful at night?”, we first need to understand how plants work.

  • During the day, plants use sunlight to convert carbon dioxide into oxygen through a process called photosynthesis.
  • At night, the process of photosynthesis stops, and plants instead release carbon dioxide through a process called respiration.

Now safety concern arises with carbon dioxide production from indoor plants. While it’s true that indoor plants release a small amount of carbon dioxide at night, but it’s important to keep in mind that the levels of carbon dioxide they produce is not harmful to humans.

In fact, the amount of carbon dioxide produced by indoor plants is much less than what you exhale while sleeping!

In a nut shell, comparatively low level of oxygen and high carbon dioxide produced by plants at night makes plant lovers conscious. They assume houseplants are harmful at night but – it’s a naturally safe sequence of events.

Also plants are nothing to blame; your houseplant’s selection may play a vital role!Follow given tips for careful and fruitful selection of indoor plants:

How to Choose Indoor Plants for Best Experience?

To choose indoor plants in the bedroom for maximum oxygen production, here are some tips to consider:

1.      Choose plants with high photosynthetic rates

The process of photosynthesis is how plants produce oxygen. Therefore, choosing plants with high photosynthetic rates can help increase the oxygen production in your bedroom.

Examples of plants with high photosynthetic rates include pothos, spider plant, peace lily, and snake plant.

2.      Consider the size of the plant

The size of the plant can also affect the amount of oxygen it produces. Larger plants generally produce more oxygen than smaller plants. However, it’s important to choose a plant size that fits well in your bedroom.

Are Indoor Plants Harmful at Night

3.      Choose plants with a high leaf surface area

Plants with a larger leaf surface area tend to produce more oxygen. These plants produce more oxygen eliminating risk of any harm and negate your concern “Are Indoor Plants Harmful at Night?”

Examples of plants with a high leaf surface area include ficus, rubber plant, and areca palm.

4.      Look for plants that are easy to care for

It’s important to choose plants that are easy to care for and thrive in the indoor environment. This will ensure that the plants are healthy and able to produce oxygen consistently.

Examples of easy-to-care-for plants include snake plant, spider plant, and peace lily.

5.      Consider indoors air circulation

Adequate air circulation is important for the health of plants and for maximum oxygen production. Ensure that there is enough space for air to circulate around the plants, and consider using a fan or opening windows to promote air circulation in your bedroom.

By considering these tips, you can choose indoor plants that maximize oxygen production and contribute to a healthier indoor environment.

Top 9 Indoor Plants – Guaranteed Safety at Night

After considering above mentioned tips for selecting houseplants, get benefit of these indoor plants to grow at your place. These are absolutely safe with no harm at night.

Are Indoor Plants Harmful at Night
Best Indoor Plants

1.      Snake Plant (Sansevieria)

The Snake Plant (Sansevieria) is a great choice for those who are new to indoor gardening or are forgetful when it comes to watering. This low-maintenance plant is known for its tall, sturdy leaves that can survive in low-light conditions. Snake plants are also excellent air-purifiers and can help remove harmful toxins from the air.

2.      Rubber Plant (Ficuselastica)

Rubber plant (Ficuselastica) is a popular indoor plant with large, glossy leaves that can be variegated with shades of green, pink, or red. This plant prefers bright, indirect light and infrequent watering. Rubber plant is one of the best air purifying plants for its broad leaves and massive plant size. It can help remove harmful pollutants from the air making it breathable and free of toxins.

3.      Peace Lily (Spathiphyllum)

The Peace lily (Spathiphyllum) is aplant with large, glossy leaves and delicate white flowers. This plant thrives in bright, indirect light and prefers consistently moist soil. Peace lilies are also known for their ability to purify the air, making them a great choice for those who suffer from allergies or asthma. Thus peace lilies allow you live at allergy-free place.

4.      Aloe Vera (Aloe barbadensis miller)

Aloe vera (Aloe barbadensis miller) is a succulent plant with thick, spiky leaves that store water. This plant prefers bright, indirect light and infrequent watering. Aloe vera is also known for its medicinal properties and can be used to soothe burns and cuts.

5.      Golden Pothos (Epipremnumaureum)

Golden pothos (Epipremnumaureum) is a trailing vine with heart-shaped leaves that are variegated with shades of green and gold. This plant can grow in low to bright light conditions and can tolerate a range of watering conditions. Golden pothos is also known for its air-purifying abilities and can help remove toxins like formaldehyde and benzene from the air.

Are Indoor Plants Harmful at Night

6.      Spider Plant (Chlorophy tumcomosum)

Spider plant (Chlorophytumcomosum) is a classic indoor plant with long, thin leaves that grow from the center and can produce small, white flowers. Spider plants thrive in bright, indirect light and prefer consistently moist soil. They are also known for their ability to remove harmful pollutants like carbon monoxide and xylene from the air thus proving ideal houseplants with no harm at all.

7.      Chinese Evergreen (Aglaonema)

Chinese evergreen (Aglaonema) is a beautiful plant with lush, green leaves that can be variegated with shades of silver, pink, or red. This plant prefers low to medium light and can tolerate a range of watering conditions. Chinese evergreen is one of the best air purifying plants and can help remove toxins like benzene and formaldehyde from the air making space clean.

8.      Areca Palm (Dypsislutescens)

Areca palm (Dypsislutescens) is a tropical plant with feathery fronds that can add a touch of paradise to any indoor space. This plant prefers bright, indirect light and consistently moist soil. Areca palms are also known for their ability to humidify the air, making them a great choice for those who live in dry climates.

9.      Boston Fern (Nephrolepisexaltata)

Boston fern (Nephrolepisexaltata) is a lush plant with delicate fronds that can add a touch of elegance to any indoor space. This plant prefers bright, indirect light and consistently moist soil. Boston ferns are also known for their air-purifying abilities and can help remove toxins like formaldehyde and xylene from the air. You can also add this fern with other houseplants for additional benefit.

Benefits of Indoor Plants at Night

Indoor plants can offer several benefits when placed in bedrooms at night. Here you can discover all:

Are Indoor Plants Harmful at Night
  • Indoor plants can help improve the air quality in your bedroom by absorbing harmful toxins and pollutants and releasing oxygen through the process of photosynthesis. This can lead to better air quality, which can in turn help you breathe easier and get a more restful night’s sleep.
  • Research has shown that indoor plants can have a calming effect and help reduce stress and anxiety. Placing plants in your bedroom at night can create a more peaceful and relaxing environment, which can help you unwind and fall asleep more easily.
  • The natural beauty and greenery of indoor plants can help create a soothing and calming atmosphere in your bedroom, promoting relaxation and restful sleep.
  • Indoor plants can also help improve the quality of your sleep. Plants can help regulate humidity levels in your bedroom, which can prevent dry air and improve your sleep quality.
  • Some plants, such as lavender and jasmine, have natural calming properties and can help you relax and fall asleep more easily. Research has shown that the fragrance of these plants can also help reduce anxiety and improve sleep.
  • Furthermore, indoor plants can help reduce noise pollution, creating a quieter environment that can promote better sleep.

Cons of Houseplants – Are Indoor Plants Harmful at Night?

While indoor plants have many benefits, there are some potential drawbacks to consider, particularly when it comes to keeping them in the bedroom at night. Here are some potential drawbacks to keep in mind:

  • Some people may be allergic to certain types of indoor plants or to the pollen they produce. This can lead to symptoms such as sneezing, runny nose, and itchy eyes, which can make it difficult to sleep.
  • Overwatering indoor plants can lead to mold growth and other problems that can affect air quality and contribute to respiratory issues.
  • Indoor plants require regular care and maintenance, such as watering, pruning, and fertilizing. This can be time-consuming and may not be feasible for everyone.
  • Indoor plants can attract pests, such as mites and flies, which can be a nuisance and may also affect air quality.
  • Some indoor plants can be toxic to pets and humans if ingested, so it’s important to choose plants carefully and keep them out of reach of children and pets.

Overall, the benefits of indoor plants at night may outweigh the potential drawbacks for many people. However, it’s important to consider these factors when choosing and caring for indoor plants in the bedroom.

Conclusion – Are Indoor Plants Harmful at Night?

In conclusion, there is no need to fear indoor plants in the bedroom at night. While there have been concerns about potential harm from the release of chemicals, scientific studies have not found any conclusive evidence to support this idea.

In fact, certain indoor plants can even help to purify the air, remove toxins, and promote better sleep.

By choosing the right plants, providing proper care, and paying attention to placement, you can create a healthy and inviting indoor garden in your bedroom that can enhance your overall well-being.

So go ahead, add some greenery to your sleeping space, and enjoy the benefits of nature indoors. Also, don’t forget to spread awareness that indoor plants are not harmful at night.

How to Grow Butternut Squash in Small Space [3 Methods]

By Sarwat Rehman

Butternut squash is normally grown on spacious ground for its bulky size and shape but growing it in small space is also possible. You can have it in the containers, pots, raised beds or grow vertically on trellis .

Typically, butternut squash grows as long as 12 inches (30 cm) with a 3 to 6 inches (7 to 13 cm)diameter and every gardener does not have enough growing space. In such a case, finding space saving methods to grow butternut squash is the only option left.

Luckily, we have 3 easiest and practical ways of growing butternut squash in small spaces (balcony or small kitchen garden)keeping cultivation area clean.

So, let’s directly come to “How to grow butternut squash in small space” with mentioned methods.

  1. Use containers or pots
  2. Get benefit of raised garden beds
  3. Grow squashes vertically on trellis

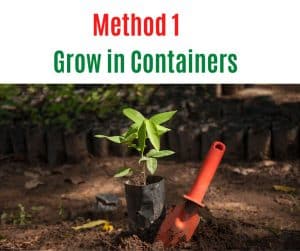
 Method 1 – Growing Butternut Squash in Containers

How to Grow Butternut Squash in Small Space

Butternut squash grow well in containers depending on the butternut squash variety you have chosen and the right container size.

Here is step-by-step method for you:

1.      Decide on butternut squash variety

Butternut squash is a common winter squash and you can find its multiple hybrids with varying traits. All are not equally suitable to grow in containers for their size and weight. Normally, you will find butternut squash in two varieties – bush and vining. Bush varieties are compact and grow more fruit in small space than vining varieties that require more space. Thus, bush cultivars are best for squash container gardening in a small apartment or limited balcony space.

Here is a glimpse of different butternut squash varieties with their sizes.

After carefully selecting your favorite type of butternut squash, get into the details of how you can grow butternut squash in container or pot.

2.      Pot selection

Selecting a pot to grow butternut squash is crucial and needs considerations for pot size, material and drainage as:

Size – Butternut squash have a large root system that needs ample room to grow thus select a deep and wide container. A 5-gallon bucket that is24 inches wide and 12 inches deep proves best for growing butternut squash. It will encourage production of large sized fruits with no problems at all. You can also get benefit of empty buckets for DIY project.

Pot material and drainage – Plastic and terra cotta pots go really well for cultivating butternut squash for their porous nature. Natural grow bags also prove fine containers for this winter squash.

Remember, considering pot drainage is more important than material as poorly draining pot will kill the roots. So, make sure your selected container has 2 to 4 drainage holes at the bottom. Drill yourself if there is not any to release excess water.

Don’t forget to test grow bags before massive plantation and check how well they drain. You can also add holes at the bottom if water doesn’t leak through the bag quickly.

3.      Potting mix preparation

Butternut squash is a heavy feeder and grows well in well-draining soil. Traditional garden soil is too dense to suffocate plant roots and trap moisture in the container leading to fungal issues.

Similarly, it is normal for the garden soil to have insects and pests. Thus best approach is to start with potting mix then add equal parts compost, peat moss, perlite and sphagnum for a well-draining and nutritionally packed base.

4.      Grow squash –Seeds vs transplant

After preparing pot with the potting mix, next is the growing step. Sowing seeds and transplanting seedlings are the two options available.

Typically, squashes do not prefer to be transplanted and grow well in containers with the seeds. You can start seeds in mid spring after the soil warms up (two weeks after the threat of last frost) or start indoors 3 to 4 weeks before last frost.

Sow the seeds (2 to 3 seeds) about 1 inch deep in the slightly damp soil and be sure to follow package directions for more specific guidelines. Aim for one plant per five-gallon container so you may need to thin seedling later.

Soaking seeds in water (for 2 to 3 hours) prior to sowing helps in water absorbance and accelerates germination that is a plus point for faster growth.

If you have opted for transplanting, always use a healthy plant from nursery or garden center.

5.      Locate the container at right place

Finding the right place for butternut squash container is a task for gardeners with small space as they are already loaded with the plants. But fortunately, container gardening of this squash variety does not require you isolated space.

You can place in shade and sunny site at different times as too much exposure to direct sunlight can harm growth. Do not place newly gown plant to sunlight for more than a few hours per day. Relocate the plant to a sunny site once it has become established.

At the same time, maintain the soil temperature to 65 to 70oF for optimum growth.

Water reasonably after plantation (1 to 2 times a day) and manage it depending on the weather conditions. The last step in growing butternut squash in containers is fertilization and you can use liquid or granular NPK (nitrogen, phosphorus, potassium) fertilizer in the growing season.

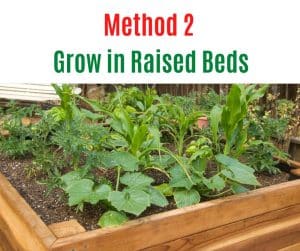
Method 2 – Growing Butternut Squash in Raised Garden Beds

How to Grow Butternut Squash in Small Space

Butternut squash (Cucurbita moschata)grows exceptionally well in raised beds where space is a problem.

Raised beds are accessible and elevated planters giving more control over the soil making squash plantation easy for gardeners of all age groups. They are square boxes with or without stand for increased accessibility. You can start growing butternut squash in a square garden bed if there is no plantation space at your place.

Before directly diving in to the plantation, make sure to learn suitable garden bed for butternut squash and its right cultivar.

Step 1 – Choosing raised garden bed

Select raised garden beds based on the material and size. Here is how you can do it:

Material – Finding ready to use raised garden bed for squash plantation is not an issue but it may cost you a bit higher. On the contrary, making DIY garden bed is the cost effective approach and you can make one in less than a few hours.

Commonly used materials to build a garden bed include:

  • Lumber
  • Recycled wood
  • Rocks
  • Cinder or concrete blocks
  • Old logs
  • Boards

Size – Using an oversized raised garden bed is not a wise solution to grow butternut squashes in limited space. You must focus on the width and length to choose one that makes plantation hassle-free task.

Typically, 4 feet wide and 4 feet long (square raised garden bed) works well for squash plantation at beginner’s level in a limited space.

You can also make it longer depending on the space available.

Lastly, make raised beds deep enough to support growing root system of the winter squash. 10 to 12 inches high raised beds are ideally used to grow butternut squash.

Step 2 – Setting up raised garden bed

After carefully preparing (or installing) raised bed, next is its set up. You need to fill the soil but be sure to use organically rich acidic soil. Avoid ordinary garden soil as it is quite heavy and suffocates roots by retaining a lot of water.

The best bet is to fill the bed with loose potting mix or a combination of equal parts compost, peat moss, or coconut coir. This prepared soil will be well draining and nutrient rich for your butternut squash to thrive in limited space.

Adding a layer of hardware cloth over the ground before placing raised bed keeps insects and moles out of the box.

Step 3 – Growing butternut squash in a raised bed

  1. Choose high-quality seeds: Select seeds from a reputable source, ideally those that are certified organic. Look for seeds that are fresh and have not been treated with any chemicals.
  2. Start the seeds indoors: Butternut squash seeds can be started indoors 3 to 4 weeks before the last expected frost date in your area. Fill seed-starting trays or containers with a good quality seed-starting mix, and sow the seeds about 1 inch deep. Keep the soil moist but not waterlogged, and place the trays in a warm, bright location.
  3. Harden off the seedlings: About a week before transplanting the seedlings into the raised bed, begin to harden them off by gradually exposing them to outdoor conditions. Start by placing them outside for a few hours each day in a sheltered location, gradually increasing the amount of time they spend outside over the course of a week.
  4. Transplant the seedlings: When the seedlings have developed 2 or 3 sets of true leaves and the soil in the raised bed has warmed up to at least 60°F, it’s time to transplant them. Dig a hole that’s slightly larger than the root ball of the seedling, and carefully place the seedling in the hole. Fill in the soil around the plant, and firm it gently.
  5. Provide adequate water and fertilizer: Water the seedlings deeply and regularly, but avoid getting water on the leaves. Apply a balanced fertilizer (such as 10-10-10) every 4 to 6 weeks throughout the growing season.
  6. Monitor for pests and diseases: Keep an eye out for common pests and diseases that can affect butternut squash, such as squash bugs, squash vine borers, and powdery mildew. If you notice any signs of infestation or disease, take action promptly to prevent the problem from spreading.

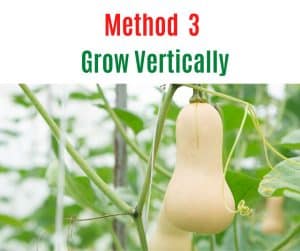
Method 3 – Growing Butternut Squash Vertically

How to Grow Butternut Squash in Small Space

Growing butternut squash vertically offers several advantages over traditional methods of growing them horizontally. You can save valuable space in your garden. This is especially useful if you have a small garden or limited growing space.

Additionally, you get multiple benefits of growing butternut squash vertically. These include:

  • Reduces disease: Growing butternut squash vertically can help reduce the risk of diseases that often affect squash plants, such as powdery mildew and downy mildew. When grown horizontally, the leaves of the plant can trap moisture, which can encourage the growth of these diseases. Vertical growing allows for better air circulation and can help keep the leaves dry.
  • Easier harvest: When you grow butternut squash vertically, the fruit is easier to see and access, making it easier to harvest. This is especially useful if you have mobility issues or find it difficult to bend down to harvest squash that is growing on the ground.

Step 1 – Choosing right butternut variety

When it comes to vertical growing, not all varieties of butternut squash are created equal. Look for compact or dwarf varieties that won’t take up too much space.

Some good options include “Honeynut,” “Butterscotch,” and “Early Butternut.” Be sure to read the seed packet or plant label carefully to make sure you choose a variety that is suitable for vertical growing.

Step 2 – Choosing a Location for Vertical Growing

Next, you’ll need to choose the right location for your plants. Here are a few things to consider:

  • Sun: Butternut squash plants need at least 6-8 hours of direct sunlight per day, so choose a spot that gets plenty of sun.
  • Soil: The soil should be well-draining and rich in organic matter. If your soil is poor, consider adding compost or other organic matter to improve it.
  • Support: Your support structure should be sturdy and able to withstand the weight of the squash plants and fruit. It should also be located in an area that is protected from strong winds.

Step 3 – Choosing a trellis for butternut squash

When growing squash on a trellis, it is important to choose the right type of trellis to provide adequate support for the heavy vines and fruit.

Additionally, make sure the trellis has enough space for the vines to grow and be trained vertically, and that it is positioned in a spot that receives adequate sunlight and air circulation.

Here are some options for trellises that work well for squash:

  1. A-Frame Trellis: An A-frame trellis is a simple and sturdy option for growing squash vertically. It consists of two angled posts with a horizontal crossbar at the top, forming an “A” shape. The squash vines can be trained to grow up the angled posts and over the crossbar.
  2. Cattle PanelTrellis: A cattle panel trellis is a heavy-duty option that can support the weight of large squash vines and fruit. It consists of a large wire panel that is anchored to the ground or a support structure. The squash vines can be trained to climb up the panel and over the top.
  3. T-Post Trellis: A T-post trellis is another sturdy option for growing squash vertically. It consists of one or more metal T-posts anchored in the ground, with horizontal wires or strings attached between them. The squash vines can be trained to climb up the wires or strings.
  4. Teepee Trellis: A teepee trellis is a simple and attractive option for growing squash vertically. It consists of several tall poles or bamboo stakes arranged in a circle and tied together at the top to form a teepee shape. The squash vines can be trained to climb up the poles and over the top.

Step 4 – Training butter squash on trellis

Training a butternut squash vine on a trellis is a great way to save space and keep your garden organized.

Once the butternut squash vines have grown to about 6-8 inches long, gently guide them towards the trellis. Use plant ties or twine to loosely attach the vines to the trellis. Make sure not to tie them too tightly, as this can damage the vine.

As the butternut squash vine grows, continue to guide it towards the trellis and wrap it around the mesh or grid. Encourage the vine to grow vertically instead of horizontally. Use plant ties or twine to loosely attach the vine to the trellis as needed.

To encourage healthy growth and fruit production, prune the butternut squash vine as needed. Remove any damaged or diseased leaves or stems, as well as any suckers that are growing from the base of the plant.

Conclusion – How to Grow Butternut Squash in Small Space?

In conclusion, growing butternut squash in a small space is not only possible but also easy and rewarding. By using trellises, containers, and compact varieties, you can enjoy the taste of fresh, homegrown squash even if you have limited garden space.

Whether you’re a city dweller or just looking to make the most of your backyard, these three methods will allow you to grow butternut squash with ease. So why not give it a try and enjoy the satisfaction of growing your own food?

Do share your experience in comment section about How to grow butternut squash in small space.

  • 1
  • 2
  • 3
  • …
  • 10
  • Next Page »

Most Recent

  • How to Store Butternut Squash [to Save Harvest]
  • How Do Indoor Plants Purify Air – Surprising Truth!
  • Do Indoor Plants Need to be by a Window? [Secret Answer]
  • Are Indoor Plants Harmful at Night? Truth behind the Myth
  • How to Grow Butternut Squash in Small Space [3 Methods]
  • About Us
  • Privacy Policy
  • Terms and Conditions

Copyright © 2025 | Privacy Policy | Terms & Conditions|