Butternut squash is normally grown on spacious ground for its bulky size and shape but growing it in small space is also possible. You can have it in the containers, pots, raised beds or grow vertically on trellis .
Typically, butternut squash grows as long as 12 inches (30 cm) with a 3 to 6 inches (7 to 13 cm)diameter and every gardener does not have enough growing space. In such a case, finding space saving methods to grow butternut squash is the only option left.
Luckily, we have 3 easiest and practical ways of growing butternut squash in small spaces (balcony or small kitchen garden)keeping cultivation area clean.
So, let’s directly come to “How to grow butternut squash in small space” with mentioned methods.
- Use containers or pots
- Get benefit of raised garden beds
- Grow squashes vertically on trellis
Key Learning Points
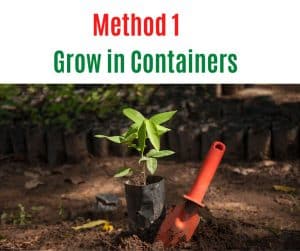
Method 1 – Growing Butternut Squash in Containers

Butternut squash grow well in containers depending on the butternut squash variety you have chosen and the right container size.
Here is step-by-step method for you:
1. Decide on butternut squash variety
Butternut squash is a common winter squash and you can find its multiple hybrids with varying traits. All are not equally suitable to grow in containers for their size and weight. Normally, you will find butternut squash in two varieties – bush and vining. Bush varieties are compact and grow more fruit in small space than vining varieties that require more space. Thus, bush cultivars are best for squash container gardening in a small apartment or limited balcony space.
Here is a glimpse of different butternut squash varieties with their sizes.
After carefully selecting your favorite type of butternut squash, get into the details of how you can grow butternut squash in container or pot.
2. Pot selection
Selecting a pot to grow butternut squash is crucial and needs considerations for pot size, material and drainage as:
Size – Butternut squash have a large root system that needs ample room to grow thus select a deep and wide container. A 5-gallon bucket that is24 inches wide and 12 inches deep proves best for growing butternut squash. It will encourage production of large sized fruits with no problems at all. You can also get benefit of empty buckets for DIY project.
Pot material and drainage – Plastic and terra cotta pots go really well for cultivating butternut squash for their porous nature. Natural grow bags also prove fine containers for this winter squash.
Remember, considering pot drainage is more important than material as poorly draining pot will kill the roots. So, make sure your selected container has 2 to 4 drainage holes at the bottom. Drill yourself if there is not any to release excess water.
Don’t forget to test grow bags before massive plantation and check how well they drain. You can also add holes at the bottom if water doesn’t leak through the bag quickly.
3. Potting mix preparation
Butternut squash is a heavy feeder and grows well in well-draining soil. Traditional garden soil is too dense to suffocate plant roots and trap moisture in the container leading to fungal issues.
Similarly, it is normal for the garden soil to have insects and pests. Thus best approach is to start with potting mix then add equal parts compost, peat moss, perlite and sphagnum for a well-draining and nutritionally packed base.
4. Grow squash –Seeds vs transplant
After preparing pot with the potting mix, next is the growing step. Sowing seeds and transplanting seedlings are the two options available.
Typically, squashes do not prefer to be transplanted and grow well in containers with the seeds. You can start seeds in mid spring after the soil warms up (two weeks after the threat of last frost) or start indoors 3 to 4 weeks before last frost.
Sow the seeds (2 to 3 seeds) about 1 inch deep in the slightly damp soil and be sure to follow package directions for more specific guidelines. Aim for one plant per five-gallon container so you may need to thin seedling later.
Soaking seeds in water (for 2 to 3 hours) prior to sowing helps in water absorbance and accelerates germination that is a plus point for faster growth.
If you have opted for transplanting, always use a healthy plant from nursery or garden center.
5. Locate the container at right place
Finding the right place for butternut squash container is a task for gardeners with small space as they are already loaded with the plants. But fortunately, container gardening of this squash variety does not require you isolated space.
You can place in shade and sunny site at different times as too much exposure to direct sunlight can harm growth. Do not place newly gown plant to sunlight for more than a few hours per day. Relocate the plant to a sunny site once it has become established.
At the same time, maintain the soil temperature to 65 to 70oF for optimum growth.
Water reasonably after plantation (1 to 2 times a day) and manage it depending on the weather conditions. The last step in growing butternut squash in containers is fertilization and you can use liquid or granular NPK (nitrogen, phosphorus, potassium) fertilizer in the growing season.
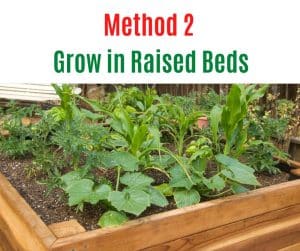
Method 2 – Growing Butternut Squash in Raised Garden Beds

Butternut squash (Cucurbita moschata)grows exceptionally well in raised beds where space is a problem.
Raised beds are accessible and elevated planters giving more control over the soil making squash plantation easy for gardeners of all age groups. They are square boxes with or without stand for increased accessibility. You can start growing butternut squash in a square garden bed if there is no plantation space at your place.
Before directly diving in to the plantation, make sure to learn suitable garden bed for butternut squash and its right cultivar.
Step 1 – Choosing raised garden bed
Select raised garden beds based on the material and size. Here is how you can do it:
Material – Finding ready to use raised garden bed for squash plantation is not an issue but it may cost you a bit higher. On the contrary, making DIY garden bed is the cost effective approach and you can make one in less than a few hours.
Commonly used materials to build a garden bed include:
- Lumber
- Recycled wood
- Rocks
- Cinder or concrete blocks
- Old logs
- Boards
Size – Using an oversized raised garden bed is not a wise solution to grow butternut squashes in limited space. You must focus on the width and length to choose one that makes plantation hassle-free task.
Typically, 4 feet wide and 4 feet long (square raised garden bed) works well for squash plantation at beginner’s level in a limited space.
You can also make it longer depending on the space available.
Lastly, make raised beds deep enough to support growing root system of the winter squash. 10 to 12 inches high raised beds are ideally used to grow butternut squash.
Step 2 – Setting up raised garden bed
After carefully preparing (or installing) raised bed, next is its set up. You need to fill the soil but be sure to use organically rich acidic soil. Avoid ordinary garden soil as it is quite heavy and suffocates roots by retaining a lot of water.
The best bet is to fill the bed with loose potting mix or a combination of equal parts compost, peat moss, or coconut coir. This prepared soil will be well draining and nutrient rich for your butternut squash to thrive in limited space.
Adding a layer of hardware cloth over the ground before placing raised bed keeps insects and moles out of the box.
Step 3 – Growing butternut squash in a raised bed
- Choose high-quality seeds: Select seeds from a reputable source, ideally those that are certified organic. Look for seeds that are fresh and have not been treated with any chemicals.
- Start the seeds indoors: Butternut squash seeds can be started indoors 3 to 4 weeks before the last expected frost date in your area. Fill seed-starting trays or containers with a good quality seed-starting mix, and sow the seeds about 1 inch deep. Keep the soil moist but not waterlogged, and place the trays in a warm, bright location.
- Harden off the seedlings: About a week before transplanting the seedlings into the raised bed, begin to harden them off by gradually exposing them to outdoor conditions. Start by placing them outside for a few hours each day in a sheltered location, gradually increasing the amount of time they spend outside over the course of a week.
- Transplant the seedlings: When the seedlings have developed 2 or 3 sets of true leaves and the soil in the raised bed has warmed up to at least 60°F, it’s time to transplant them. Dig a hole that’s slightly larger than the root ball of the seedling, and carefully place the seedling in the hole. Fill in the soil around the plant, and firm it gently.
- Provide adequate water and fertilizer: Water the seedlings deeply and regularly, but avoid getting water on the leaves. Apply a balanced fertilizer (such as 10-10-10) every 4 to 6 weeks throughout the growing season.
- Monitor for pests and diseases: Keep an eye out for common pests and diseases that can affect butternut squash, such as squash bugs, squash vine borers, and powdery mildew. If you notice any signs of infestation or disease, take action promptly to prevent the problem from spreading.
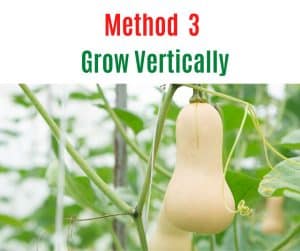
Method 3 – Growing Butternut Squash Vertically

Growing butternut squash vertically offers several advantages over traditional methods of growing them horizontally. You can save valuable space in your garden. This is especially useful if you have a small garden or limited growing space.
Additionally, you get multiple benefits of growing butternut squash vertically. These include:
- Reduces disease: Growing butternut squash vertically can help reduce the risk of diseases that often affect squash plants, such as powdery mildew and downy mildew. When grown horizontally, the leaves of the plant can trap moisture, which can encourage the growth of these diseases. Vertical growing allows for better air circulation and can help keep the leaves dry.
- Easier harvest: When you grow butternut squash vertically, the fruit is easier to see and access, making it easier to harvest. This is especially useful if you have mobility issues or find it difficult to bend down to harvest squash that is growing on the ground.
Step 1 – Choosing right butternut variety
When it comes to vertical growing, not all varieties of butternut squash are created equal. Look for compact or dwarf varieties that won’t take up too much space.
Some good options include “Honeynut,” “Butterscotch,” and “Early Butternut.” Be sure to read the seed packet or plant label carefully to make sure you choose a variety that is suitable for vertical growing.
Step 2 – Choosing a Location for Vertical Growing
Next, you’ll need to choose the right location for your plants. Here are a few things to consider:
- Sun: Butternut squash plants need at least 6-8 hours of direct sunlight per day, so choose a spot that gets plenty of sun.
- Soil: The soil should be well-draining and rich in organic matter. If your soil is poor, consider adding compost or other organic matter to improve it.
- Support: Your support structure should be sturdy and able to withstand the weight of the squash plants and fruit. It should also be located in an area that is protected from strong winds.
Step 3 – Choosing a trellis for butternut squash
When growing squash on a trellis, it is important to choose the right type of trellis to provide adequate support for the heavy vines and fruit.
Additionally, make sure the trellis has enough space for the vines to grow and be trained vertically, and that it is positioned in a spot that receives adequate sunlight and air circulation.
Here are some options for trellises that work well for squash:
- A-Frame Trellis: An A-frame trellis is a simple and sturdy option for growing squash vertically. It consists of two angled posts with a horizontal crossbar at the top, forming an “A” shape. The squash vines can be trained to grow up the angled posts and over the crossbar.
- Cattle PanelTrellis: A cattle panel trellis is a heavy-duty option that can support the weight of large squash vines and fruit. It consists of a large wire panel that is anchored to the ground or a support structure. The squash vines can be trained to climb up the panel and over the top.
- T-Post Trellis: A T-post trellis is another sturdy option for growing squash vertically. It consists of one or more metal T-posts anchored in the ground, with horizontal wires or strings attached between them. The squash vines can be trained to climb up the wires or strings.
- Teepee Trellis: A teepee trellis is a simple and attractive option for growing squash vertically. It consists of several tall poles or bamboo stakes arranged in a circle and tied together at the top to form a teepee shape. The squash vines can be trained to climb up the poles and over the top.
Step 4 – Training butter squash on trellis
Training a butternut squash vine on a trellis is a great way to save space and keep your garden organized.
Once the butternut squash vines have grown to about 6-8 inches long, gently guide them towards the trellis. Use plant ties or twine to loosely attach the vines to the trellis. Make sure not to tie them too tightly, as this can damage the vine.
As the butternut squash vine grows, continue to guide it towards the trellis and wrap it around the mesh or grid. Encourage the vine to grow vertically instead of horizontally. Use plant ties or twine to loosely attach the vine to the trellis as needed.
To encourage healthy growth and fruit production, prune the butternut squash vine as needed. Remove any damaged or diseased leaves or stems, as well as any suckers that are growing from the base of the plant.
Conclusion – How to Grow Butternut Squash in Small Space?
In conclusion, growing butternut squash in a small space is not only possible but also easy and rewarding. By using trellises, containers, and compact varieties, you can enjoy the taste of fresh, homegrown squash even if you have limited garden space.
Whether you’re a city dweller or just looking to make the most of your backyard, these three methods will allow you to grow butternut squash with ease. So why not give it a try and enjoy the satisfaction of growing your own food?
Do share your experience in comment section about How to grow butternut squash in small space.
Leave a Reply