Did you know that indoor air can be up to 5 times more polluted than outdoor air?
With common household items like cleaning products and furniture releasing harmful chemicals into the air, it’s important to find natural and effective ways to purify the air we breathe. And that’s where indoor plants come in.
Not only do indoor plants add a touch of green to your space, but they can also help remove harmful pollutants and toxins through a process called Phytoremediation.
In this article, we’ll explore the science behind this process to know how do indoor plants purify air and highlight some of the best plants for air purification (including NASA-approved houseplants). You will also get to know about 6 factors to consider when choosing air purifying plants and lastly, the major pros and cons of these air plants are there as a bonus.
So, if you want to breathe cleaner, fresher air and improve your overall health, keep reading!
Why Does Indoor Air Need Purification?
Indoor air is not always as fresh and clean as we would like it to be. In fact, it can often be filled with all sorts of pesky pollutants that can cause a wide range of health issues, from coughing and sneezing to more serious respiratory problems.
Here you can find some common indoor air pollutants:
- Dust and dust mites
- Pollen
- Mold spores
- Pet dander and hair
- Tobacco smoke
- Carbon monoxide
- Nitrogen dioxide
- Formaldehyde
- Volatile organic compounds (VOCs) from cleaning products, paint, and building materials
- Radon gas
- Asbestos fibers (in older homes or buildings)
- Lead particles (in older homes or buildings)
- Bacteria and viruses
Indoor air purification can help remove these pollutants and improve the overall air quality in your home or building.
How Do Indoor Plants Purify Air?
Well, it turns out that plants are natural air purifiers, thanks to a process called phytoremediation.
Phytoremediation is the process by which plants can remove or mitigate pollutants from the environment. Specifically, it involves the uptake of contaminants such as heavy metals, organic chemicals, and radioactive compounds from soil, water, or air into the plant’s tissues, where they can then be broken down or immobilized.
- When it comes to VOCs specifically, plants have been shown to be particularly effective at removing formaldehyde, benzene, and trichloroethylene – all common indoor air pollutants. These harmful chemicals can be released by-products like furniture, carpets, and cleaning agents, but indoor plants can help to reduce their levels in the air.
- But that’s not all! Plants also release oxygen as a byproduct of photosynthesis, which can help boost the air quality and make us feel more energized and alert. Plus, having plants around can have a calming effect and reduce stress levels, making us feel more relaxed and happy overall.
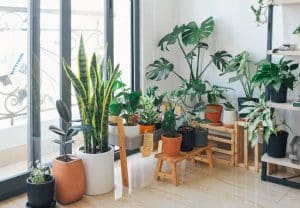
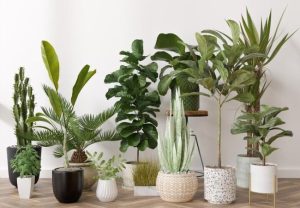
The Best Air Purifying Indoor Plants
Not all indoor plants are created equal when it comes to air purification. Some plants are more effective than others at removing certain types of pollutants from the air.
Here are some top air-purifying indoor plants:
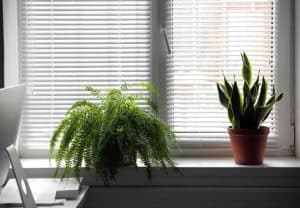
- Spider plant –effective at removing formaldehyde, xylene, and toluene from the air.
- Boston fern – good for removing formaldehyde and benzene.
- Peace lily – helps to remove formaldehyde, benzene, and trichloroethylene.
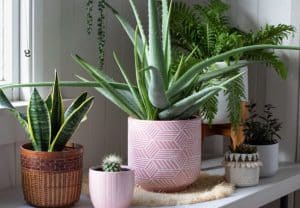
- Snake plant – removes formaldehyde and benzene from the environment.
- Aloe vera – helps clean indoor air by removing formaldehyde and benzene.
- Dracaena – effectively removes trichloroethylene and xylene.
- Golden pothos – makes the air clean by removing formaldehyde and carbon monoxide.
- Bamboo palm – effective at removing formaldehyde, benzene, and trichloroethylene from indoors.
- Rubber plant – good for removing formaldehyde from the air.
- Philodendron – removes formaldehyde from surrounding
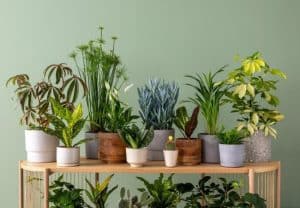
What are NASA Approved Air-purifying Indoor Plants?
In the late 1980s, NASA conducted a study to determine the most effective indoor plants for purifying the air. The study found that certain plants were particularly good at removing pollutants such as benzene, formaldehyde, and trichloroethylene from the air.
List of NASA-Approved Air Purifying Houseplants
Here is a list of some of the NASA-approved air-purifying plants:
- Aloe vera (Aloe barbadensis)
- Spider plant (Chlorophytum comosum)
- Snake plant or mother-in-law’s tongue (Sansevieria trifasciata)
- Peace lily (Spathiphyllum spp.)
- English ivy (Hedera helix)
- Boston fern (Nephrolepis exaltata)
- Bamboo palm (Chamaedorea seifrizii)
- Rubber plant (Ficus elastica)
- Golden pothos (Epipremnum aureum)
- Areca palm (Dypsis lutescens)
These plants have been found to be effective at removing various indoor air pollutants and improving the overall air quality. In addition to their air-purifying qualities, many of these plants are also relatively easy to care for and can add natural beauty to indoor spaces.
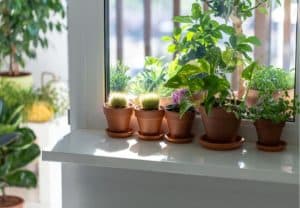
How Many Houseplants Do I Need To Purify The Air in My Home?
The number of houseplants you need to purify the air in your home depends on several factors, including
- Size of your home
- Types of pollutants present
- Types of plants you choose
According to a NASA study, you should aim for at least one plant per 100 square feet of indoor space. This means that a 1,000-square-foot home would require at least 10 plants to effectively purify the air.
However, this is just a general guideline, and the actual number of plants you need may vary depending on the factors mentioned above.
6 Factors to Consider for Choosing Air Purifying Plants
When selecting air-purifying plants for your indoor space, consider the following factors:
1. Air Purification Ability
Look for plants that are known for their air-purifying qualities. Some common examples include the Peace lily (Spathiphyllum), Snake plant (Sansevieria), Spider plant (Chlorophytum comosum), and Boston fern (Nephrolepis exaltata).
These plants have been shown to effectively remove pollutants from the air.
2. Plant Size and Maturity
Consider the size and maturity of the plant and ensure it fits well within your available space. Some air-purifying plants like rubber plants can grow quite large, while others are more compact.
Additionally, larger, more mature plants will have more leaves and therefore be more effective at removing pollutants from the air. However, smaller plants can still be effective, especially if you group them together in clusters.
3. Lighting Requirements
Assess the lighting conditions in your space and choose plants that can thrive in those light levels. It’s a fact that some plants require bright, indirect light, while others can tolerate low-light conditions.
4. Maintenance Needs
Consider your ability to provide care for the plants. Different air-purifying plants have varying watering and maintenance requirements. Thus select plants that align with your schedule and ability to provide the necessary care.
5. Toxicity
If you have pets or small children, be mindful of plant toxicity. Some air-purifying plants may be toxic if ingested therefore research the toxicity levels of plants and choose non-toxic options if safety is a concern.
6. Personal Preference
Finally, consider your personal preference and aesthetic taste. Choose air-purifying plants that you find visually appealing and that complement the style of your indoor space.
By considering these factors, you can choose air-purifying plants that not only improve your indoor air quality but also suit your space, lifestyle, and personal preferences.
Do Indoor Plants Remove Mold From The Air?
Indoor plants have been shown to help reduce the levels of mold in the air, but they may not be the most effective solution for removing mold.
Mold growth occurs when moisture accumulates in an area, so the most effective way to prevent and remove mold is by addressing the moisture issue.
However, some plants can help by absorbing excess moisture in the air, which can reduce the risk of mold growth. Plants like spider plants, Boston ferns, and peace lilies have been shown to be effective at reducing airborne mold levels.
Additionally, the soil in indoor plants can sometimes harbor mold spores, so it’s important to keep the soil properly aerated and not over-water the plants, which can contribute to mold growth.
11 Benefits of Having Air Purifying Houseplants
Indoor plants not only add a touch of natural beauty to your living space, but they also have a variety of health benefits, particularly when it comes to air quality.
Here are 9 benefits of having air-purifying houseplants:
- Plants absorb carbon dioxide during photosynthesis and release oxygen back into the air, which can help increase oxygen levels in your home and promote better breathing.
- Studies have shown that being around plants can help reduce stress and anxiety levels, leading to a more relaxed and calm environment.
- Plants have been shown to improve concentration and cognitive function, making them a great addition to home offices and workspaces.
- Some plants, like lavender and jasmine, have a calming effect and can help promote better sleep quality.
- Many plants have natural scents that can help purify the air and provide a natural and pleasant aroma to your home.
- Plants release moisture into the air through a process called transpiration, which can help increase humidity levels and alleviate dry skin and respiratory issues.
- Being around plants can have a positive impact on mental health, helping to reduce symptoms of depression and improve overall well-being.
- Indoor plants can add a natural and calming touch to your home, creating a relaxing and inviting atmosphere that can improve your mood and overall sense of happiness.
- Some plants have antibacterial properties and can help boost your immune system, helping to reduce the risk of getting sick.
- Plants can help absorb sound waves, which can reduce noise pollution in your home and create a more peaceful environment.
- Plants can help boost creativity and promote innovative thinking, making them a great addition to home offices and creative spaces.
Overall, having air-purifying houseplants can provide a range of health benefits and help create a more inviting and relaxing living space.
3 Disadvantages of Air-purifying Plants
Houseplants themselves are not harmful or have any drawbacks but they are either associated with some allergens or alter surroundings for sensitive individuals.
Here you can find major problems associated with air-purifying indoor plants:
- Some houseplants produce small amounts of pollen, which can trigger allergies in susceptible individuals. Examples include plants in the Araceae family (e.g., peace lilies, philodendrons) and certain flowering plants.
- Indoor plants create a humid environment, which can promote the growth of mold and fungi on the soil, leaves, or surrounding surfaces. Mold spores can become airborne and cause allergic reactions or respiratory issues in some individuals.
- Dust can accumulate on the leaves of houseplants, especially in indoor environments with poor air circulation. Dust mites or other particles present in the dust can act as allergens for some people.
It’s important to note that while these allergens can be present in houseplants, they are generally not significant sources compared to outdoor allergens such as pollen from trees, grasses, or weeds. Regular cleaning and maintenance, such as wiping the leaves, providing proper drainage, and ensuring good ventilation, can help minimize allergens associated with houseplants and create a more allergy-friendly indoor environment.
Conclusion – How Do Indoor Plants Purify Air?
In conclusion, indoor plants are much more than just a decorative addition to your living space. They can also provide numerous health benefits by purifying the air we breathe. By selecting the right plants and taking proper care of them, you can enjoy the benefits of cleaner, fresher air, reduced stress levels, and improved overall health. So whether you’re a seasoned plant enthusiast or just starting out, incorporating air-purifying plants into your indoor environment is a smart choice for your well-being.
Say goodbye to stuffy air and hello to fresh air with indoor plants!