Gardening Zeal

All About Gardening

  • Home
  • Gardening Guide
    • Growing Fruits
    • Growing Vegetables
    • Lawn Care
    • Plants and Flowers
  • Indoor Gardening
    • Houseplant Types
    • Indoor Plants FAQs

Does Baking Soda Kill Ants? Burning Question of the Time

By Sarwat Rehman

‘Does Baking Soda Kill Ants?’, the most burning question of the time that is searched not only by gardeners but every person frustrated by ants in the home.

does baking soda kill ants
Ants – Tiny Lawn Destroying Creature

If you are one of those you must know first ‘Ants belong to the family Formicidae’ that have more than twenty thousand species and most diversified insects on the earth.

This tiny creature is the prime problem in the garden as they modified after flowering plant diversification. With the divergence of ants, man found multiple ways to tackle their nuisance.

So is the the ‘Baking Soda’.

Here is the solution to the problem and pet answer to your query about ‘Does baking soda kill ants?’.

Let’s begin with the devastating role of ants in the garden, ant species, and finally about how you can use baking soda to kill ants in the garden.

Ants in Garden

You may be stung by an ant BUT there are thousands of ants that live in colonies. These thousands of ants are grouped into soldiers, drones, and workers that are head by only the queen.

This huge number of ants make complex nests underground, on trees, under tree trunks or logs, hollow stems, or under stones in the garden.

The tiny wise ants have a deep selection sense of nest building. They use soil and plant material to build their protective nests.

Different ant species make nests carefully.

  • Temnothorax albipennis

These ants are clever enough that they do not make nests in gardens where they find dead ants as indications of disease or predator.

They quickly sense the threat and abandon the place to a safe site.

  • Weaver ant (Oecophylla smaragdina)

Weaver ants belong to the family Formicidae that live on trees and are recognized due to their unique nest-building strategy.

The workers build nests by weaving leaves using larval silk. They build enormously huge nests spanning number of trees.

  • Formica polyctena

The ants of this species construct nests consciously by considering nest temperature. They maintain a constant temperature so that larva develops.

They not only maintain their nest ventilation but also maintain heat by making a nest in a sunny place.
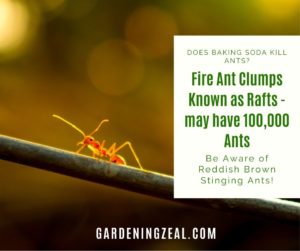
  • Fire Ants

Fire ants also called red ants belong to the genus Solenopsis that are stinging in nature. These little ants with painful stings are reddish-brown in a color that gives an appearance of fire red color.

These ants reside in the form of colonies by producing large mounds on lawns or ground that feed on young plants.

does baking soda kill ants
Fire Ants – Stinging while walking in lawn?

Ants in Garden Good or bad

So, after finding ant species in the garden, you must be wondering whether ants in the garden are good or bad?

These biting ants not only sting you when caring for plants in the garden but also damage your greenery.

Coming to the point, ants do more bad than good in the garden.

The only benefit you may get from ants is they prey on insects.

Fortunately, you can take this benefit from having frogs in garden then why keep plant devastating ants in the garden as they weaken plant roots and make them vulnerable to diseases.

They build deep complex nests having food storage rooms and nursery rooms that are complex structures of the nest.

If you have a patchy lawn with irregular grass, this may also be the gift of ant colonization because they prevent proper growth of grass.

Now surely you want to get rid of ants, but how?

Adding to your luck, you can get rid of this tiny creature easily with BAKING SODA.

See what baking soda is and how you can use it to eliminate ants.

Baking Soda as Insecticide – Answer for ‘Does Baking Soda Kill Ants’

Baking soda in an inexpensive natural solution to the problem of ants.

When ants ingest baking soda in any way, they release carbon dioxide from the body that ultimately leads to their death.

How to Use Baking Soda to Kill Ants – Use in Combination

So, your curiosity about ‘Does baking soda kill ants?’ is going to end up here.

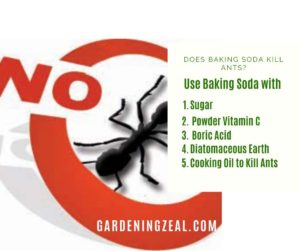
You will know 5 fantastic ways to use baking soda with different materials to eliminate ants in the garden or elsewhere in the house.

  1. Baking Soda and Sugar

Ants like sugar. You can deceivingly attract them by giving sugar mixed in baking soda.

To make this mix, you have to take icing sugar because ants are clever enough to separate sugar crystals from the mix.

Take equal amounts of baking soda and sugar — mix in a container.

You can also add water to make a paste depending upon your using strategy.

When made this mix, scatter in the lawn where you see high mounds. Add at the trunk base. You can also sprinkle beneath and alongside the stones that you have placed on the garden paving.

Find out any nesting by removing topsoil and fallen leaves and sprinkle there to get rid of ants.

  1. Baking Soda and Powder Vitamin C

Just like other combinations of baking soda to kill ants, Vitamin C pills also work to eliminate ants. Just crush the pills and mix with baking soda and sugar in water to make a mixture.

When you are done, locate the anthills in the garden and apply the prepared mixture as per the massiveness of the colony.

You may also apply near young sensitive plants to protect from any attack of ants.

  1. Baking Soda and Boric Acid

Using baking soda with boric acid is a good combination to kill ants. Boric acid is a good antiseptic that can help to get rid of ants.

For extra benefit, you can mix the boric acid into a sugar masked baking soda mix.

Caution: Boric acid is toxic for human and pets both. You must take care to use it in the garden where your kids and pets play.

does baking soda kill ants
Kill ants with baking soda
  1. Baking Soda and Diatomaceous Earth

Diatomaceous Earth is a natural compound made from marine animals, shells of diatoms.

Add some powdered diatomaceous earth with baking soda alone or a mixture of sugar and baking soda for a more potent mix.

You might be thinking what diatomaceous is going to do with ants?

So, here comes the puzzle solved, Diatomaceous powder is quite abrasive in nature. When an ant comes in contact with it, its protective outer covering, cuticle, damages.

Due to its absorbent activity, ant loses water-holding capability and as a result of dehydration dies.

Caution: In order to get rid of ants in the garden, use food-grade diatomaceous earth as it is safe and non-toxic for both pets and humans.

Some varieties other than food grade may have somewhat pesticide activity and are not safe to use in pets and kids’ accessible areas.

  1. Baking Soda and Cooking Oil to Kill Ants

Cooking oil mixed in baking soda gives good results to deter ants. Take one teaspoon of baking soda and mix in less than one spoon of cooking oil.

Make a spray of this mixture by mixing it in warm water. One cup of warm water is sufficient for this mixture.

If you have more colonies of ants, you can prepare as per your need and spray where you see ant hills in the garden. Still, if the problem is unsolved contact pest control vancouver and gets rid of the pests.

What is the Best Time to Repair Lawn Patches? 6 Classy Steps to Repair

By Sarwat Rehman

‘What is the best time to repair lawn patches?’

As no one likes baldness, how one can manage bald spots in a lush grassy lawn. These bare lawn spots are quite irritating when sitting on a shiny winter morning.

You have to repair these patches at the right time so that you can fully enjoy gleaming mornings.

Here is all about what is causing patches in the lawn and best time to repair with detailed and easy steps of repairing patches.

Patchy Lawn Causes – Repair Lawn at Time

Big soil revealing patches in lush green grass give quite an odd view. These bare patches make all your efforts, of decorating and planting, fruitless.

best time to repair lawn

It looks like baldness covered your lawn.

So, you have to cover this baldness at right time but before going into detail all about repairing time and techniques, first, point out what are the causes your lawn is going to be patchy.

  • Insects or Diseases
  • More foot traffic
  • Drought
  • Fungal attack
  • Animal (pets) urine
  • Harsh chemicals
  • Chemical spill
  • Unsharp mowing blades
  • Bugs
  • Unsuitable grass (dormancy of planted grass)
  • Erosion from water runoff
  • Improper cleanliness
  • Ground rubbish or debris
  • No or improper fertilization
  • Mowing grass too much
  • Vehicles

So, before applying techniques for repairing patches, locate the problem you may have in your lawn then start any treatment.

If you fail to locate the problem, you can also consult a professional.

Because…

Diagnosis first, cure later!

Lawn Repairing – Best Time to Repair Lawn Patches

When you are done with locating the cause, go for its repairing. But when?

Time of repairing matters as if you repair in hot scorching heat it will result in damaging seedlings that is why see which season is best for repairing.

  1. Spring or Summer?

Is spring the best time to repair lawn patches?

No, spring is too late to repair.

Growing new grass seedlings in summer may give them trouble. The burning heat of summer results in drying of your lawn that will result in stunted growth.

Even if you water enough, it will give tough struggling time to grow.

  1. Fall or Winter – Best Time to Repair Lawn

Fall! The best time to repair patchy spots in the lawn. As fall is a much cooler season and you don’t need to give much water. The grown seedling will grow easily without much struggle.

In these conditions, cool and damp, the lawn has the potential to recover.

But when winters end, new grass finds more competition with weeds and will be difficult to recover patches well.

How to Fix Patchy Grass – 6 Classy Steps to Repair Lawn in Fall

  1. Mowing

Mow the lawn so that all areas where repairing needs to be done reach up to reasonable height.

Set your mower at lower settings so that lawn could be 2 or fewer inches in height. You can go twice to the area where replantation needs to be done.

  1. Flatten the Grass

When done with mowing, go for flattening with an iron rake and remove all the unnecessary debris or weeds from the lawn.

Removing any debris and weeds will give more chances to seeds to grow with minimum competition.

best time to repair lawn

  1. Spread the Soil

The next step is to spread the soil overground.

When your lawn grass is mowed and flattened equally, you have to spread the best organic soil you want to use.

Spread the soil to about one-fourth to half of the inches deep. After spreading soil, go for the next step.

  1. Water It

You must have a sprinkling system on your lawn. When you have spread the soil, water it with the help of a sprinkling system for about 15 – 20 minutes.

It will help the soil to moisturize and seeds will grow well.

  1. Sow the Seeds

Now is the time to sow seeds. Take the seeds of the best company that you use occasionally or search online and spread a layer over moist soil that you have spread on the ground.

If you select low maintenance seeds with maximum drought tolerance capability will give good results.

If you have a roller, you can use it to push the seeds deeper into the soil so that they firmly grow into the soil.

  1. Care it Consciously

So, done with all necessary steps next is to care rightly.

Water the lawn every morning. If you live in a hot and dry location, water twice a day but not in the evening as it will result standing water overnight, and chances of fungal growth will be more.

Make a routine of watering for at least one month in Northern areas and longer in hot areas.

Having Frogs in Garden – Are Frogs in Garden Good or Bad?

By Sarwat Rehman

Gardeners often inquire ‘Are frogs in garden good or bad?‘

As they like bright green creatures but also get worried due to their presence. Likewise, many gardeners just like you are looking for an authentic answer to this question.

Adding to your good luck you are at the right place to get all about differentiation of frog and toad, straight towards your question ‘are frogs in garden good or bad’ and how you can invite them.

Most importantly read about POISONOUS FROGS to encounter if you find them in the garden and stay safe.

Frog vs Toad Difference – Frogs in Garden

If you have a yard or garden with beautiful green, be ready to host frogs and toads!

No need to be worried about your plants as they are not intended to dine your plants instead, they will help to get rid of insects and assist in many ways.

Just keep exploring!

frogs in garden
Frogs vs Toad – Observe the Difference

So, before hosting your guests, frogs and toads, just have a brief overview of their habitat, where they like to live and want to eat.

Frogs and toads are amphibians, which means they need both water and land for their survival.

  • Frogs are aquatic and prefer a moist environment while toads live on land but near water.
  • The skin of frogs is slimy and smooth while toads have dry bumpy skin. These bumps are not going to give you warts.
  • Frogs have a narrow body while the body of toads is wider.
  • Frogs jump high but toads run or take small hops.
  • The eyes of frogs are big round and bulging while toads have small eyes.
  • The lifespan of frogs is generally the same. They usually live for about 7-14 years.
  • The tongue of the frog is quite longer than the toad that is why a frog can capture prey from a long distance but the toad must be near to its prey.

The size of frogs varies are there are many larger frogs that are extinct now.

The largest Frog is the ‘Goliath Frog’ which is 30cm long approximately 13.5in. It weighs almost 3 kilograms.

According to National Geographic, ‘The Devil Frog of Madagascar’ was once entitled largest frog with 41 cm length and 4.5kilogram weight but is extinct now.

The smallest frog is the ‘Gold Frog’ which is approximately 1 cm long and weighs 200 grams (7 ounces).

Frogs in Garden Good or Bad

Is inviting frogs in the garden good or bad? Do you think they can do bad with your garden?

Definitely NO!

But if they are not doing bad are you going to have any benefit?

Obviously Yes!

Rather than a single, they are going to give you a list of benefits to have them in the garden.

Count them down one by one!

  1. Natural Pest Control

Frogs and toads give tremendous pest control services.

In fruit or vegetable garden, insects like flies, mosquitoes, caterpillar, beetles and cockroaches are the main problems not only for plants but also for human beings.

So, frogs serve as a helping hand to get rid of all insects benefiting from harmful disease-carrying mosquitoes, flies and other insects.

As per research, amphibians consume approximately 10,000 insects per summer season.

In this way, all insects vanish without the use of dangerous insecticides or pesticides.

  1. Wildlife Conservation

Amphibians especially toads and frogs are severely facing environmental changes as there is a lack of interest of people to consider such animals.

If you allow local frog and toad varieties to your garden, they will reproduce in a healthy ecosystem.

In this way, their population will increase resulting conservation of wildlife.

  1. Bio indicators

Frogs are exceptionally good bio-indicators. You can indicate something is wrong in your garden.

As frogs inhabit in healthy environment indicating all is well.

But if you see this tiny creature leaving your place, you must locate where is the problem going on.

They might have a problem with water that you have arranged for them might possibly have any chemical spilled in it or you have placed hazardous chemicals openly.

  1. Eco-Friendly – Frogs in Garden are Good!

The environment is facing many problems. If you give amphibians little attention, they will give you huge benefits in return.

When they select your garden to live in, they make it eco-friendly eliminating all risks and hazards.

  1. Frogs Good for Gardens and Gardeners

Most importantly, this little jumping creature singing in its soothing sound gives you a relaxing sensation especially when you are busy with pruning or growing new plants.

They will give you perfect company and never let you bore!

  1. Children’s Recreation

In addition, to give you company, they are a real source of enjoyment for children. They love to see their jumping skills.

Their life cycle from tadpole to a complete frog is mesmerizing.

Children find outdoor activity rather than sticking to games or cartoons that is healthy for them.

Now, hope so your confusion regarding frogs in the garden are solved. This is not the end of all benefits. These are a few from many.

You can experience it on your own and see much more.

Here is the time to make your garden frog friendly.

Let’s do that!

How to Attract Frogs To Your Garden – Make Garden Frog Friendly 

Yes! You can attract frogs to the garden to take many advantages and give them natural habitat to live in.

Let’s see what you can do to invite!

1. Remove Hazardous Chemicals 

As frogs are nature-loving creatures and want a natural ecosystem to survive. So, if you want to attract frogs in the garden you must remove all chemicals from the garden.

Even do not use insecticides, pesticides, herbicides or other chemical fertilizers if you want to attract frogs in your garden.

One of the alternatives to fertilizers is you must follow organic gardening techniques.

Use healthy soil and grow companion plants by considering crop rotation.

Keep all hazardous materials, e.g; repellents saved at the right place, out of access to hoping young frogs.

Caution: An important thing to handle any type of frog or toad is your hands must be rinsed before touching it. 

Amphibians have porous skin like a sponge. If you handle it carelessly without rinsing bug repellent from hands, it will be absorbed into the frog’s porous body and will poison it.

2. Give Them Shelter 

Frogs hide from the sun.

You have to give them a proper shady place to shelter from the scorching heat.

One thing you can do to provide shelter is to line the pond edges with pots or use stones to make a cave-like shelter to hide in.

3. Grow Right Plants

Having frogs in the garden means that you provide the appropriate conditions.

You have to take care of their likes and dislikes.

So, grow plants that are not poisonous to frogs and toads.

If you want to attract frogs in the vegetable garden, you have to avoid eggplant, snow peas and rhubarb in the pond area or any garden vicinity where frogs have access.

In the case of the flower garden, avoid planting daffodils, hydrangea, hyacinth, azalea and honeysuckle.

If you will provide the most appropriate conditions, there will be more frogs and toads in your garden.

Caution: Do not grow Cattail in frog ponds as they are thick-stemmed plants with a high proliferation rate and can crowd pond vegetation. 

Reeds, sedges and spike rushes are the best plants to grow in frog ponds as they are plants with thin stems.

Thin and vertical stemmed plants as mentioned above are the best suitable plants.

4. Make a Water Pond

A watery place is essential to invite frogs to your garden because frogs are amphibians and have slimy porous skin to breathe through it.

They need enough water to maintain their skin moisture and lay eggs.

Caution: You may not encourage frogs and toads to stay if you have dogs that enjoy hunting down toads.

As a defence mechanism against predators, most toads release skin secretions that produce a foul-smelling odour and can be toxic to dogs and other animals.

5. Frogs in Garden but No Pond – Other Water Sources

If you are worried about frogs providing water in the garden but not having a pond, use other alternatives.

A spare shallow basin or cemented pot can give you a place for water storage.

Place these pots in a cool shady place and allow frogs to enjoy!

Are All Frogs Poisonous – Don’t Invite Frogs in Garden Unknowingly 

Before inviting frogs in your garden, you must research and consider whether all frogs are poisonous? Because definitely, you intend to host friendly frogs rather than poisonous ones.

So, here comes the answer to your question ‘Are all frogs poisonous’ that is ‘NO’. All of the frogs are not poisonous.

Some of the species of frogs and toads are poisonous that you must not have in your garden.  

There are more than 4700 species of frogs out of which only about 100 species are poisonous native to tropical and subtropical regions, Africa, Central, and South America. 

Likewise, toads in the garden may also be dangerous but fewer species, about 200.

You must be conscious and observe signs of poisonous frogs before rearing in your garden.

Deadly Poisonous Frog

‘Golden Poison Frog’ (Phylobbates teribilis) is the most poisonous frog on earth that belongs to the genus Phyllobates. 

The most striking feature of the golden poison frog is, an adult frog has enough poison to kill two mature African Bull Elephants.

Poisonous frogs are dangerous enough to prove fatal.

So, be careful in nurturing frogs and toads in the garden.

Telling you about dangerous frogs doesn’t mean that you can not have them in your garden.

You simply need to be careful and pinpoint any dangerous species if you find something mysterious (although wildlife authority keeps strict observation).

How to Tell If a Frog in Garden is Poisonous?

As you know now that some frogs are poisonous but not all, you can point out poisonous ones by observing the signs.  

First of all, appearance defines a poisonous nature.

In the animal world, bright striking color warns you to be alert.

Yes! Poisonous frogs tend to be bright in color but not all bright colored frogs are poisonous. They look like pretty creatures but carefully touch such species as they may injure you.

Invite good frogs in the garden and take care of yourself!

Best Wine Bottle Fountain Ideas – 5 Amazing Fountains to Style Garden

By Sarwat Rehman

Do you have ‘Wine Bottle Fountain’ in your yard? What? You haven’t heard or ever seen bottle fountain?

This is something you really missed!

Know about it and design your yard.

Wine bottle fountain is a DIY fountain that is a unique element of the garden and you can make it easily. Using empty glass, metallic or plastic bottles, you can design a fountain and add required details with decorative materials to make it elegant.

Here is all about how you can make wine bottle fountain with one or multiple bottles, stunning bottle fountain designs and many more ideas.First, you will get things needed and know the detailed procedure of making a DIY wine fountain. Next are 5 amazing ideas, and in the end, you’ll find fountain pump purchase guidelines.

So, don’t make a delay and let’s start exploring this pro guide.

Make Wine Bottle Fountain Easily

Wine bottle fountain is as easy to make as to relax besides it having a cup of hot coffee on a foggy evening.

Many people style gardens with luxurious fountains or waterfalls that are quite common and lack uniqueness.

Wine bottle fountain
Wine Bottle Fountain – How to Make

If you want to style your garden uniquely with no expense, you can do with little creativity.

You just need few things depending upon how much you want to decorate the fountain.

So, go in your storeroom and collect all the empty wine bottles or simply glass bottles to make new out of them.

You can use as many wine bottles as you want to make eye-catching fountain. Simply one bottle can also help to make wine bottle fountain. The rest of the decoration depends on your taste.

So, let us begin our creativity!

Things you need

  • Wine bottles
  • Wine or cocktail glass
  • Fountain pump – Electric or Solar
  • Power supply
  • Basin – Optional
  • Tubing
  • Decoration rocks/ marble or anything you have or want to add in decoration

Wine Bottle Fountain – Project Details

Creating a DIY garden fountain gives wider opportunities to use multiple things in different ways, but the principle is the same. Here you will get basic details of wine bottle fountain and modify it as per your need.

Drilling Glass Holes

Drilling holes in the glass bottles is the first thing before stepping into the garden to make a fountain. It seems to be daunting, but diamond bits make it easier and practical. Diamond bits are glass, granite, or marble cutting tools that effortlessly drill holes in the wine bottles.

So, invert the bottles, and make holes. Use diamond bits gently and go slow without forcing it. Also, keeping the bit wet makes cutting smoother.

Bear in mind diameter of the holes should be equal to the tubing you choose. Wider holes may leak or result in malfunctioning.

Pro Safety Tips

Glass drilling can prove to be risky as cutting heats up glass and possibly crack in your hand. So, wearing gloves is the best approach. Secondly, wear safety glasses to prevent eyes damage.

Pipe Assembling

When bottles are ready and you have decided on the fountain layout, next is the assembly of the pump. It is quite simple.

If you already have a fountain pump, that’s great. But if you want to buy, make sure you have checked electric, and solar-powered fountain pumps available at the end of this article.

So, there would be two pump areas; input and output. The input side would be attached to the water reservoir and ensure it stays clean.  Once it is clogged, the pump power will decrease.

On the other hand, the output side is to supply water to the fountain. You can directly attach it to the wine bottle or use multiple tubing for each bottle. You may either get this fountain tubing with the pump or buy it from any hardware store.

Pro Assembly Tip

If you find the pipe is somewhat loose or holes are larger, use clear silicone sealant to adjust it. You can also use it otherwise to hold the tube firmly.

Add Details to make it Attractive

You are almost done with major DIY wine bottle fountain work. Next is its embellishment. You can use decorative garden stones, rocks, or pebbles. Adding garden statues in DIY fountains shows next-level creativity.

You can also make the fountain more interesting by adding any color to the water. Red is the most favorite and gives a stunning look.

You can also use more than one glass bottle placed in a way that water spills over them or splashes over glasses.

Aditionally, place a deep cemented sink or basin, if you want, to keep the fountain on ground level. Otherwise, you can sink it into the ground, but it should be deep enough to support water flow.

More Ideas of  Bottle Fountain

So, now you are able to make bottle fountain easily on your own by using empty glass bottles or wine glasses.

You can position it at a most visited place or in center as it attracts everyone’s attention.

In addition to this simply easy fountain idea, here are some more ways to decorate the garden with glass bottle fountains.

Just have a look and decide which one you are going to use!

Designing bottle fountain with colored water flowing out and splashing on glasses gives an exclusive fountain look.

1. Center Stand Style

First of all, decide on a centric garden place and design its structure to place bottles and glasses.

It is a detailed fountain with multiple fixtures and stands. You may also need a helping hand to make this arrangement.

If you are not interested and want to keep it budget-friendly, too, minimize the massive stonework and go simple. Using bricks is also an option.

So, make the structure as you want, follow the project details mentioned above, decorate it with marble and rocks to give it an ecstatic look.

wine bottle fountain
Wine Bottle Fountain – Center Garden Idea

2. Rack Fountain

Furthermore here is another way of using bottles to make a fountain in a rack.

This is a relatively simple and inexpensive garden fountain. All you need is a stand and few empty bottles. If you don’t have a wine bottle, no worries. You can also use plastic or metallic bottles with labels to place in the fountain.

A plus point of this fountain is bottles are appropriately held in the frame and can not fall.

One more way of using bottles to make a fountain.
Flowing Fountain Idea

This is the best creative fountain you can ever have!

3. Waterfall Wall Wine Fountain

If you don’t have empty bottles right now, start collecting and make this fountain at the front that will give your garden wall a great running water look.

Stack all the empty bottles in a corner with

In this style, you don’t need to drill holes in all bottles. Instead, decide how much fountain water flow you want. Maximize or minimize as per your wish and make holes in desired bottles.

Stack them all at your desired place and hold firmly with any sealant or sassing to prevent bottle slip. Next, take a basin, fountain pump, and do the same to make this fountain.

bottle fountain
Multiple Bottles Fountain – Water Fall Wall

4. Barrel Fountain

Here is the simply elegant use of wine bottles to make a fountain. Just take a barrel and drill holes by measuring the diameter of the bottles you are going to use.

Adjust bottles in barrel. Give them supply and finally enjoy your creativity!

You can also bring character to this idea and add flowers or leaves to the water-filled barrel.

wine bottle fountain
Bottle Fountain  Idea- Barrel Fountain

5. Center Stone Style

You can make a totally different fountain at a garden corner by placing a big stone beside the bottle and decorate it with stones.

If you have a big stone and don’t sure how to utilize it, it is the best way. In fact, you can also buy this extra-large garden stone to make this fountain.

Certainly, the falling water will give you a relaxing sound.

wine bottle fountain
Center Glass Fountain

DIY Fountain Pumps – Purchase Guide

Fountain pumps come in a wide range of varieties, and each seems to be good on first look. But this is not the case. You must carefully research their types and see what good water pump must-have.

So, you can find this all in the subsequent headings.

Submersible VS External Water Pumps

Generally, fountain pumps are of two types, Submersible, and External water pumps. As the name suggests, submersible pumps can be used in a moist environment without affecting performance. But external pumps’ motors must not come in contact with water.

Some other differences between Submersible and External water pumps are:

Submersible Water PumpExternal Water Pump
Submerged in water Needs dry spot
Easy to installDifficult to install
50 to 5,000 gallons of water per hourHandle 1,000 gallons of water per hour
Low maintenance More maintenance - Moisture risk
No noise Noisier
Consumes less energy Consumes more energy
Cheap Expensive

So, preferably, buy a submersible water pump for a DIY garden fountain and use it without being worried about water contact and electricity consumption.

Here, you can find the best fountain pumps with excellent qualities:

Image Product Details   Pricing
backpac 5ft Power Cord Submersible Water Pump Flow Rate: 800 GPH (3000L/H)
Lift Height: up to 10 ft.
Power: 24W
Voltage: 110-120V
Check Price
backpac 6.5ft Power Cord Submersible Water Pump Flow Rate: 400 GPH (1500L/H)
Lift Height: 
6.56ft/2m
Power:
25W 
Voltage: 110 V-120V/50-60Hz
Check Price
cordlessblower 5.9FT Power Cord Submersible Water Pump Flow Rate: 550 GPH (2000L/H)
Lift Height: 7.2 Ft (2.2m)
Power: 30W
Voltage: 110-120V
Check Price


Solar Powered Water Pumps

These pumps utilize sun – solar energy to flow water in the fountains. Solar-powered water pumps give a considerable advantage of no electricity cost with easy to install features. They are also inexpensive and require low maintenance.

There are batteries with solar pumps to make the process smoother and store excess power received during the day.

When the sun hardly arises on cloudy or rainy days, these batteries help to work in such conditions. Although it is for a limited time, still incredibly assist in low days. You can also supply solar power to the bird feeders.

Above all, a single investment for buying a solar water pump gives comfort forever, and you forget the electricity bill.

Here you can find multi-featured solar-powered water pumps:

Image Product Details   Price
backpac Solar Powered Fountain Pump Features: 6 different nozzles
Nozzle base and head
Spray height: Can reach 30-50cm
Check Price
backpac Solar Fountain Water Pump Features: 7 nozzles
Solar panel with pump
Anti-collision pole
Fastener
Spray Height: 12-20 inch
Check Price
cordlessblower Solar Bird Bath Fountain with Panel Features: High-quality rotor
Service life: up to 10,000 hr.
IP65 waterproof design
Withstand all kinds of severe weather
Spray Height: 45-65cm
Check Price

To make something stunning out of crap is worth applauding. When you put all of your efforts to make new things that people gaze is your silent triumph.

So, don’t hesitate and make the best use of empty bottles to design a wine bottle fountain. It is not only cheap but helps to contribute and to spend time in the garden. Before starting, make sure to use the best fountain pump to keep it running all the time.

You just need to think differently and create wisely.

Yes, make something that matters!

Otto Luyken Laurel – How to Care Otto Luyken Cherry Laurel?

By Sarwat Rehman

The Dwarf Cherry Laurel ‘Otto Luyken’ is an attractive evergreen shrub with lush bloom clusters. This plant is tough and hardy and extremely easy to grow.

This compact Cherry Laurel was granted the prestigious Award of Garden Merit by the Royal Horticultural Society.

Noteworthy Characteristics

Otto Luyken Laurel, a perfect evergreen shrub is a dwarf form of English Cherry Laurel with creamy white flowers on bright glossy foliage.

It was first introduced in Germany by Hesse Nurseries in year around 1968. Originally, it is native to Southeast Europe and Southwestern Asia, generally recognized for the tall growth of plants in the wild reaching tree height.

This broad spreading Otto Luyken Laurel with fragrant spiked flower is a year-round interest that can grow up to 12 feet if unclipped.

You can also grow it quite easily as it is a neat and manageable shrub causing not much disturbance for growers as well as neighbouring plants.

This dense hedge gives compact growth for the privacy screens and is a perfect winter shelter for roaming birds.

Yes, Bird-friendly Laurel, it is!

Hardiness

This fast-growing cherry laurel is adapted to grow from west to south and East of America spreading all the way as it is hardy in zones 6 – 9 and can from partial shade to full sun.

Zone 6 hardiness signifies that it can grow in cold temperatures ranging from 0 – 100 C giving you the opportunity to enjoy its beauty year-round.

Otto Luyken Cherry Laurel – How to Care

Be sure to choose the right location and conditions for your Otto Luyken Cherry Laurel to thrive. Spring and fall are ideal times to plant. Although anytime temps are not extreme you can plant this dwarf shrub. This Cherry Laurel grows in planting zones 6-9.

Plant in full sun to partial shade. In growing zones 8 and 9, some shade is recommended.

Laurels are adaptable but prefer moist, well-draining soil. Water deeply when planting and twice weekly for the first 3 months while your new plant is establishing. After establishing, Laurels are drought tolerant.

Three inches of mulch is a great option to prevent weeds, keep the soil cool and moist, and protect the roots during extreme temperatures.

Fertilize when planting and in spring with a balanced, slow-release fertilizer. We have our own custom blend made to give your new plants the best start! English Laurels can tolerate heavy pruning, but don’t require it. Prune any time of the year.

Otto Luyken Cherry Laurel are a pest, deer, and disease resistant. This Laurel is also pollution and salt tolerant.


  • « Previous Page
  • 1
  • 2
  • 3
  • 4
  • 5
  • 6
  • 7
  • Next Page »

Most Recent

  • How to Store Butternut Squash [to Save Harvest]
  • How Do Indoor Plants Purify Air – Surprising Truth!
  • Do Indoor Plants Need to be by a Window? [Secret Answer]
  • Are Indoor Plants Harmful at Night? Truth behind the Myth
  • How to Grow Butternut Squash in Small Space [3 Methods]
  • About Us
  • Privacy Policy
  • Terms and Conditions

Copyright © 2025 | Privacy Policy | Terms & Conditions|