Gardening Zeal

All About Gardening

  • Home
  • Gardening Guide
    • Growing Fruits
    • Growing Vegetables
    • Lawn Care
    • Plants and Flowers
  • Indoor Gardening
    • Houseplant Types
    • Indoor Plants FAQs

What to Plant with Broccoli – Detailed Broccoli Companion Plants?

By Sarwat Rehman

Do you know inappropriate broccoli companion plants can make your plant stressed out? They compete with broccoli and suppress the growth.

Broccoli companion plants include leafy vegetables, tuber plants, and aromatic herbs, including mint, chamomile, celery, rosemary, and dill. Some annuals and perennials like Marigolds and Nasturtiums also prove best companions of broccoli. They give several benefits to companions and assist their growth.

So, if you want to keep your broccoli plant flourishing, be wise to surround it with the right plants and get the proper benefit of companion planting. Here you will find the ultimate benefits of all broccoli companion plants and how they encourage broccoli growth.

I’ve divided broccoli companion plants into sections

  • Vegetables
  • Herbs
  • Annuals and perennials

In the end, you will also find bad companions of broccoli. So, let’s explore.

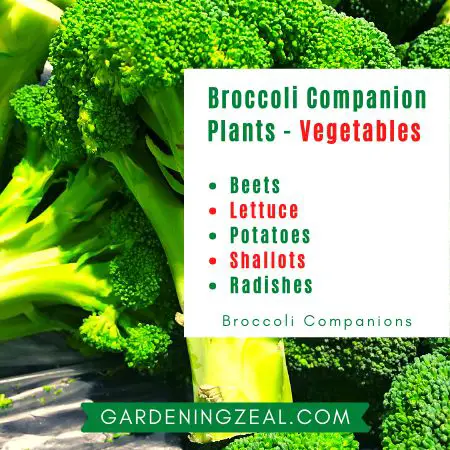
Vegetables – Broccoli Companion Plants

Beets

Beet plant (Beta vulgaris) is a cool-season fast-growing vegetable plant that grows well in cool temperatures of spring and fall 1.

Broccoli companion Plants
Vegetable Broccoli Companions

The beet plant is generally grown as a root crop, but all parts of it are edible. These are one of the most beneficial companion plants for broccoli as they require little room and are compromising.

Beets also enrich soil nutrients and make it healthy for companion planting.  The second most obvious reason for planting beets with broccoli is the calcium need.

Broccoli absorbs an enormous amount of calcium from the soil that does not affect beet growth. In this way, both plants get what they need without any competition and prove good companion plants for each other.

Lettuce

Lettuce (Lactuca sativa) is a well-known leafy vegetable and, like beet plants, is also a cool-season crop. It is grown worldwide, but the USA and Europe are the most significant consumers and producers of lettuce 2.

Growing lettuce with broccoli is in both plants’ best interest and provides grow-able conditions to each other.  You can plant relatively close to each other without worrying about space and nutrients as both plants have root systems at different levels and draw nutrients from different levels of the soil.

So, there is not any stressful situation or unhealthy competition among plants. In fact, lettuce has a fibrous root system that makes roots go deep down in the form of fibers and absorb required nutrients.

There is also a mutual benefit of growing lettuce with beets and broccoli, as lettuce benefits from the magnesium added by the beets.

So, it’s a win-win situation for all plants.Potatoes

Potato plant (Solanum tuberosum), member of the nightshade family Solanaceae is staple food crop of many countries 3.

Potatoes are grown for edible tubers widely used all over the world. You may cut, mash, boil or cook potatoes to have a starch-rich diet. In fact, potato flour is also used as a thickener for sauces in baking.

If you already have potatoes in a garden bed, you must know how easily they grow. But growing potatoes with broccoli is an ultimate treat.

They make broccoli more delicious and mouthwatering by enhancing its flavor.  You can clearly notice the difference between broccoli having potatoes as a neighboring plant and the one growing alone.

Secondly, growing potato plant along with broccoli is also a favor to your potatoes. Broccoli has a shallow root system and doesn’t need in-depth nutrients. On the other hand, potatoes have a deep-rooted system, and roots anchor profound in the soil to absorb nutrients.

So, both plants reasonably get the required nutrients at different levels of the soil without developing competition.

Shallots

Shallots, a variety of onions (Allium cepa), are slightly aromatic plants belonging to Amaryllis 4.

The shallot bulbs are grown for their mild flavor in predominantly Asian cuisines. You can also use shallots in meat recipes and different sauces.

When it comes to broccoli companion plants, shallots stand out for pest repelling capabilities. They repel carrot rust fly and make vegetable garden pest-free.

Similarly, you can pair shallots with other veggies like carrots, beets, and herbs, including sage, thyme, mint, and chamomile.

Radishes

Radish (Raphanus sativus) is a cool-season, fast-growing vegetable belonging to the mustard family. The most common radish varieties are likely of Asia and are grown worldwide 5.

You can eat raw radish roots or cook leaves for a mild crisp.

If grow spring-type radish, they begin in late summer and mature in cooler days of fall. In comparison, winter radishes are sown in mid-summer to late summer and grow considerably more prominent.

A considerable benefit of rowing radish with broccoli is its mild growing behavior. Radishes do not thrive. They mature before other crops and help break up the soil as they grow. This early radish growth breaks down nutrients in the soil take companion plants can take.

You can also interplant broccoli with radish, spinach, and lettuce. These crops enjoy the shade under broccoli during late spring and early summer.

Aromatic Herbs – Broccoli Companion Plants
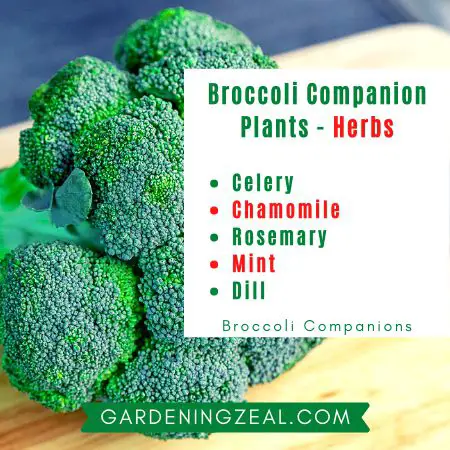
Broccoli companion Plants
Aromatic Herbs – Broccoli Companions

Celery

Celery (Apium graveolens )is an aromatic herb belonging to the Parsley family 6. It is mainly used as a vegetable but can also be delicately used in stews, stir-fries, soups, and salads 7.

Like so many other herbs, Celery is a potential companion of broccoli. It helps improving broccoli’s flavor and make it more delicious.

Broccoli, celery, potatoes, and onions make a perfect companion garden where all neighboring plants boost broccoli’s taste.

Chamomile

Chamomile (Matricaria chamomilla) is a traditional herb that comes from the daisy-like flower of the Asteraceae family.  It is widely used for various medicinal purposes and is an excellent tea ingredient.

You can have two common types of chamomile, German chamomile and Roman chamomile 8.

Chamomile is a wonder plant with anti-bacterial and anti-fungal properties. The good news is the chamomile neighboring plants also get the benefit of these properties.

When grown chamomile along with broccoli, it would automatically be safe from bacterial and fungal infections.  Mildew, mold, and blight are major fungal ailments, but chamomile serves as a barrier to protect broccoli from such diseases.

It also has a deterring scent and helps getting rid of mosquitos. When it comes to insects, it is not amazing it deterring harmful insects or mosquitos but is known to attract beneficial insects like hoverflies and ladybugs. These beneficial insects consume aphids, mites, or any other plant-eating insects.

Chamomile also attracts bees and other pollinators to the garden.

Overall, chamomile acts as a defense mechanism against bacteria, fungi, and insects to safeguard broccoli and other neighboring plants.

Chamomile also pairs well with mint and basil. It improves their taste and smell. So, growing broccoli with chamomile, mint, and basil is a great way to make your garden versatile.

Rosemary

Rosemary (Rosemarinus officinalis) is a relatively easy-to-grow herb and with ornamental features 9. It grows stunning flowers ranging in blue, white, and pink depending on the rosemary variety.

It has an intense flavor and pine-like smell that makes it a popular ingredient in several foods.

Rosemary is one of the best companion plants of broccoli growing along with other herbs like mint, thyme, oregano, sage, and lavender for its insect repelling power.

Rosemary repels cabbage moths, Mexican bean beetles, carrot rust flies, and cabbage flies that lay their eggs on broccoli. When your plants get rid of damaging insect pets, they grow healthy and beautiful.

Mint

Mint (Genus Mentha ) is a fragrant herb of the Lamiaceae family. This aromatic herb is widely grown and used in herbal medicine.

Mint also adds a unique flavor and pleasant aroma to the salads and cuisines. There are over 25 species of fragrant herbs, including this mint family 10.

Mint is a fantastic broccoli companion plant as it helps to maintain the fertility of the soil. It attracts earthworms, natural soil dwellers to improve soil fertility and helps to establish a uniform nutrient level in the soil.

Similarly, mint attracts hoverflies and predatory wasps and repels flea beetles, aphids, and cabbage moths. You can use cut mint as mulch around broccoli or grow in containers around any vegetable garden.

Dill

Dill (Anethum graveolens), a parsley family member, is an annual or biannual herb with a strong scent 11.

Whether fresh or dried, Dill leaves are used in salads, soups, dips, and many other dishes. The dill seeds are also used as a spice in pickling and enhance the flavor of stews and roasts.

Like any other aromatic herb, the dill plant is one of the best broccoli companion plants for its strong aroma.

It attracts ladybirds, garden spiders, hoverflies, bees, and parasitoid wasps. These beneficial insects or predators make a defense for broccoli and all other plants grown in closed vicinity.

When there would be no pest problem, plants will be healthy.

Annual and Perennial – Broccoli Companion Plants
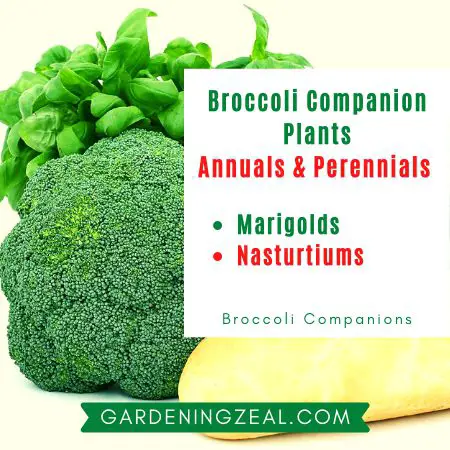
Broccoli Companions
Flowers – Broccoli Companions

Marigold

Marigolds (genus Tagetes) are warm-season annuals with bright and long-lasting blooms. They are easy to grow and give your garden a spark of bright color 12.

It is believed that marigolds have some pest-repellent properties and keep several pests in check. French Marigolds and Mexican Marigolds are two common types to grow as companions of the broccoli plant.

French Marigolds produce a chemical to repel root rot nematodes, root-lesion nematodes, whitefly, and Mexican bean beetles.

Marigold companion planting also controls potato beetles, corn earworms, flea beetles, Japanese beetles, squash bugs, and cabbage maggots.

Similarly, the Mexican type also deters many pests and discourages rabbits from nibbling their plants 13.

Nasturtiums

Nasturtiums (Tropaeolum majus), native to South America and Central America, is a warm-season, easy-to-grow annual and perennial plant 14. The absolutely gorgeous nasturtiums flowers are a pure delight to the garden or landscape.

Nasturtiums are the most beneficial broccoli companion plants as they act as traps to attract aphids and squash bugs in the vegetable garden.

They keep such bugs away from vegetables and make a pest-free environment. Another outstanding contribution of nasturtiums in companion planting is their power to attract pollinators and hoverflies in the garden.

Broccoli Companion Planting Chart

Plant Varieties  Broccoli Companion Plants  Companion Plantation Benefits
Vegetables Beets Enrich soil nutrients, Absorbs enormous amount of calcium
Lettuce

Draw nutrients from different soil levels, Different root systems, No competition of space and nutrients

Potatoes Enhance broccoli flavor, No competition
Shallots Pest repellents, Repel carrot rust fly
Radishes Breaks down nutrients, Make soil healthy
Vegetables Celery Improves broccoli’s flavor
Chamomile Anti-bacterial and anti-fungal properties, Deterr insects, Attract beneficial insects and pollinators
Rosemary Insect repelling power
Mint Maintain soil fertility, Attracts hoverflies, Repel insects and beetles
Dill Attract pollinators and insect predators, Repel insects
Annuals and perennials Marigolds Produce a chemical to repel insects, Discourages rabbits nibbling the plants
Nasturtiums Acts as insects trap, Lure aphids, Attract pollinators and hoverflies


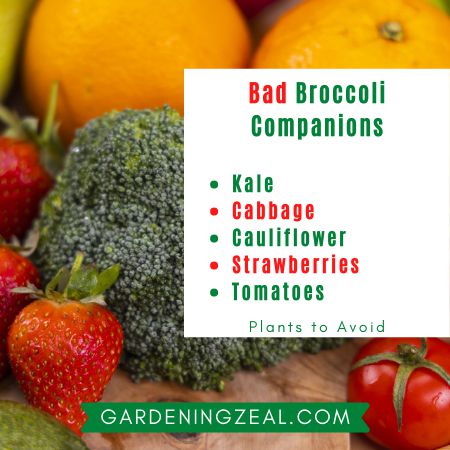
What not to Plant with Broccoli – Bad Broccoli Companion Plants

When growing broccoli companion plants, avoid other members of the brassica plant family as they prove bad companions in poor soils 15.

Broccoli Companion plants
Bad Broccoli Companions

Plants from the same family have similar nutrient requirements, and in nutrient-deficient soil, plants compete and grow with nutrient deficiencies.

Growing different brassicas is not harmful as plants have a large nutrient reservoir if the soil is nutrient-rich and fertile. Also, be sure to properly fertilize the soil, so the soil remains full of nutrients throughout the growing season.

Here are some plants, including Brassicas that are avoided to plant with broccoli:

  • Kale
  • Cabbage
  • Cauliflower
  • Strawberries
  • Tomatoes
  • Peppers
  • Eggplant
  • Mustard greens
  • Pole beans
  • Lima and snap beans
  • Squash

The other significant category of bad broccoli companions is the heavy-feeders. Broccoli is also a heavy feeder, and other heavy-feeding plants grown in broccoli’s vicinity can negatively affect it.

Instead, pair up broccoli with light-feeders, for example, beets or plants mentioned above in the article.

Here are some heavy feeders you must avoid to grow with broccoli:

  • Watermelon
  • Cantaloupe
  • Pumpkin
  • Sweet corn
  • Asparagus

So, it is all about broccoli companion plants, what to avoid and what to plant with broccoli. Hopefully, now you can better get the benefit of companion plantation and grow multiple plants to enhance the garden diversity.


When To Harvest Jalapenos? 5 Pro Tips

By Sarwat Rehman

When to harvest jalapenos? When there are chances of heavy rainfall or frost, it is the ultimate query of gardeners. The answer is simple.

Jalapenos are ready to harvest when 3 to 5 inches long, are firm and fat with a bright green coloration. First, jalapenos are light green, then brighten up and turn into dark green, black, and red at complete maturity. Jalapeno peppers take about 3 to 4 months to reach firmness and get ready to harvest.

So, don’t lose massive harvest and get apparent signs of mature peppers, weather impact, and most importantly, how you can make jalapeno harvest without damaging plant with pro tips.

Let’s dig in!

When to Harvest Jalapenos?

Jalapeno peppers (Capsicum annuum), need 3-4 months or almost 90 frost-free summer days to reach maturity and develop favorite spicy flavor 1.

They do not like to sit in the frost, and you must keep an eye on the weather forecast on jalapeno harvesting days.

when to harvest jalapenos
Signs to Harvest Jalapenos

You need to be observant and inspect jalapeno fruit time by time as it is easy to judge the jalapeno stage of ripeness from the appearance.

During the growing season, you will see peppers light green, and after a few days, they will turn into darker green, almost black, and finally red.

These color changes are clear indications of the harvesting stage, and you must know the signs of the jalapeno harvesting stage.

Signs of Ready to Harvest Jalapenos

These are 4 quick signs to get jalapenos stage of ripeness. A jalapeno should be

  • 3-5 inches long
  • Firm to touch
  • Fat
  • Deep green and glossy

Some other signs are:

  • Your God gifted senses, sight, touch, and taste are three prime sensors for assessing whether jalapenos are mature enough to be served in a platter or not. If they have a green sheen, are tough, and taste spicy, it means they are ready to harvest.
  • Mature jalapeno peppers develop small cracks on the sides towards the stem. Examine the shoulder sides of the peppers, and if you identify such cracks, don’t keep them hanging over the plant and cut nicely.
  • Another good sign of mature jalapenos is the Corking. These are tiny white lines on pepper’s skin and are entirely safe to eat. When your jalapeno plants show such lines, harvest peppers immediately; otherwise, the chances of rotting will increase or eventually fall off the plant.

Bear in mind that all fruits on a single jalapeno plant would not be ready to harvest at the same time.

Ensure checking all plants or developing peppers weekly so you can harvest each fruit at the right moment.

Jalapeno Harvest Season

Jalapeno harvesting mainly depends on the plantation time. You can plant in the spring, March-April, or fall late July-August by direct seeding or transplanting.

Similarly, the jalapeno harvest time varies. If you have planted in spring, the harvest will occur in June. For fall jalapeno planting, the harvest will begin in Oct and last until the first frost.

Direct Seeded Jalapenos: Approximately take 110 to 120 days to mature.

Transplanted Jalapenos: Approximately take 75 to 85 days to mature 2.

The jalapeno harvesting season is a treat. You have different flavors of jalapenos and easily enjoy mild to spicy jalapeno flavors by picking at different times.

If you are craving heat and sweetness in the peppers, let them be on the plant until they turn red.

But if you want to make jalapeno pickle, crispy and crunchier peppers are the best. So, pick green, firm, and tough jalapenos to make a mouthwatering pickle.

Jalapenos Harvesting and Weather Concerns

Jalapeno plant is frost sensitive, and extremely low temperature can kill fruit, plant, or both.

The jalapenos and other peppers weaken when the temperature is between 40 and 60 oF. Even the leaves and fruits blacken and collapse when the temperature drops to 32 oF 3.

In fact, light frost kills plants and ruins your efforts.

when to harvest jalapenos
When to Harvest Jalapenos – Weather Guide

Don’t go by frost risk and do preventive measures to keep your plant healthy and alive.

An excellent way of protecting plants from frost damage is covering plants with row covers. You can cover plants at night and uncover them in the morning.

If it is your first experience growing peppers, you might not have considered soil temperature, but it is as vital as the air temperature. When growing peppers, be sure the soil is warm.

Covering the soil with black plastic keeps the soil warm and helps to produce a massive jalapeno harvest.

Pro Tip: When the temperature is severely damaging for the jalapeno plant, uproot the entire plant and hang it in a protected area to completely mature. It also prevents late-season peppers from frost damage.

How to Harvest Jalapenos?

After getting your jalapenos are ready to be picked, don’t make a delay and harvest properly. If you leave ripe jalapenos on plants, chances are mold or other fungal diseases attack and result in massive loss. So, be productive and know how to harvest jalapenos without damaging the plant.

Follow these guidelines without skipping any step and fill your bucket with crispy jalapenos.

  1. First, identify ripe peppers. Harvesting unripe jalapenos are of no use so, be careful in targeting only matured peppers. Before stepping into your garden, make sure you have gone through the signs of harvestable jalapenos mentioned at the article’s start.
  2. You can see jalapenos drooping downwards with bottoms pointing towards the ground. Hold the branch near the pepper, and gently pull the pepper upwards. You will see ripe jalapenos are pulled off effortlessly.
  3. An excellent way to harvest jalapenos is by using garden shears or a sharp knife. This approach prevents damage to the peppers and encourages more jalapenos on the plant.

Pull off jalapeno peppers from all the plants and collect them in a dry basket as moisture can rot your massive harvest.

Eat them raw, bake with stuffed cheese, make a pickle, or store them for later use.

It is all up to you!

5 Pro Tips to Harvest and Store Jalapenos

when to harvest jalapenos
Tips to Harvest Ripe Jalapenos

  • Don’t twist or tear the stem of the jalapenos as properly ripped peppers come off without any hustle.
  • Wear gloves when harvesting or handling jalapenos as capsaicin content in these peppers can irritate your hands, eyes, mouth, or nose 4. If you are exposed to it and feeling irritated, rinse the exposed area to water or cover it with a milk-soaked towel 5.
  • Storing jalapenos is fun. There are countless ways to preserve jalapeno peppers, but dehydrated peppers last for a long time and give a better taste. You can use dehydrators to make the fully dry. Commercial dehydrators are expensive. It is better to buy an economical dehydrator for your kitchen needs.
  • You can optimally store peppers for two to three weeks at 50 to 55 oF in 80% humidity 6.
  • Use crisper drawer for storage of harvested jalapenos in a bag for up to two weeks.

FAQs – Jalapeno Harvesting

Are Jalapenos Hotter When They Turn Red?

Red jalapenos are comparatively mature and hotter for capsaicin, the compound responsible for hotness. Capsaicin continues to produce in all peppers around the season. But red peppers are older than greens and contain more capsaicin content, resulting in intense flavor and extra spicy peppers.

Why Are My Jalapenos Dying?

A common reason for dying jalapenos is improper watering. Overwatering is the main culprit as pepper plants wilts and dies in excess water. Too much water also results in root rot, other fungal diseases, and caries away essential nutrients needed for healthy plant growth.

Will Jalapenos Ripen After Picking?

Jalapenos continue to ripe even if you make an early harvest and turn into red or dark green. Simply place them on a south-facing window and allow indirect sunlight or place them at room temperature in a basket for about one week. Be sure to check and turn around peppers to discourage any rotting periodically.

Why Are My Jalapeno Peppers So Small?

If your jalapenos are not growing big, provide ideal growing conditions. Ensure the plant is in full sun and receiving enough light without any blockage. Water appropriate, and don’t let them sit in soggy soil. Growing different jalapeno varieties like Mammoth jalapeno peppers also give bigger peppers.

Are Jalapenos Good For You?

Jalapenos are packed with nutrition and provide vitamins A, B, C, and K. They are also a good source of potassium and folate. Jalapeno peppers also contain carotene, an oxidant that keeps your cells revived and help them fight against any damage. These peppers have a spicy flavor for compound capsaicin that has many health benefits.

Top 12 Winter Vegetables – Nutritional Profile of Healthiest Winter Crops

By Sarwat Rehman

The cool breeze of winter gives you extra peace of mind when you sow and grow new seeds. In this relaxing mod, you find ways to spend most of the time in your garden to grow and harvest winter vegetables.

These highly nutritious winter veggies plus this healthy routine will never let you aged.

Cauliflower, kale, spinach, cabbage, and lettuce are the best winter crops. These vegetables are full of nutritious elements and you can grow them easily in your kitchen garden. From November to March is set for your winter gardening.

Winter vegetables contain sugar and water which help them to grow while it’s snowy outside.

If you want to take uncountable benefits from winter crops, do not skip any of these as I have mentioned in the list of winter vegetables.

Most importantly, the nutritional profile of each vegetable includes calories, protein, fiber, fat content, and many other essential vitamins and minerals.

So, there is no chance to miss it – let’s dig in!

winter vegetables
Winter Vegetables – Infographic

List of Winter Vegetables to Grow – Top 12 Winter Crops

Winter vegetables are a healthy addition to the garden and most of the green veggies are grown in winter. Here are the names of winter vegetables that are easy to grow in a garden bed or pot.

  • Cauliflower
  • Kale
  • Carrot
  • Radishes
  • Parsley
  • Lettuce
  • Spinach
  • Swiss chard
  • Rutabaga
  • Beet greens
  • Cabbage
  • Parsnip

Cauliflower

The scientific name of Cauliflower is Brassica Oleracea and it belongs to the Brassicaceae family. You can easily grow cauliflower in your kitchen garden as it is an annual plant and grows by its seeds.

It is a great source of antioxidants, fiber, and Vitamin B. It contains a high amount of fiber that helps to strengthen your bones and is very important for your digestive health.

Cauliflower also reduces the risk of several chronic diseases including cancer and other heart diseases.

The very first reason to give this plant a part to your place is its amazing benefits as cauliflower is low in calories, containing 12 calories for 1/2 cup so you can eat it without gaining weight.

Just because of containing a low number of calories and a high amount of fiber and water, it’s a very friendly diet to lose weight and incredibly easy to adjust with your diet.

Here is an overview of the nutrition found in 100 grams of raw Cauliflower 1.

Nutrients Amount Per 100 grams
Calories 25 kcal
Fiber 1.2 g
Cholesterol 0 mg
Protein 1.18 g
Carbohydrates 4.71 g
Vitamin C 48 mg
Vitamin B6 0.1 mg
Iron 0.4 mg
Potassium 299 mg
Magnesium 15 mg
Phosphorus 44 mg

Kale

Kale is a leafy green flower called “The Queen of Greens “and “The Nutritional Powerhouse” which belongs to winter vegetables that you can grow at home for your kitchen.

The scientific name of kale is Brassica oleracea var. sabellica and is a member of the Brassicaceae family like cabbage, or other leafy winter vegetables are. Kale is beneficial for your digestive system which helps prevent constipation and reduces anxiety arrests. It also helps to control your blood pressure and prevents your body from cancer and diabetes.

Kale contains fiber, water, antioxidants, calcium, vitamins C and K. You must take vitamin K in your diet as it is helpful in the flow of blood in your body to reduce the chance of cardiac arrest.

As with other benefits, Kale is also good for your eye health. It contains Lutein and Zeaxanthin that can help to reduce the risk of age-related eye problems.

There are some nutrition facts found in 100-grams of raw Kale 2.

Nutrients Amount Per 100 grams
Calories 35 kcal
Fats 1.5 g
Fiber 4.1 g
Cholesterol 0 mg
Protein 3 g
Carbohydrates 4.4 g
Vitamin C 94 mg
Vitamin B6 0.15 mg
Iron 1.60 mg
Potassium 348 mg
Magnesium 33 mg
Phosphorus 55 mg

Carrot

Carrot is a root vegetable that is so easy to harvest in your home garden.

Its scientific name is Daucus Carota and could find in various colors like Red, Orange, White, Skin, Purple containing Vitamin A. All of these usually uses in salads and different food items. it is also so effective for your digestive system.

Winter vegetables
Carrots – A Healthy Winter Crop

Carrots are an excellent source of beta-carotene. Which can be converted to Vitamin A in your body. Vitamin A is essential for eye health and important for the immune system and proper growth and development of your body.

Carrots are a good source of Vitamin A and healthy antioxidants that may reduce the risk of several diseases.

Here is an overview of the nutrition found for 100 grams of carrots 3.

Nutrients Amount Per 100 grams
Calories 208 kcal
Fats 16 g
Fiber 2.5 g
Cholesterol 9 mg
Protein 1.25 g
Carbohydrates 16 g
Vitamin C 6 mg
Vitamin B6 0.11 mg
Iron 0.5 mg
Potassium 308 mg
Magnesium 12 mg
Phosphorus 40 mg

Radishes

Radishes are also part of the root vegetables. These are round in shape and commonly the same in colors (Red, Orange, White, Purple, Skin) as other root vegetables.

This is a delicious plant that you can eat. the circle of its seed’s life is very short. Once the radish seed is planted, it grows in hardly three or four days. Its scientific name is Raphanus sativus.

They are a good source of antioxidants like vanillic acid and other phenolic compounds.

Radishes are rich in nutrition including Calcium, Potassium, Sodium, and Vitamin C, and Vitamin B6. they also contain A and K (Iron, Magnesium, Phosphorus, and Zinc).

Here is an overview of the nutrition found per 100 grams of radishes 4.

Nutrients Amount Per 100 grams
Calories 16 kcal
Fats 0.1 g
Fiber 1.6 g
Cholesterol 0 mg
Protein 0.6 g
Carbohydrates 3.4 g
Vitamin C 14 mg
Vitamin B6 0.07 mg
Iron 0.3 mg
Potassium 233 mg
Magnesium 10 mg
Phosphorus 20 mg

Parsley

Parsley is a leafy green herb and vegetable. Scientific name Petroselinum crispum. It decorates your food dishes to look pretty much more.

In food and beverages, Parsley is highly used as greenish and flavoring. Like other vegetables, it took a special place from a medical point of view. Some people apply Parsley to the skin for dark patches, cracked skin, and insect bites.

Parsley is also helpful for the stimulation of your hair growth. Some people take parsley for kidney stones (Nephrolithiasis), gastrointestinal (GI) disorders, constipation, diabetes, cough, asthma, and high blood pressure.

Parsley contains many powerful antioxidants, which may help prevent cell damage.

In manufacturing, Parsley seeds oil uses for fragrance in beauty soaps, perfumes, and cosmetics.

There are some nutrition facts of Parsley found Per 100 grams 5.

Nutrients Amount Per 100 grams
Calories 35 kcal
Fats 0. 8 g
Fiber 3 g
Cholesterol 0 mg
Protein 3 g
Carbohydrates 6 g
Vitamin C 134 mg
Vitamin B6 1 mg
Iron 6 mg
Potassium 555 mg
Magnesium 51 mg
Phosphorus 56 mg

Lettuce

Lettuce is a spring season food that is easy to garden in your home space for your kitchen.

Lettuce is found in three colors (Red, Green, Purple). It took a very small time to grow (45 to 80 days) from seeds to becoming mature. Its scientific name is Lactuca sativa.

Most Lettuce verities are used to eat fresh. Lettuce is commonly used to serve in fresh salads, although it is used in other kinds of foods like soups and sandwiches. Lettuce is generally a source of Vitamin K and Vitamin A.

It contains a high amount of Fiber and Water which is necessary for your bones’ health and makes them solid and strong.

There are some nutrition facts found for 100 grams of raw Lettuce 6.

Nutrients Amount Per 100 grams
Calories 15kcal
Fats 0.2 g
Fiber 1.3 g
Cholesterol 0 mg
Protein 1.4 g
Carbohydrates 2.9 g
Vitamin C 6.1mg
Vitamin B6 0.06 mg
Iron 0.5 mg
Potassium 194mg
Magnesium 10 mg
Phosphorus 25 mg

Spinach

Spinach is a leafy green vegetable. Since the days of Popeye, Spinach has been famous for its ability to make you stronger and good for a healthy finish. Its scientific name is Spinacia oleracea.

Spinach is easily available in markets, departmental stores, and also could be gardened at home.

Spinach is low in carbs and high for our digestive system. Most of the carbs consist of Fiber which is healthy for our body, it also contains a small amount of sugar in form of glucose.

Eating spinach is also good for your eye health, Controls blood pressure levels, and helps to prevent cancer.

There are some nutrition facts of Spinach found for 100 grams 7.

Nutrients Amount Per 100 grams
Calories 23 kcal
Fats 0.4 g
Fiber 2 g
Cholesterol 0 mg
Protein 3 g
Carbohydrates 3.6 g
Vitamin C 2. 9 mg
Vitamin B6 0.2 mg
Iron 3 mg
Potassium 556 mg
Magnesium 80 mg
Phosphorus 50 mg

Swiss Chard

Leafy green vegetables are a powerhouse of nutrition and an important part of a healthy life.

Its scientific name is Beta vulgaris subsp. vulgaris var. vulgaris. It has an earthy taste and has a rich amount of minerals and vitamins such as potassium, magnesium, and Vitamins A, C, and Vitamin K. As with other winter vegetables Swiss Chard is also a cold seasonal leafy green vegetable.

Eating greenish vegetables can offer various health benefits to reduce the risk of several diseases like heart disease, blood pressure, mental decline.

Swiss Chard contains flavonoid syringic acid, which may be beneficial for blood sugar levels.

There are some nutrition facts found in 100 grams of raw swiss chard 8.

Nutrients Amount Per 100 grams
Calories 19 kcal
Fats 0.3 g
Fiber 1.6 g
Cholesterol 0 mg
Protein 1.9 g
Carbohydrates 3.8 g
Vitamin C 2. 9 mg
Vitamin B6 0.1mg
Iron 8 mg
Potassium 379 mg
Magnesium 80 mg
Phosphorus 45 mg

Rutabaga

Rutabaga is a root vegetable and easy to harvest at your home space for your kitchen.

This root vegetable grows best in cold weather and develops a sweeter flavor as the temperature turns colder in the fall and winter. It is an important vegetable for your daily diet. It belongs to the Brassica genus of plants. I

ts common name is Swedish Turnip and its scientific name is Brassica napobrassica.

Rutabagas are low in calories and an excellent source of nutrition and antioxidants. Aside from being an excellent source of vitamins and potassium, Rutabagas are also good at having a large amount of magnesium, phosphorus, and manganese.

Rutabagas are root vegetables that are rich in vitamin C potassium, increasing your potassium intake may lower blood pressure and reduce the risk of heart disease.

There are some nutrition facts found in 100-gram of raw rutabagas 9.

Nutrients Amount Per 100 grams
Calories 39 kcal
Fats 0.16 g
Fiber 2.4 g
Cholesterol 0 mg
Protein 1.09 g
Carbohydrates 8.6 g
Vitamin C 25 mg
Vitamin B6 0.1mg
Iron 0.5 mg
Potassium 305 mg
Magnesium 20 mg
Phosphorus 53 mg

Beet Greens

Beet Greens are root vegetables also well-known winter vegetables. Its scientific name is Beta vulgaris subsp. vulgaris Conditiva Group. These are round in shape and have leafy green heads.

Beet Greens are rich in nutrition but beets are commonly used in dishes while the leaf is remaining ignored. The green leaf is edible and has amazing health benefits that can be enjoyed as well.

This bright red or purple root vegetable also contains antioxidants beta-carotene which is known to be great for eye health and detoxification.

Beet Greens contains a large amount of vitamin A which is great for your eye health and also good for your skin health.

Beet Greens also contains Vitamin C which is essential for healthy bones and teeth as well.

There are some nutrition facts found in 100-gram of raw Beet Greens 10.

Nutrients Amount Per 100 grams
Calories 22 kcal
Fats 0.1 g
Fiber 3.6 g
Cholesterol 0 mg
Protein 2.2 g
Carbohydrates 4.4 g
Vitamin C 30 mg
Vitamin B6 0.1mg
Iron 2.5 mg
Potassium 762 mg
Magnesium 70 mg
Phosphorus 41 mg

Cabbage – One of the Best Winter Vegetables

A leafy green vegetable, Cabbage has a special place among the winter vegetables. Cabbage is a round shape cold-weather vegetable and commonly found in various colors like red, green, and white.

It is an annual plant that can be harvest in your home garden for your home kitchen. It belongs to the Brassica family along with, Brussels sprouts, Kale, and Broccoli. Its scientific name is Brassica oleracea var. capitata.

Cabbage has thick leaves. Cabbages are low in calories and an excellent source of nutrition and antioxidants that may prevent the risk of cancer.

Another benefit of cabbage is that it can be fermented and turned into sauerkraut, which provides numerous health benefits such as improving your digestion and helping your immune system.

Cabbages are famously low in calories and high in fiber and water so it may help you to lose your weight and easy to manage in your regular diet plan.

There are some nutrition facts found in 100-grams of raw cabbage 11.

Nutrients Amount Per 100 grams
Calories 25 kcal
Fats 0.1 g
Fiber 2.5 g
Cholesterol 0 mg
Protein 1.2 g
Carbohydrates 5.6 g
Vitamin C 36.6 mg
Vitamin B6 0.124mg
Iron 0.4mg
Potassium 172 mg
Magnesium 12 mg
Phosphorus 26 mg

Parsnip

Parsnip is a root vegetable and belongs to the Apiaceae family as like other root vegetables Carrots and Parsley belongs. Its scientific name is Pastinaca sativa. Like Carrots, Parsnips are also grown sweeter in cold weather.

They have a slightly earthy taste and are rich in nutrition. Parsnips are an excellent source of beta-carotene. Which can be converted to Vitamin A in your body.

Vitamin A is essential for eye health and important for the immune system and proper growth and development of your body.

Parsnips are a good source of Vitamin A and healthy antioxidants that may reduce the risk of several diseases. With Carrots, Parsnips are a delightedly good source of vitamin B and E, potassium, magnesium, and manganese.

Because of the high amount of fiber, Parsnips are a good excellent choice for a healthy digestive system.

There are nutrition facts found in 100-grams of raw Parsnip 12.

Nutrients Amount Per 100 grams
Calories 75 kcal
Fats 0.3 g
Fiber 5 g
Cholesterol 0 mg
Protein 1.2 g
Carbohydrates 17 g
Vitamin C 17 mg
Vitamin B6 0.1 mg
Iron 0.5mg
Potassium 375 mg
Magnesium 29 mg
Phosphorus 71 mg


When and How to Harvest Kale Plant – Kale Harvesting Guide

By Sarwat Rehman

Are you thinking about “How to harvest kale” that you have grown in the yard and now want to have on your platter?

No need to be worried if you have not found the right way of harvesting kale because this ultimate guide on ‘When and how to harvest kale plant’ will open up all the knots in your mind regarding kale harvesting.

Let’s dig in!

Know About Kale Plant

Green leafy Kale, a member of the cabbage family is must grow green in the garden because of its nature of growth and nutritional significance.

Rich source of carbohydrates and protein, green kale is cool season green capable of tolerating frost.

Instead, leafy green vegetable demands frost as frost adds sweetness to its flavor.

Due to its high nutritional content, kale is been widely used in cooking and even used uncooked as salad or in garnishing.

how to harvest kale
All About Kale Plant

Kale Plant Guide – When and How to Harvest Kale

Most cold tolerant brassicas, Kale is the plant that demands frost feast!

It requires frost for better flavor development that you can also compare by dinning kale leaves before after frost.

You will clearly observe the difference in taste.

  • Sow Right

In order to harvest bulk leaves in fall or winter, you have to sow the seeds rightly so that you can grow rightly.

Sow the seeds about ½ inch deep in the seedbed in rows almost 6 inches apart. Water the seeds on time and take good care of the seedbed to have good results.

  • Grow Right

If you have sown seeds at times inappropriate conditions, you are going to have fresh kale leaves soon.

When you see three to four leaves growing, transfer the plants to their growing position in such a way that the lowest leaves are set at ground level.

Water well. Keep a pace among plants almost 20 inches apart.

By giving water timely and proving feed in spring plants will give the best growth.

When to Harvest Kale – Harvesting Kale

If you have grown kale and now worrying about when to harvest kale, you must be glad to know that it is a winter-loving plant and gives the best sweet flavor if harvest after frost.

It grows best in spring or fall depending upon the time you planted.

Kale planted in late summer will be ready till early fall, while if you plant in winter or spring you will get till late spring or early summer.

  • Harvesting Time

Mainly, harvesting time depends on your plan to grow kale. If you grow plants from seeds, you can harvest about 2.5 months after planting.

But if you are going to transplant you can expect to harvest after 50 – 55 days of planting.

  • See Plant Height

If you want to pick leaves with full taste, wait to reach plant height up to 8 inches so that they can reach the size of a hand.

Give water timely and harvest regularly to grow leaves even for months.

  • Harvest in Cold or After Frost

Kale can grow in the cold where the temperature is about 80 Fahrenheit. It can also survive frost!

Normally it is said for plants to harvest before frost, but exceptionally kale is one of few plants that not only survive cold but also requires frost for more flavor.

Frost adds more sugar and sweet taste to leaves.

Suggestions to embrace frost

  1. Transplant seedlings about 6 weeks before frost, or grow by sowing for about three months before expected frost so that you can harvest after full flavor is added.
  2. You can also harvest some of the leaves before you expect frost in your area and wait for new leaves to embrace frost.

Generally, kale survives cold, but if you live in an area where the temperature falls down to 32 Fahrenheit, you need to protect the kale plant by insulating with covers or frames.

By doing this your plant will be safe from harsh cold and grow steadily.

how to harvest kale
When to Harvest Kale – Kale Harvesting Time Guide
  • Summer Harvesting – When to Harvest Kale

As kale is a frost loving plant and usually doesn’t like the heat of summer. Leaves get tough and bitter in hot when the temperature reaches 80 or more.

It shows if you plant kale in spring, by the end of summer you will feel leaves with a bitter flavour.

So, if you want sweet tasty kale leaves to enjoy fresh salad in fall or winter you need to harvest almost one-third of leaves in summer.

You can add harvested leaves to compost.

New sweet leaves will develop till winter for your fresh food.

  • Over Maturity

Grow kale as it is a widely and rapidly growing plant but in order to use its leaves keep noticing its maturation level.

It can spread several feet wide and up to 2 to several feet tall depending upon variety.

If you see flower buds or stalks, it means it is over matured. Its over-maturation causes a bitter taste in leaves that is inappropriate for use and devalues them.

In order to delay over-maturity, cut down the floral stalks before blooming. But you still need to harvest at a time before delaying as it can spoil your taste.

How Do You Harvest Kale – Are You Doing Right?

Harvesting kale in the right way is as essential as the life of a plant!

There is always a right and a wrong way of anything, so is the way of harvesting kale leaves that if you properly pick, your plant will grow continuously without any problem.

But if you pick leaves unknowingly, it may cause trouble for your kale.

So, before harvesting this season, must read given right ways of harvesting kale so that it will not die and grow continuously.

how to harvest kale
Are You Harvesting Kale Right?

How to Harvest Kale So It Keeps Growing – Step by Step

A well-concerned question ‘How to Harvest Kale’ is worth questioning because of the strategy you must follow to harvest kale.

Although it’s tricky not a big deal, you just take care in picking so that rest of the plant leaves remain intact.

  • Moving on towards harvesting leaves, you have to take a sharp knife or a pair of pruning shears according to availability, and a jar to put all the leaves in it.
  • When you are done with it, hold the leaves with one hand and cut from the stem in the way you cut the entire leaf.
  • Keep in mind that you have to take old and large leaves.
  • Older leaves grow towards the outer side while the inner top side contains fresh tenders that you must not damage or cut.
  • If you see any damaged leaves showing holes or getting pale, cut them and add them to the compost heap.
  • Kale plant leaves need to be harvested routinely. If you will leave on plants, they will be somewhat bitter and tough.
  • This green leafy plant suggests picking earlier rather than late!
  • Always cut outer leaves that are at the bottom without damaging baby kale leaves. Never cut central bud as it is the growing area of the plant.
  • Do not pick too many leaves from a single plant at a time as it will affect its growth rate. Try to leave about 1/3 of the leaves intact.

So, after knowing simply easy tricks, you can practice on your own to pick kale leaves from your garden.

Things You Must Consider When Harvesting Kale from Your Garden

You must keep an important thing in mind that it takes almost 5 -7 days to develop new leaves from the kale plant, so leave some new central leaves so that plant remains productive.

Grow 4-5 kale plants, that you can easily in pots if lack room in the garden so that you can take a handful of leaves from each plant to enjoy an all-time fresh salad.

Do not cut from roots while harvesting leaves because as leaves grow on stem. If you cut from roots, you are pushing your plant to death.

Kale Plant Dying – Pick Whole

If your plant is grown enough and goes to seed or the temperature has fallen below its tolerance level (below 20oC), it may die.

Before its death, you should harvest all of its leaves and pick the whole plant by cutting from the stalk. Cut the plant stalk near the soil.

You can use these leaves immediately or store them properly for later use as guided below.

Storing Harvested Kale Leaves – How to Store Kale Leaves?

When you are done with all harvesting of kale leaves considering the weather and all other factors, you can store them in the right way to use even after weeks.

Take your leaves filled jar to sink and wash thoroughly to remove any dirt or debris. As plants are susceptible to various pests and sometimes, you spray plants to prevent diseases.

Washing with tap water before saving will free from health concerns.

Tip: Never use hot water or soak the leaves as it causes wilting.

Spread the leaves over a clean and dry place or on a paper towel and air dry before packing.

Tip: Don’t store wet leaves as fungus can grow in moisture.

how to harvest kale
How to Store Kale – Kale Storing Tips

Take a plastic ziploc or resealable bag and place leaves. You can also place a paper towel under leaves for better protection.

Tip: Remove air properly before sealing.

Label the bag with the date you are storing it so that you can use it accordingly without forgetting when you stored it.

Place in refrigerator.

Tip: One to two or three weeks are ideal to store kale leaves fresh.

How to Store Kale Without Plastic?

Storing food; vegetables and fruits, without plastic bags is the main concern in the emerging world.

It is beneficial not only for food but is a SIGNIFICANT NEED to overcome climate change, a devastating reason of which is excessive use of plastics.

Thanx to the plastic alternative storage options like; organic cotton bags, mesh bags although use for groceries, French terry bags are recommended ones to store leafy greens in these plastic-free bags.

You can also store in

  • Glass containers
  • Tea towels

What you have to do is

Properly wash and completely dry the leaves with a paper towel as guided above.

Removing any moisture is essential to prevent rotting so, try to dry maximum.

Remove the stems.

  1. Wrap the hardy green kale in a paper towel loosely, place it in a glass container and store it in the fridge.
  2. You can also place kale veg simply in a cup of water just like a bouquet in the fridge but not in a crowded place.
  3. You can also freeze your green! To freeze, just blanch the leaves after removing the stem and thoroughly washing.

Boil for 25 – 30 seconds and give them heat shock by transferring to an icebox. It will give them crisp rather than wilting.

After doing this, stain all of the water and tap with a towel to dry them out.

Wrap in a beeswax wrap and freeze for later use.

So, hopefully, all of your puzzling questions and tied knots about ‘When and how to harvest kale plant’ are solved.

Now you are in a position to harvest leaves when you see grown with critical analysis and after determining all aspects of harvesting that not only you can use immediately but store for later foods.

Now you can have a green leafy platter when you want!

Do You Know When to Harvest Butternut Squash – 4 Clear Signs of Mature Butternut Squash

By Sarwat Rehman

When fall approaches, gardeners start wondering “When to Harvest Butternut squash” in a way that it could be stored without damage.

Growing butternut squash and harvesting it at right time is the prime thing a gardener must keep an eye on.

when to harvest butternut squash
Butternut Squash – A Delicious Garden Vegetable

As most of the growers mistakenly harvest butternut squash improperly at the wrong time. As a result, most butternuts are not in a condition of prolonged storage and face problems.

Now take a deep breath as it’s time to harvest butternut squash wisely!

You just have to follow prescribed harvesting time and observe 4 simple signs of mature butternuts to harvest timely by working on tips so that you can cure and store butternuts properly.

What is Butternut Squash

Butternut squash (Cucurbita moschata) commonly known as ”Garma or Butternut Pumpkin” is a variety of winter squash that grows on the vine.

Oval-shaped squash with yellow outer hard skin contains yellowish-orange fleshy pulp.

Seeds are present in bell-bottom compartments that are of no use in cooking but can be dried for other purposes.

Rich source of minerals, fiber, antioxidants, and vitamins especially vitamin A, this squash is basically a fruit but is also cooked as a vegetable.

Adding full flavors to winter recipes, butternut squash is full of sweet nutty flavor that you can enjoy till spring.

Tough and firm-textured skin with hard rind makes it capable of long term storage.

Store in winter; enjoy till spring!

When to Harvest Butternut Squash – Know Best Harvesting time

Having fresh food especially vegetables in the home garden is one of the healthiest things you can ever have.

Among kitchen garden vegetables, butternut squash is the most easily grown vegetable that you can grow in bulk and store for later refreshment.

Buy Squash Recipes eBook Here

If you have grown butternut squash in summer it is the best time, October to November, to harvest mature butternuts.

Like pumpkins or gourds, butternuts are grown in spring or summer.

Hot summer weather is the best time to flourish butternut vine and it takes 3-4 months to fully mature.

They will be fully matured till winter.

But, whether the specific squash you are going to harvest is mature enough to be harvested?

You must observe the following signs of matured squash.

Is Your Butternut Squash Ready to Harvest – 4 clear Signs of Mature Squash

If you have grown winter squash and now planning to harvest, wait!

Wait and see whether your butternut squash is ripe enough to be harvested?

If you harvest before it is fully mature, that will neither be firm nor appropriate for storage and if wait for so long without knowing ripens signs, it will split.

But no need to be worried about it!

You just have to follow and observe given clear signs of ripe butternuts and you will get all of your answers about ‘When to harvest butternut squash’ clearly.

  1. Notice its Appearance

First of all, notice its color. Ripe squash is deep tan (peanut color) with no or minimum stripes near the stem.

When butternut squash grows on a vine, it contains green vertical lines that fade as it matures.

See your vine.

If squashes are still green with lines, wait for a week or two and harvest when you clearly see its matured form.

harvest butternut squash
Butternut Squash Harvesting Time!

  1. Length

Coming to the next sign, you have to notice its length.

Generally, squash matures when reaching 8 – 10 inches but it is not a fact and depend upon variety and soil.

Long squashes grow in nutrient-rich soil. So, carefully observe length on a daily basis and when you see it stops growing, pick your sharp knife and cut from the stem.

  1. Observe stem

A good way to decide whether butternut squash is ready to be harvested is to observe its stem. Brown cracky stem is an indication of its maturity.

As it matures, the plant slowly stops transferring nutrients to winter squash and the stem dries changing color from green to brown.

If you mark this sign OK, you can pick and have delicious squash soup!

  1. Toughness

Finally, you are near to pick your butter squash if it is firm enough to resist being punctured with your fingernail.

The toughness of rind will tell that they are ready to be picked.

Concludingly, harvesting squash tests all of your senses, you need a long, tan-coloured firm rind butternut squash with a brown stem to cut for best taste.

Things You Must Consider When Harvesting Butternut Squash  – Best Harvesting Tips

If you have marked all the signs OK to pick the squash, it’s good.

Now you have to consider some of the very simple tips before harvesting butternut squash. By following these tips, your butternut squashes are never going to be wasted.

  1. Harvesting mature squash at right time will give you the best-storing butternuts.
  2. Use sharp shears to cut rather than pulling from the vine.
  3. Cut from at least 2 inches of the tan cracky stem of butternut. In this way, squash pulp will be protected from bacteria and fungi.
  4. If you are expecting frost in your zone, try to harvest a day or two before frost starts. Severe cold weather or frost can be worst for your squash.
  5. If butternuts are not ripe and frost hits, carefully cover your squash with a sheet or blanket.
  6. Use improperly harvested squash (without stem or with naked pulp) as soon as possible and not store for long. They are more susceptible to bacterial attacks.

How to Cut Butternut Squash Easily

Cutting butternut squash is simply as easy as eating a squash dish!

Yes, this is so simple to cut butternut squash by cutting with a sharp knife or pruners at a distance from rind without damaging it.

As mentioned in harvesting tips, cut 2-3 inches of stem attached with squash to avoid any damage.

If butternuts have accidental cuts or bruises, you can not store them for longer storage. You have to use them early to prevent any infectious attack.

Or you can also add those damaged squash to compost heap so that you can see new growth next year.

How to Store Butternut Squash

Storing butternut squash is important as they are produced in bulk and due to their bigger size can not be used all at once.

Therefore, you have to store them rightly for later use.

Here is a simple way of storing cut or uncut squash. Just follow carefully to store butternut squash.

1. Store Uncut or Undamaged Squash

Storing winter squash carefully is important and need to be done with care.

Don’t place them outdoor or in the refrigerator to be attacked by insects and rot, respectively.

As butternut squash with firm rind is picked for best storing so, do not place them in the refrigerator if you want to store for months (you can store for up to 5-6 months).

By placing in the refrigerator, they will absorb moisture and lose toughness as a result there will be more chances of rot.

Place your butternuts in a dry cool place where the temperature ranges from 50 – 60 Fahrenheit (10 – 150C) and humidity 60 – 70 %.

A dry room or basement is best to store squash.

when to harvest butternut squash
Cure before Store Butternut Squash

Butternuts can also last for 10 -14 days at room temperature placed at the table or a shelf.

For prolonged storage, it is recommended to store in a single layer without piling it up so that they do not touch each other and damage.

Have a weekly check on stored butternuts and observe if anyone showing signs of rot.

2. Store Cut Squash

If you want to store squash in cuttings, you can place it in the refrigerator by cutting it into small to medium-sized pieces.

Just peel off tough skin with a peeler, you can also cut it from the center for ease. Remove inner side seeds with a spoon or scratch with a knife.

Cut it in the required size or for the purpose you want to store.

If you want to roast, later on, cut in cubes, or for noodles use a spiralizer to shred.

Curing Butternut Squash

Curing is the simple procedure done with some fruits and vegetables to maximize their taste and to enhance their shelf life.

Most of the time harvested butternut squash also need curing for best peak flavor and sweetness.

To cure butternut squash, you simply have to place them in a sunny corner of your yard and place them for almost a week.

It will not only enhance their taste but also thicken their skin for prolonged storage.

By placing in a warmer place for some time also removes water that helps to store for a longer time period.

In frost conditions, you can also give curing time in greenhouse.

Coming to end, hopefully, you have gotten all of your questions answered starting from ‘when to harvest butternut squash’ to curing butternuts by following harvesting time and tips to storing conditions.

Now you can easily harvest your squash and store it properly to enjoy delicious squash recipes when you want!

  • « Previous Page
  • 1
  • 2

Most Recent

  • How to Store Butternut Squash [to Save Harvest]
  • How Do Indoor Plants Purify Air – Surprising Truth!
  • Do Indoor Plants Need to be by a Window? [Secret Answer]
  • Are Indoor Plants Harmful at Night? Truth behind the Myth
  • How to Grow Butternut Squash in Small Space [3 Methods]
  • About Us
  • Privacy Policy
  • Terms and Conditions

Copyright © 2025 | Privacy Policy | Terms & Conditions|